For today, I am sharing a masculine vintage love card made simply with distressed touches. This project is also for the Unity blog. I share tips for this below.
Sentiment: There's no otter for me. You are my otter half. I love you so much.
This was made easy with the use of patterned paper.
Hi there. Today, I am sharing my layered card with mixed media stamping and embossing. This one has a Paris theme with the Eiffel Tower as the focus. This is a sneak peek of the release happening Thursday, April 6, 2023 at Unity.
Sentiment:
May your day be as wonderful as you are.
I added layered stamping as well as the frame and the embossed texture in the background.
Hi there. Here, I am sharing an anniversary floral watercolor card with a mix of techniques. This one features the Unity Stamp Co. background of the month for March 2023.
Sentiment:
Happy Anniversary
It is always nice when someone remembers your anniversary. So, having cards like these on hand is nice for celebrating the occasion in person or in the mail. This one is flat for easy mailing.
Hi there. Today, I am sharing an elegant monochromatic card featuring a flower against a dry embossed script background. I share how to make that background pop.
Sentiment:
Today we celebrate you.
This is a perfect greeting card for weddings, bridal showers, anniversaries, engagement, birthdays and more.
Hey there. Here is a may bell flower or Lili of the valley card, perfect for Valentin's Day or most love themes. I paired the florals with the hearts and the sentiment.
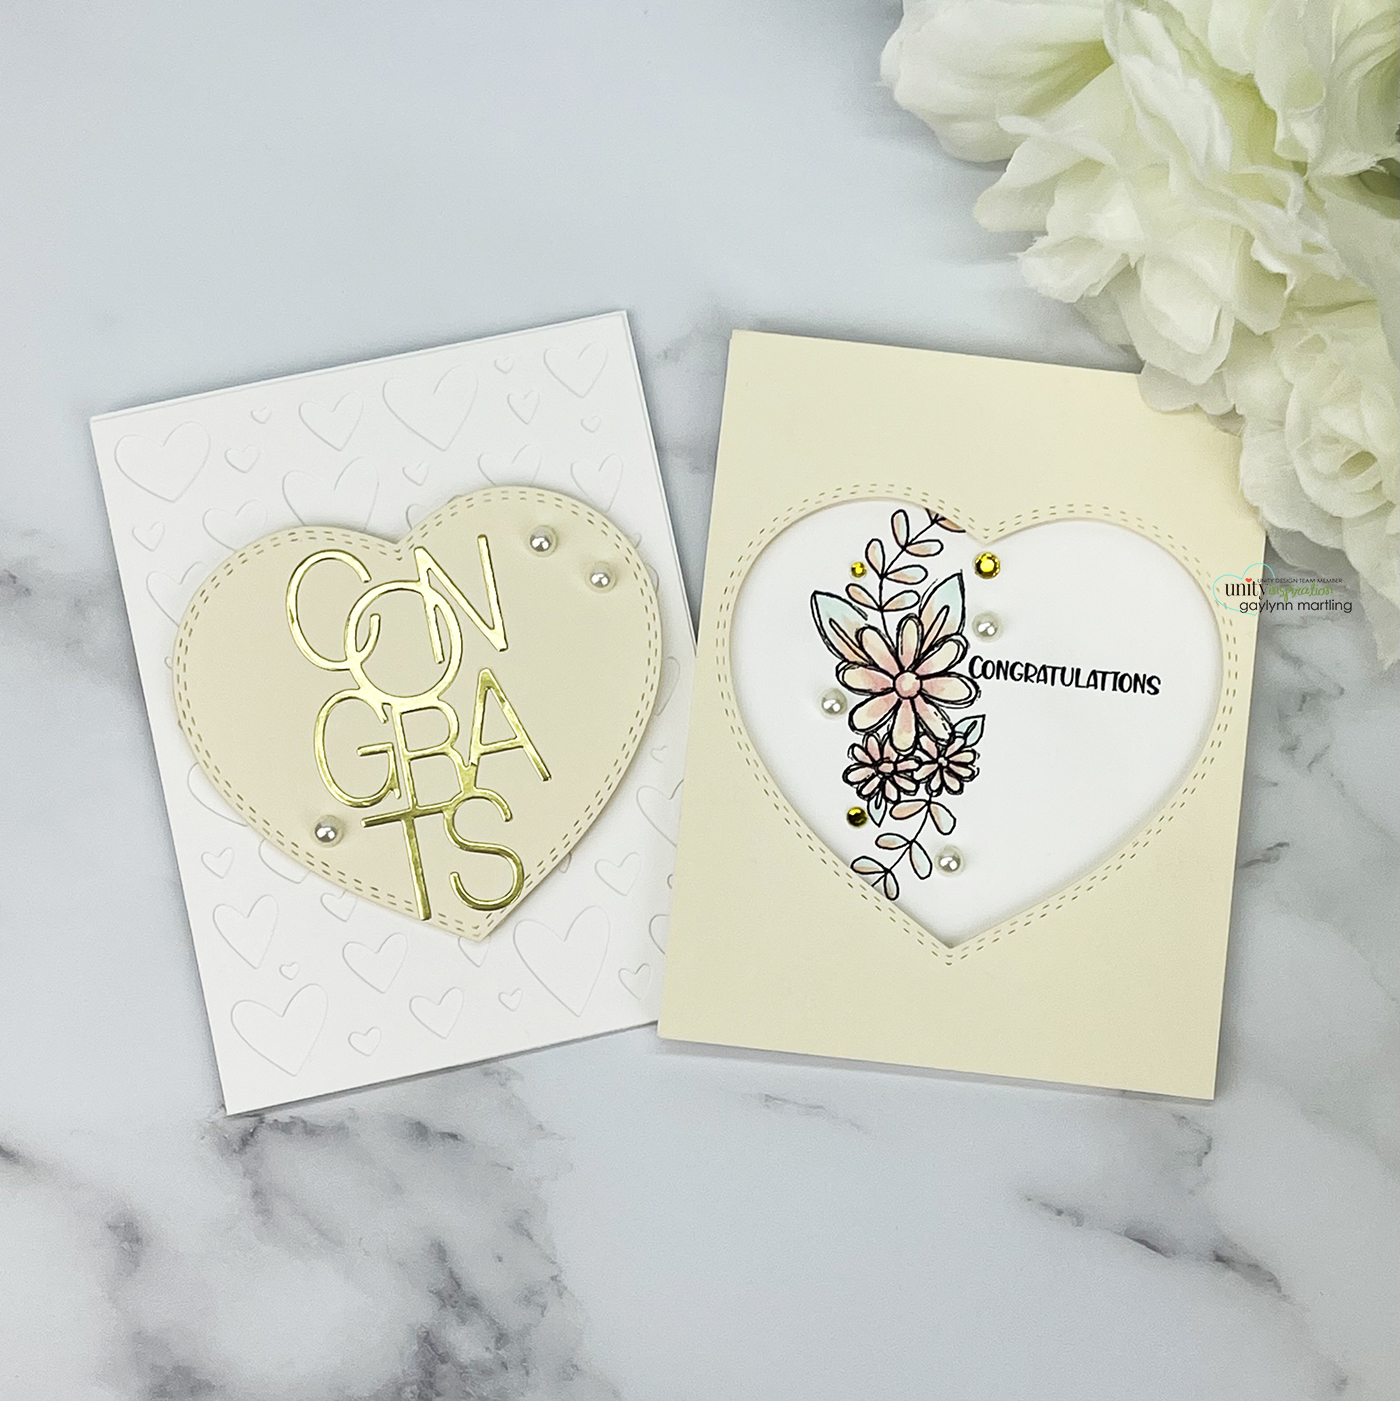
Hello. Today, on the Unity blog, I am sharing card foiling two ways on two cards. This is a new and easy way to transfer foil onto card panels, with or without stamping.
Sentiments:
Happy Birthday and Congrats on your happy day. I made a quick video tutorial showing the process for this project. {{Please subscribe to my video channel and like this video. Many thanks.}}
These cards were pre-stamped and colored with room for added foiled sentiments. Using card foiling two ways adds the perfect touch to this set of floral cards.
Hello, it's Gaylynn. The My Creative Time 119th Edition release and sale is live. For today, I am sharing a heart tag card to say I love you. See what Emma has in store for you. For the blog hop, you may have arrived from Emily's blog.
Sentiment: I love you.
This card shows the broken heart in gold bringing two hearts together as one. This is great for saying I love you.
Anniversary cards are always nice to have on hand. This one was made using layering dies and stamps by Unity Stamp Co.
Sentiment:
Happy Anniversary I did. I do. I will always love you.
For this card, I used colors in shades of purple and green. The style was kept clean and simple with a lovely floral in the corner. This card has shades of the color of Veri Peri, the 2022 Pantone color of the year.
I made a quick video tutorial showing the process for this project. {{Please subscribe to my video channel and like this video. Many thanks.}}
Creating a watercolor dinosaur scene card is easy with simple stamping and watercoloring. Today on the Unity blog, I am sharing a cute anniversary card for a special first anniversary.
Sentiment:
To my favorite couple. Happy 1st Anniversary.
Here's to your day, your life and your enduring love.
This watercolor dinosaur scene card was made using two completely different stamp sets that blend beautifully together for this love theme.
I made a quick video tutorial showing the process for this project. {{Please subscribe to my video channel and like this video. Many thanks.}}
Hi there. The My Creative Time design team is sharing card projects on the MCT blog today. I decided to make a love card that could work for anyone or as a masculine card, for Valentine's Day.
Sentiment: Love you.
This card is in neutral colors of kraft, dark brown and a hint of mint. I use hearts from a favor box die set. And, the background stamping was heat embossed in white onto brown cardstock. I paired this with a kraft color envelope to give it more of a masculine look. For the sentiment, I used MCT die-cuts.
For today's card, I am sharing a butterfly card set against a stamped print offset background layer. It is a love-themed card, great for Valentine's Day, anniversary or love occasions.
Sentiment: Love, hugs & kisses.
Helpful tips:
Here are helpful tips for creating this butterfly card. To begin, stamp a background panel and a butterfly panel with Copic friendly ink. Next, trim or die-cut an offset shaped panel for the background. Then color in the butterfly with Copic markers or your markers. Next, fussy cut (cut out) the butterfly. Also, onto a kraft color card base, heat emboss the sentiment in white. Finally, layer everything onto the card front, to finish.
I made a quick video tutorial showing the process for this project.
{{Please subscribe to my video channel and like this video. Many thanks.}}
Hello, it's Gaylynn. The My Creative Time 107th Edition release, sale and blog hop has begun.
For the blog hop, you may have arrived from Emily's blog.
Sentiment:
LOVE
Lots of love
This gift card holder was put together easily using some of the tall dies along with the new love-themed stamps and dies. I just folded the tall pieces in half to form a mini card. Then, I added the gift card die-cuts to the inner folded flap only. To finish, everything was layered on the front side and the gift card sample was placed inside.
*** BLOG HOP GIVEAWAY ***
Leave your comments on each blog for a chance to win a $25 Gift Card to the My Creative Time store. One lucky winner will be chosen and noted on the MCT blog! GOOD LUCK my friends!
(Please don't forget to leave a way/email for MCT to contact you, if you were to be one of the lucky winners.)
*** SALE ALERT ***
DON'T FORGET our sale starts RIGHT NOW HERE! Use the code:JAN2021 to receive a 15% discount off your entire purchase! This sale applies to "IN-STOCK" items ONLY. This sale will end on Friday, January 22, 2021, at midnight PST.
***FREEBIE***
Starting this Friday, January 15, 2021, at 8am PST, we will be giving away this new die set “Gift Card Helper Dies”! This new die set will be given to the FIRST 25 shoppers for FREE! If you are one of the first 25 shoppers, this die set will automatically be added to your package/order. Once 25 shoppers come through, this die will be available for purchase! So, if you see this die available in the store, you were not one of the first 25 shoppers. No exceptions will be made. This freebie die is not part of the “bundle” and will be sold separately! (The freebie has ended.)
Here is the inside.
Here are my sneak peek blog projects from this release.
Hello, it's Gaylynn. The My Creative Time 107th Edition release is coming up on Friday. But for today, the team is sharing Day 3 sneak peeks.
Sentiment: LOVE
Here is a slimline or tall style love card that doubles as a gift card holder. For this card, I used the new love die-cuts, the tall dies and layers plus the gift card helper dies. The little notches are cut perfectly to fit a gift card almost anywhere on a card, tag or favor. The possibilities are limitless. This card is made for many occasions including Valentine's Day, anniversary, I love you, wedding or any love occasion. I can also be for a guy or gal.
Card base cut 7 1/2" x 7 1/2"
Score at 3 3/4"
***Sneak Peek Giveaway!***
We will be giving away the sets we are showcasing each day to ONE lucky winner! For example, the set we are showcasing on Wednesday, Emma will announce the winner of that on Thursday and the sets we are showcasing on Thursday, Emma will announce that winner on Friday on the MCT blog! ALL you have to do is leave a comment on each of our blogs! You are NOT required to comment on EVERY SINGLE blog, but the more you comment on, the more chances you have for winning! VERY IMPORTANT, PLEASE leave a way for us to contact you with your comment just in case "YOU" are the lucky winner! For EXTRA entries, you can spread the word about this release on Facebook, tweet about it OR even Instagram it! #mycreativetime! GOOD LUCK EVERYONE and let's start spreading the word!
***FREEBIE***
Starting this Friday, January 15, 2021, at 8am PST, we will be giving away this new die set “Gift Card Helper Dies”! This new die set will be given to the FIRST 25 shoppers for FREE! If you are one of the first 25 shoppers, this die set will automatically be added to your package/order. Once 25 shoppers come through, this die will be available for purchase! So, if you see this die available in the store, you were not one of the first 25 shoppers. No exceptions will be made. This freebie die is not part of the “bundle” and will be sold separately!
Hello, it's Gaylynn. The My Creative Time 107th Edition release is coming up on Friday. But for today, the team is sharing Day 1 sneak peeks.
Sentiment: Thanks for being my gnomie.
This is a cute pun card featuring a fun gnome with hearts. It would work for either a guy or gal, I think. I love the punny sentiment with it. The card would be great for Valentine's Day, anniversary, love occasion, thank you or just because.
***Sneak Peek Giveaway!***
We will be giving away the sets we are showcasing each day to ONE lucky winner! For example, the set we are showcasing on Wednesday, Emma will announce the winner of that on Thursday and the sets we are showcasing on Thursday, Emma will announce that winner on Friday on the MCT blog! ALL you have to do is leave a comment on each of our blogs! You are NOT required to comment on EVERY SINGLE blog, but the more you comment on, the more chances you have for winning! VERY IMPORTANT, PLEASE leave a way for us to contact you with your comment just in case "YOU" are the lucky winner! For EXTRA entries, you can spread the word about this release on Facebook, tweet about it, or even Instagram it! #mycreativetime! GOOD LUCK EVERYONE and let's start spreading the word!
Hello. For Technique Time at Unity, I show ink smooshing watercolor for this love card background. I also use outline flowers as an accent.
Sentiment: Hugs & Love
Adding ink smooshing watercolor in pink and red to the background stamping creates an easy artsy look, especially for this love card. The flower overlay is an added bonus.
Helpful tips:
Here are helpful tips for creating this card using ink smooshing and fussy cutting. To begin, stamp and trim a background panel using watercolor paper. Also, stamp and fussy cut outline flowers and the sentiment. Next, add pink and red watercolor to a piece of acetate or a plastic craft mat. Then, place the acetate over the watercolor paper background and smoosh the color onto the panel. Repeat this process until you get the look you want. Once dry, adhere the background panel to the card base using extra tacky tape. Finally, add the flowers and accents, to finish.
I made a quick video tutorial showing the process for this project.
{{Please subscribe to my video channel and like this video. Many thanks.}}
Also, foam and flat double-sided tape, cardstock, Altenew watercolor half pans, paint brushes, tan cording, heat tool, My Creative Time belly band dies and rectangle frame die layers; adhesive gems, Ranger watercolor paper, plastic craft mat and jet black archival ink; acetate.
Be sure to visit the Unity blog for the entire article and tutorial.
Hi there. Today, I am sharing my tri-fold slim card made using watercolor and diagonal cut detail.
Sentiment:
This is us, our life, our story, our love Through the ups and downs, I'd pick you again and again. Happy Anniversary
This tri-fold slim card is interactive, with art on the front and on the inside. It was easy and fun to make.
Here are the measurements that I used for this trifold slim card base & envelope. Please reference the video for the process and details for this project.
This tri-fold slim card size folded is approximately 3 5/8" x 8 1/2". First, use an envelope #10 size or a 4 1/8" x 9" size. Also, use one sheet of 8 1/2" x 11" cardstock for the base.
Next, score on one end of the long side at 3 5/8". Then, rotate the paper to score the other side of the long end at 3 5/8". You should have two vertical score lines on a horizontal sheet of cardstock.
Next, using a paper trimmer, align the cutting from about 2" from the bottom left of the horizontal cardstock piece upwards to the top of the second fold line. Then, cut a diagonal section from the cardstock, from those points. Next, fold back the small cut section at the first fold line and fold inward at the second fold line. Finally, decorate the front and the inside with stamping, watercolor and embellishments.
This card base and envelope example was made using an envelope that I happen to have on hand.
Please note, dies are not necessary. A paper trimmer can be used to trim the desired card base and the layers.
Here is another look.
Supplies: Unity Stamp Co. You Are My Always; Ranger archival jet black ink, cardstock, flat and foam double-sided clear tape, Pink Fresh Studio slim ornate banner dies; Altenew watercolor half pans and palette mat; watercolor brush, envelope, Fiskars paper trimmer, MSC scoring board, bone folder, Canson watercolor paper.
Hi there. Today, I am sharing a congratulations card using deco foil along with vellum stamping, with no coloring.
Sentiment: Congrats. Here are helpful tips for using deco foil with toner sheets. To begin, trim or die-cut the toner card front panel to fit your project. Coloring is optional. I decided to not add coloring to this card. Next, trim a piece of foil to cover the toner panel. Then, place the foil over the toner sheet, pretty side up. Now, run them through a preheated laminator, pretty side up. You can also use a carrier sheet or parchment paper to sandwich them. Or, carefully run them through without it. Once cooled, gently peel away the foil piece to reveal the shiny foiled background. Next, stamp or emboss the sentiment and flowers onto vellum cardstock using StazOn ink. Trim that to fit. Finally, layer everything and add the sentiment panel and gems to finish the card.
I made a quick video tutorial showing the process for this project.
{{Please subscribe to my video channel and like this video. Many thanks.}}
Hi. This is Gaylynn and I enjoy paper crafts, mostly card making. This is a place to document my hobby. I get to do what I love as a contributor on creative design teams. You will find card tutorial videos here as well. Thank you so much for visiting.