Take a look at this layered watercolor flowers and bees card. I used watercolor layers and paper frame layers to build this up.
5/08/2024
Layered watercolor flowers and bees card
5/06/2024
Dancing mouse birthday card & watercolor
How about a dancing mouse birthday card? I gave her watercolor, sprinkles and a party banner to celebrate.
This one has a feminine look to it for gals, daughters, friendship, sisters and family.
5/02/2024
Hey Girl friendship car card ~ Uniquely Unity stamps
This card is fun, featuring a car and girls on an adventure. This stamp scene is part of the Uniquely Unity monthly membership stamp set for May 2024 called Wind In Your Hair.
This can made for most any occasion just by switching out the sentiment.
3/17/2024
Uplifting and inspirational girl tag card
How about a quick and easy tag card? This is super sweet and can be made in no time. This sweet girl Unity Stamp Co. stamp is designed by the talented Phyllis Harris Designs and was inspired by her book I See You Wind.
Life is a balance of holding on and letting go.
3/12/2024
Sweet girl greeting card scene with Copic markers
Hi everyone. Today's project is a sweet girl greeting card scene. I used Copic markers for coloring plus patterned paper for the background.
Be still for a moment, the world will wait.
I think this is good advice. This Unity stamp was created by artist Phyllis Harris.
1/24/2024
Set of Baby Cards - boy & girl congratulations
Hello everyone. Today, I am sharing a set of baby cards, one for a boy and one for a girl. They coordinate in style. Plus, this is a sneak peek of something new coming soon at Unity Stamp Company.
11/22/2023
Friendship Christmas Wine Bottle Gift Tag
Hi everyone. Today, I am featuring wine bottle gift tag making. This one is friendship and Christmas themed.
10/07/2023
Build A Scene ~ Friends Of Unity Blog Hop October 2023
Welcome. Thank you for visiting. The October 2023 Friends Of Unity blog hop inspiration is "Build A Scene". I hope that you will join in on the fun. Simply comment on each blog in the hop. See the end of this post for your next stop.
I decided to include two Christmas and winter cards with different scenes.
5/24/2023
Embossed Circle Accents + Copic Coloring ~ Girl Card
Hi friends. Today, I am here sharing a sweet card that is also up on the Unity blog today. It features embossed circle accents, die-cutting and Copic marker coloring.
Sentiment:
The circles were included to add to the whimsical look of this stamped scene.
5/25/2022
Celebrate You ~ Day 3 MCT 121st Edition Sneak Peeks
Hello, it's Gaylynn. The My Creative Time 121st Edition release and sale are coming up on Friday. But for today, the team is sharing adorable Day 3 sneak peeks. Here is a sweet celebration card, great for a birthday, baby, shower or girly occasion.
4/13/2022
Emboss resist with Brusho watercolor + Copic markers
Hello. Today, on the Unity blog, I am sharing a watercolor birthday card using emboss resist with Brusho watercolor plus added Copic coloring.
3/10/2022
Just a note... Thinking of you girl scene watercolor card.
Today, I am sharing a peaceful card scene made using stamping and Zig Clean Color Real Brush marker pens for watercolor.
Just a note... Thinking of you.
This can be a great family or friendship card for almost any occasion, especially thinking of you, miss you or just because.
7/01/2021
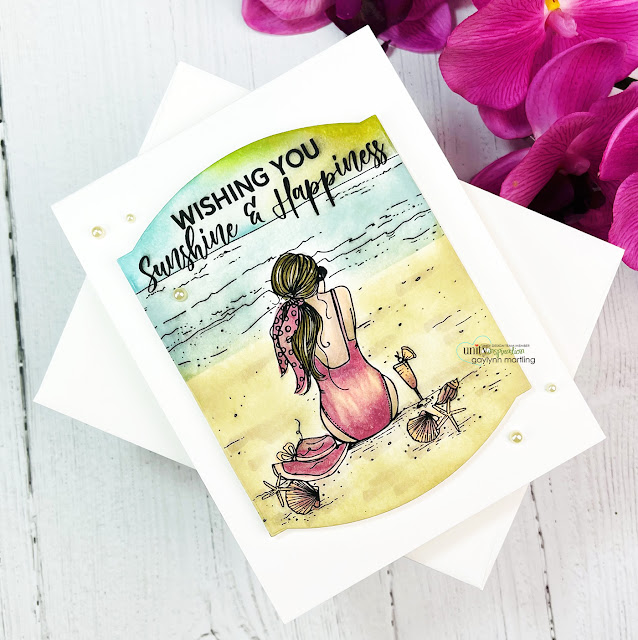
Ink blending, masking & Copics Summer beach card tutorial.
Today, I am sharing a Summer beach card featuring a girl in a tropical scene. I used a mix of distress ink, Copic markers and masking for the scene building.
Here is another look.
YouTube: Gaylynn NeatThingsBtq
Unity Stamp Co. All Sunshine & Happy.
Also, foam double-sided tape, distress ink pads in antique linen, tattered rose, squeezed lemonade, tumbled glass and speckled egg; Copic markers E87, E43, E70, YR30, YR82, R01, RV34, RV95; ink blending brush, Post-It tape, adhesive dots, MFT elegant rectangle STAX die-namics, cardstock.
Thank you for visiting.
Gaylynn
6/01/2021
Stamp, stencil & glitter peonies ~ Slimline card tutorial
Today, I am sharing coordinating stamps and stenciling for this slimline birthday card.
For this card, using MFT slimline die-cut layers:
Here is another look.
YouTube: Gaylynn NeatThingsBtq
Unity Stamp Co. Birthday Blooms and Layering Peony Stencil.
Also, Fiskars paper trimmer, scissors, original Misti, ink blending brushes, distress oxide ink worn lipstick, distress ink speckled egg and scattered straw, Ranger archival ink magenta hue, Gina K. Designs glitz glitter in bubblegum, spatula, MFT extreme black hybrid ink, pad, poppin' pink premium dye ink, cement gray and princess pink prestige cardstock, slimline slide-in and slimline starter die-namics; flat and foam double-sided tape.
Thank you for visiting.
Gaylynn
5/14/2021
Whimsical stamped bee pun card & patterned paper ~ tutorial
For this sweet pun card, I am mixing patterned paper and stamping. I tried coordinating the sweet bees, flowers and sentiments to fit in with the background paper colors.
Bee you tiful You.
YouTube: Gaylynn NeatThingsBtq
Thank you for visiting. Have a beautiful day.
Gaylynn
3/10/2021
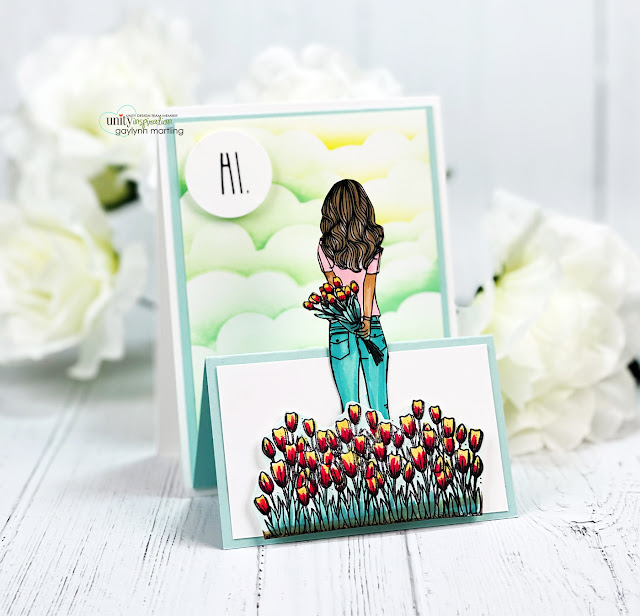
Tulip Flowers Scene Girl ~ Easel Card Tutorial
For Technique Time, I am showing a way to make an easel card that includes an outdoor scene. In this tutorial, no dies are used.
An easel card technique is a great way to add interest and dimension to a handmade card. It is interactive and is includes pretty scene building.

Helpful tips:
Here are helpful tips for creating this easel card scene. To begin, stamp the girl, the flowers and the sentiment. Next, trim and score a card base and a mint color frame panel. Then, trim a cloud panel and a bottom trim. Also, add color to the girl and flowers and then fussy cut (cut out) the girl and the flowers. I used a circle punch for the sentiment. Next, add light ink blending in two colors onto the cloud panel using a cloud stencil. Finally, adhere the scored green panel onto the card base and add the accent layers to finish the easel card.
A2 card base: Cut 11" x 4 1/4" and score at 5 1/2".
Mint frame layer: Cut 10 1/4" x 4" and score at 5 1/2" and 7 3/4".
Cloud layer: Cut 5" x 3 3/4".
White front strip: Cut 3 3/4" x 2 1/4".
Also, foam and flat double-sided tape, cardstock, Misti, Simon Says Stamp intense black ink, distress oxide ink in cracked pistachio and fossilized amber; 1 1/4" paper punch, scoring board, bone folder, Copic markers E44, E33, E71, E11, Y21, RV29, RV11, BG18, BG15, BG32, BG10.
2/10/2021
Stencil blending + Copic markers book themed card tutorial
For Technique Time on the Unity Stamp Company blog, I share stencil blending and Copic coloring for this book-themed card.
Technique Time and
Watercolor Wednesday.
2/03/2021
Matching card and wine tag gift set tutorial
For Technique Time on the Unity Stamp Company blog, I am sharing a friendship themed card and wine tag gift set. These coordinate perfectly.
Technique Time and
Watercolor Wednesday.
1/28/2021
Puppy dog slimline card with Copic marker blending.
This is a sweet puppy dog slimline card featuring pet-themed stamping. I used stamping along with blends of Copic coloring, Unity paper and also die-cutting.
Sentiment: Sending puppy kisses.
Helpful tips:
Here are helpful tips for creating this puppy dog slimline card. To begin, stamp the puppy and add the colors of choice. I chose to use a blend of Copic markers to create a similar color scheme as one of the pups in the family. Next, fussy cut (cut out) the dog stamping. Then, trim or die-cut a slimline or tall card base and card layers. Also, make dog bone-shaped cutouts or die-cuts using patterned paper and layers. Finally, layer everything to finish.
This card base was cut 7 1/2" x 7 1/2" and scored at 3 3/4" to coordinate with the MCT tall die-cut layers.
{{Please subscribe to my video channel and like this video. Many thanks.}}YouTube: Gaylynn NeatThingsBtqHere is another look:
Supplies: Unity Stamp Co. Love Puppies and Pretty Polkas {paper pack}.
Also, My Creative Time Tall Frame Dies, Tall Paw Frame Dies and Doggies and Kitties; adhesive pearls, flat and foam double-sided tape, Copic markers C9, C7, C5, C3, E71, E18, E15, E13, E11, R02, R27.
Thank you for visiting.Gaylynn
1/13/2021
Tropical beach seashells girl ~ embossing on kraft tutorial
Hello. For Technique Time at Unity, I show distress embossing on kraft color cardstock for this tropical beach girl card. I also use Copic coloring for the girl.
Technique Time and
Watercolor Wednesday.


