Showing posts with label graduation. Show all posts

6/13/2024

Koi Pond Stenciling and Copic Coloring

 Today, I am sharing a tropical scene with Koi pond stenciling and Copic coloring.  This is a soft combination paired with patterned paper.

Sentiment:
Follow your dreams.  They know the way.

I really like the mix of patterns and layers.

5/15/2024

Northern Lights Ink To Stamp Background ~ Graduation Card

Check out this set of cards with a Northern Lights ink to stamp background technique.  I made each card slightly different.  Graduation sentiments were added, but almost any theme will work.


The encouraging sentiment strips were added and layered for graduation greetings.  And, the backgrounds coordinate with the sentiments perfectly.  Lots of Unity Stamp Co. products were used and they are linked down below for your convenience.

6/21/2023

3-D Butterfly + Background Stamping ~ Encouragement

 Hi friends.  Try out 3D butterfly and background stamping together for easy dimension and interest.  This card incorporates both with a soft and pretty touch.


Sentiment: 
Watching you grow & evolve brings me joy.

Sending encouragement and inspirational words is so meaningful.  This is one example of how to share heartfelt sentiments.

5/09/2023

Watercolor graduation wobble card.

Hello and welcome.  Here is another project for the Unity blog. I have a watercolor graduation wobble card with a bit of humor.  This one was made simple for a guy or gal.


Sentiment:  Nice hat.  Congrats.

For this card, I only used the cap at the stamp focus along with a fun sentiment.

5/05/2023

Graduation congrats card ~ puppy dog & cap

  Hi everyone.  Today I am sharing sweet graduation greetings featuring an adorable puppy dog with a grad cap.  This is a clean and simple design with a bit of coloring and patterned paper accents.


Sentiment:  Congrats.  You did it!


5/03/2023

Watercolor graduation hat floral card

Hi friends.  Today for the Unity blog, I have a watercolor graduation hat floral card, ready for celebrating.

Sentiment:
Bittersweet endings, exciting beginnings.

For a soft look, I added watercolor for color in coral and teal shades.  Also, I chose a complementing sheet of patterned paper to accent. 

3/16/2023

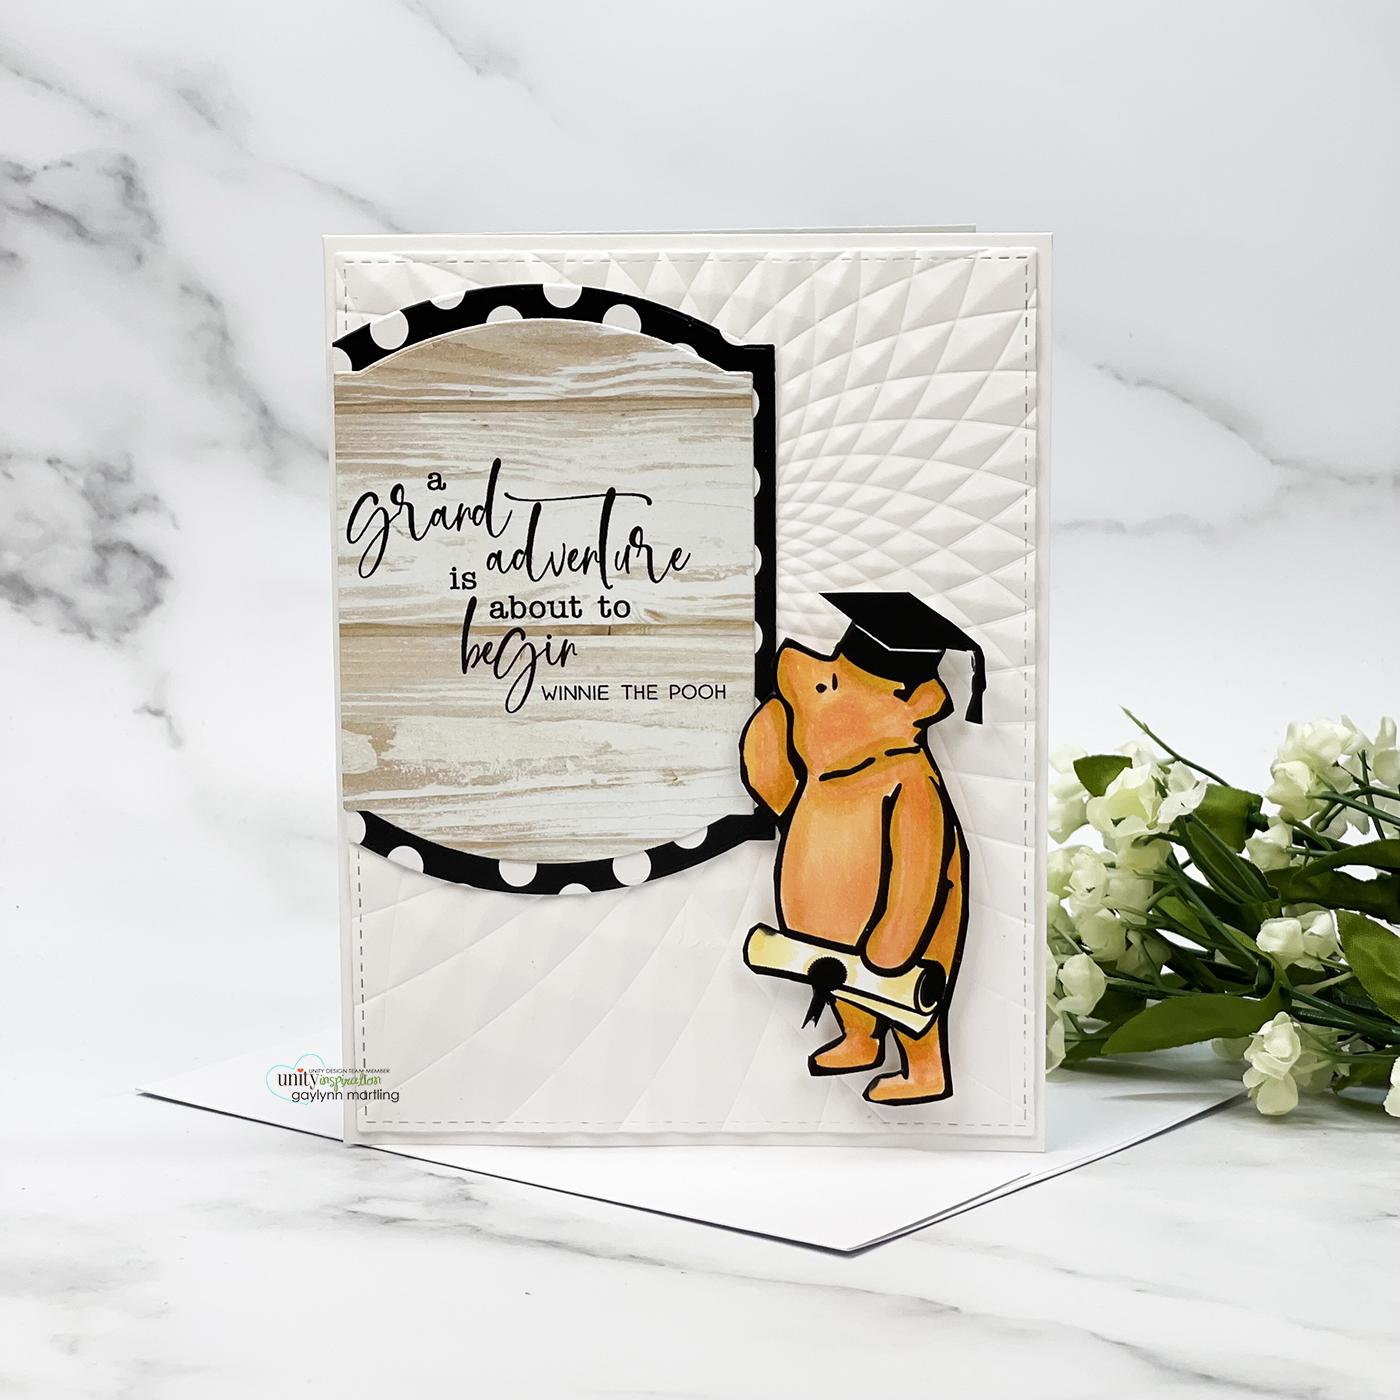
Graduation grand adventure embossed card.

  Hi.  Today, I am sharing a sweet graduation card with stamps by Unity Stamp Co.  I also include dry embossing and patterned paper.

Sentiment:
A grand adventure is about to begin.

This theme is the sweetest.  I kept this one simple for the guys or the gals for graduation occasions.

5/25/2022

Using ink sprays 2 ways ~ Mixed media card techniques

     Hello.  Today, on the Unity blog, I am sharing a way of using ink sprays 2 ways for mixed media projects.  These cards use the same ink yet have very different looks.

Using ink sprays 2 ways is so easy to do.  Creating a clean and simple card or a layered mixed media card are just two of many options for ink sprays.

I made a quick video tutorial showing the process for this project.

{{Please subscribe to my video channel and like this video.  Many thanks.}}

4/25/2022

Graduation ~ Day 1 My Creative Time 120th Edition Sneak Peeks

 Hello, it's Gaylynn.  The My Creative Time 120th Edition release and sale are coming up on Friday.  But for today, the team is sharing adorable Day 1 sneak peeks.  This card features graduation clear stamps and dies.


Sentiment:
Hats off to the grad.
We are so proud of you.

This is a great grad card for almost anyone.  I kept the colors, black, white and mint green.

6/14/2021

Cheers ~ Day 1 Sneak Peek MCT 111th Edition

Hello, it's Gaylynn.  The My Creative Time 111th Edition release is coming up on Friday.  But for today, the team is sharing Day 1 sneak peeks.


Sentiment:
Cheers.  You are simply the best.


This card was made for celebrations like graduation, good grades, promotion, birthday and so many other occasions. I added circles in the background with one of the new big word dies along with a coordinating sentiment strip and gold dots. This is a clean and simple design.
***Sneak Peek Giveaway!***
We will be giving away the sets we are showcasing each day to ONE lucky winner! ALL winners will be announced on Emma’s blog on Friday during the blog hop! ALL you have to do is leave a comment on each of our blogs! You are NOT required to comment on EVERY SINGLE blog, but the more you comment on, the more chances you have for winning! VERY IMPORTANT, PLEASE leave a way for us to contact you with your comment just in case "YOU" are the lucky winner! For EXTRA entries, you can spread the word about this release on Facebook OR even Instagram! #mycreativetime! GOOD LUCK EVERYONE. Let's start spreading the word!

Here is another look.


Supplies for today's project: My Creative Time More Big Word Dies, More Sentiment Strip Dies, Big Word Sentiments, Linked Circles Die; foam double-sided tape, cardstock, Nuvo crystal drops bright gold, multi medium matte glue, MFT cardstock and ink.

See more inspiration on the My Creative Time blog.

Thanks for visiting. Have a great day.

Gaylynn

5/07/2021

Graduation Card ~ MCT 48 Hour Flash Sale & Blog Hop

 Hello, it's Gaylynn here. Welcome to another My Creative Time "48 Hour Flash Sale" and blog hop. This sale is for 48 hours ONLY that is going on right NOW and will end on Sunday, May 9, 2021, at 7am PST. Use the code FLASH at checkout to get 20% off of your entire "in-stock" only purchase! Sale applies to in-stock items only! Start shopping HERE. For the blog hop, you may have arrived from Emily's blog.


Sentiment:
Congrats. The best view comes after the hardest climb.

Today, I am sharing a tall or slimline style graduation card featuring the new quote bubble die set and the new inspirational stamp set.  Also, I made a grad hat using trimmings from one of the treat box dies.  I love that we get to mix and match things from MCT to make something totally different than what it was intended for.  Also, I used the congrats sentiment and the star from other kits in her line.  The cap tassel was made from gold cording.  I used hot glue to fasten the tassel under the star.  This was fun to put together and it is fitting for a guy or gal.

In addition to our sale, we are ALSO showcasing brand new stamps and dies! They are called “Quote Bubble Dies” and "Good Things Are Coming". They are available for purchase HERE.
Here is another look.


GIVEAWAY!
Leave your comments for a chance to win a $25.00 Gift Card to the "My Creative Time" store! Don't forget to leave a way for us to contact you "just in case" YOU are the LUCKY winner! Good Luck!


Don't forget to use the code FLASH at checkout to get 20% off of your entire "in-stock" only purchase!

Supplies:  My Creative Time Quote Bubble Dies, Good Things Are Coming, Big Word Dies, Tall Postage Frame Dies, Tall Frame Dies, Fancy Pillow Treat Box Die, Star Rosette Die; Gina K. Designs connect glue, hot glue gun, cardstock, black and gold glitter cardstock, gold cording, flat and foam double-sided tape, scoring board, paper trimmer, mini Misti.

Your next stop in the blog hop is Ginger's blog.


The entire hop lineup is on Emma's My Creative Time blog.

Remember to leave comments along the way on the blog hop for MCT prize chances.
Thanks for stopping by.

Gaylynn

5/04/2021

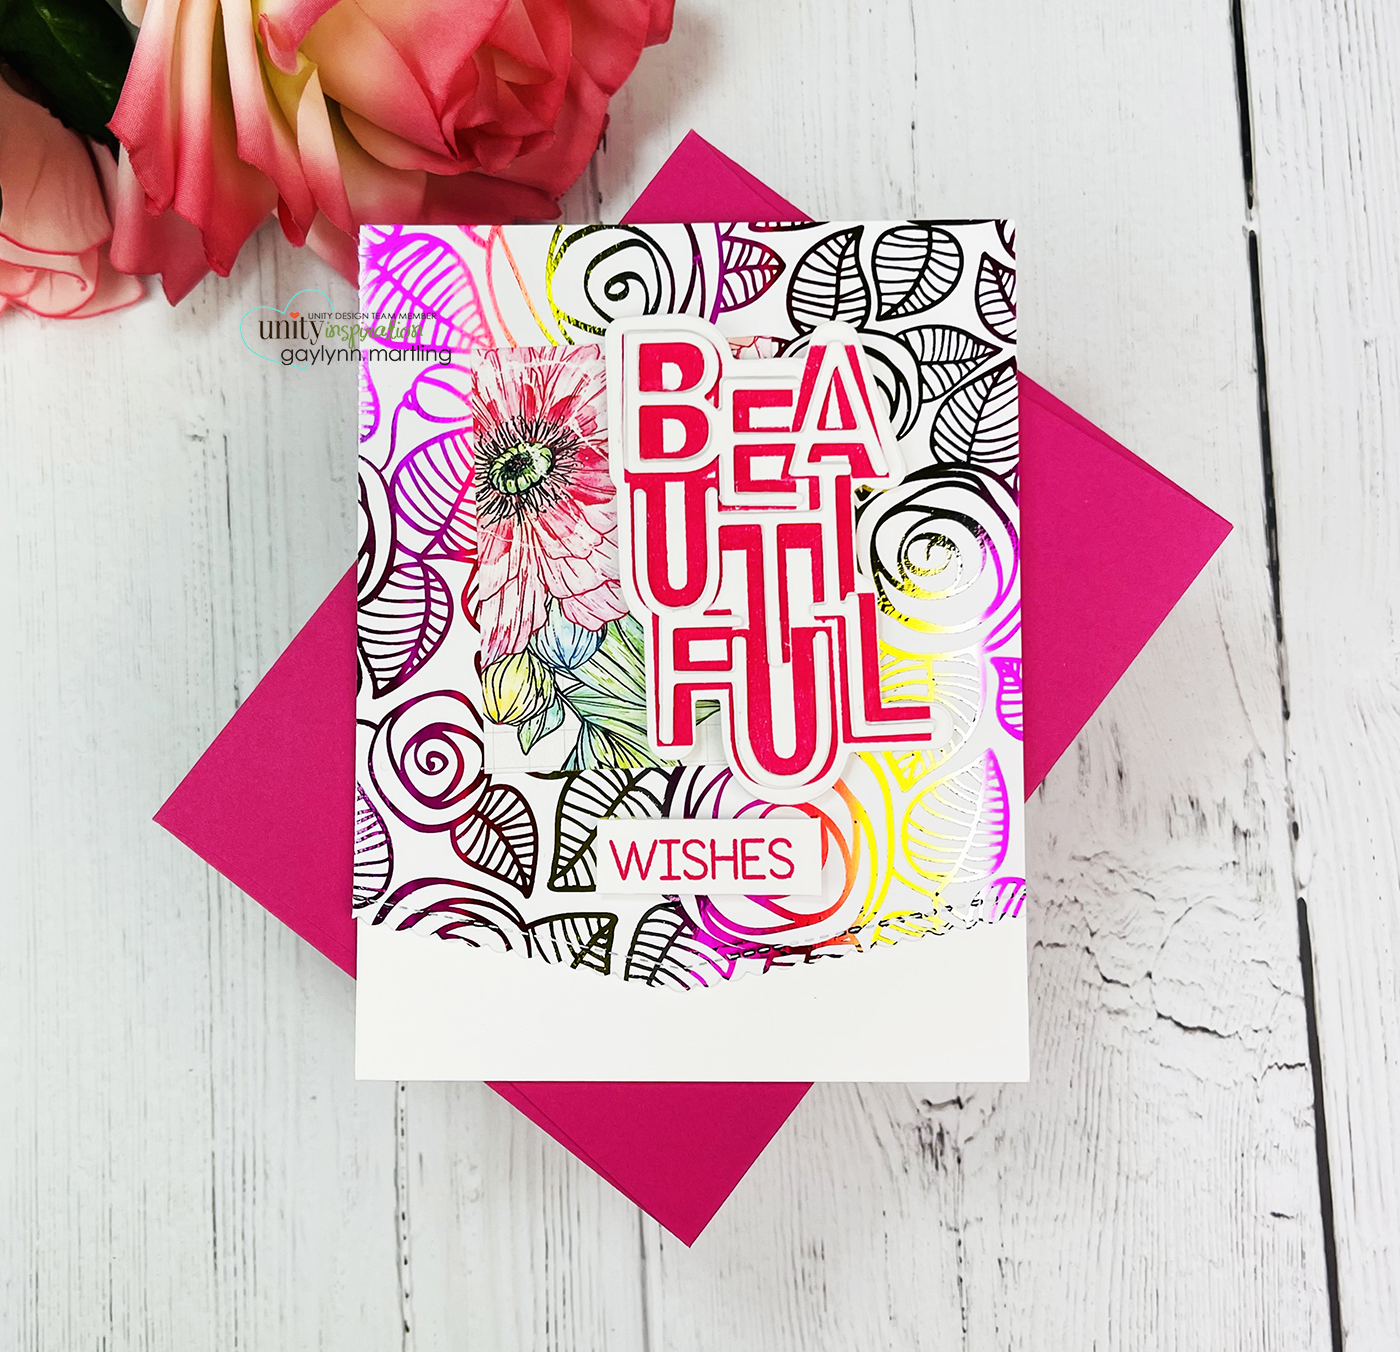
2 Cards ~ Toner card front laminator foiling, stamping & die-cuts

 Today, I am sharing two cards.  These were made using Unity stamps and coordinating dies along with deco foil and toner card fronts.  We are also participating in an Instagram hop with Unity and Therm-o-Web.  Head over to @neatnook on Instagram to play along or to get lots of creative inspiration.

Sentiments:
Congrats.  This calls for a celebration!
Beautiful wishes.


Helpful tips:

Here are helpful tips for making these cards.  First, trim and score the card bases and the toner card front panels.  Next, stamp, watercolor and fussy cut the flowers and leaves for accents.  Also, trim a patterned paper accent piece for the beautiful card.  Preheat your laminator.  Next, stamp the two big words plus smaller sentiments onto cardstock.  Then, die-cut around the big words with the coordinating dies.  Also, die-cut the narrow outline word layers three or four times per word on white cardstock.  Then, adhere 3 or 4 narrow outline layers together for dimension.  Next, layer the white stacked outline words over the thicker stamped corresponding words for a wonky abstract look.  Then, foil the trimmed toner card fronts using a laminator and foil sheets.  Finally, layer everything onto the card front, to finish.
 
Here is another card version:


I made a video tutorial showing the process for this project.
{{Please subscribe to my video channel and like this video.  Many thanks.}}
Also, cardstock, scissors, scoring board, Fiskars paper trimmer, Altenew watercolor, Ranger watercolor paper, My Favorite Things stitched scallop basic edges & stitched basic edges die-namics, premium dye ink in poppin' pink and jalapeno popper.

Remember that there is an Instagram hop going on.
Head over to @neatnook on Instagram to play along or to get lots of creative inspiration.
Thank you for visiting.  
Have a beautiful day.
Gaylynn


4/22/2020

Watercolor swoosh card background with colorful stamping.

Hello.  For Technique Time at Unity, I am showing a watercolor swoosh background technique along with colorful stamping.


Sentiment: So well done.


A watercolor swoosh background can be made easy with a one or two colors along with simple stamping. This is an easy way to add softness to card making.

Here are helpful tips for creating a watercolor swoosh background card. To begin, pre-cut or die-cut a watercolor paper panel to fit your card base. Next, mix two different colors of watercolor onto a palette. Then, using a wide paintbrush, dab the brush into one of the colors and make a swoosh from left to right. Optional, add layers of color to the swoosh if you want to. Now, repeat the swoosh with another color below the first swoosh, overlapping slightly. Next, heat set the watercolor swoosh background or leave out to dry completely. Then, using an original Misti or stamp positioning tool, add the big sentiment, the mouse and the border stamp in navy archival ink or waterproof ink. Also, stamp the flowers in three coordinated colors, repeatedly around the top. Finally, add twine and adhesive gems, to finish.


I made a quick video tutorial showing the process for this project.
{{Please subscribe to my video channel and like this video.  Many thanks.}}
YouTube:  Gaylynn NeatThingsBtq


Here is another look.


Supplies:  Unity Stamp Co. So Well Done and A Little Mousy; MFT die-namics, double-sided foam tape, Altenew palette mat, Canson watercolor paper, Prima watercolor, Ranger archival ink in cobalt, saffron and aquamarine; original Misti, paintbrush, adhesive gems.

Be sure to visit the Unity blog for the entire article and tutorial.
Also, you can find my other features at Unity's
Technique Time and
Watercolor Wednesday.


Thanks for visiting.
Gaylynn

3/29/2020

Foiling digital toner prints with Copic markers graduation card.

Hi there.  Today, I am sharing a graduation or encouragement card and video.  I used a digital stamp for this flower along with a pre-stamped and embossed sentiment from a red rubber stamp.


Sentiment:
Behind you all your memories, before you all your dreams, around you all who love you, within you all you need.

Here are helpful tips for creating this card.  To begin, either use printed digital stamps or hand-stamped images and a sentiment for use with Copic markers or your markers of choice.  Also, preheat a laminator.  Then, trim or die-cut the image panel and the glitter background panel, to fit your card base.  Next, stamp the sentiment.  Then, using clear embossing powder, heat emboss the sentiment to prepare it for foiling later.  Next, add color to the flower in layers for a variegated look.  I used Copics in a variety of colors listed below.  Next, sandwich the stamping with a piece of gold foil over the stamping, pretty side up, between a folded parchment paper carrier sheet.  Then, run it through a preheated laminator.  Gently peel away the foil.  Finally, layer everything and add twine to finish.

I made a quick video tutorial showing the process for this project.
{{Please subscribe to my video channel and like this video.  Many thanks.}}
YouTube:  Gaylynn NeatThingsBtq


Here is another look.


Supplies:  Unity Stamp Co. In This Together {digital stamp} and Sentiments for Graduates rubber stamp; double-sided foam tape, My Favorite Things A2 stitched rectangle dies, gold cording, gold deco foil, laminator, laser printer with toner ink, gold glitter paper, Ranger archival ink, clear embossing powder for sentiment, original misti, Copic markers in YG0000, Y13, G16, YG13, R35, RV29, RV04, R20, RV11, R32.

Thanks for visiting.
Gaylynn

3/04/2020

Congrats foiled card & video with deco foil and toner sheets.

Hi there.  Today, I am sharing a congratulations card using deco foil along with vellum stamping, with no coloring.


Sentiment:  Congrats.

Here are helpful tips for using deco foil with toner sheets.  To begin, trim or die-cut the toner card front panel to fit your project.  Coloring is optional.  I decided to not add coloring to this card.  Next, trim a piece of foil to cover the toner panel.  Then, place the foil over the toner sheet, pretty side up.  Now, run them through a preheated laminator, pretty side up.  You can also use a carrier sheet or parchment paper to sandwich them.  Or, carefully run them through without it.  Once cooled, gently peel away the foil piece to reveal the shiny foiled background.  Next, stamp or emboss the sentiment and flowers onto vellum cardstock using StazOn ink.  Trim that to fit.  Finally, layer everything and add the sentiment panel and gems to finish the card.

I made a quick video tutorial showing the process for this project.
{{Please subscribe to my video channel and like this video.  Many thanks.}}
YouTube:  Gaylynn NeatThingsBtq


Here is another look.


Supplies:  Unity Stamp Co. Big Time Congrats and Deco Foil Toner Card FrontsMCT more stitched rectangular diesdouble-sided foam tape, StazOn black ink, Papertrey Ink vellum cardstock, pink hemp cording, adhesive gems, deco foil pink melon, laminator, clear flat double-sided tape.

Thanks for visiting.
Gaylynn

1/01/2020

Amazing things butterfly favor box or gift holder.

Hello and Happy New Year!

Today, the My Creative Time team is sharing favor wrap projects.  Here is a small favor box decorated with a butterfly and an encouragement sentiment.


Sentiment:  You will do amazing things.

This is great for many occasions like good luck, graduation, going away, new job, congratulations, encouragement or as a gift card holder or party favor.

To begin, I die-cut the favor box from patterned paper.  I also die-cut the butterfly.  Then, I stamped the sentiment onto the front panel.  Everything was assembled.  Finally, tissue paper was included with a small gift token.

Supplies:  My Creative Time Present Box Die and Amazing Things; Ranger jet black archival ink, Ranger wonder tape, BasicGrey Plumeria paper and tissue paper.

Please visit Emma's My Creative Time blog for more inspiration.

Thanks for visiting.
Best wishes for a fabulous 2020.
Gaylynn

7/02/2019

Celebrate stars watercolor card ~ MCT Birthday Palooza

Today, the My Creative Time team is sharing birthday themed projects.


Sentiment:  Celebrate.

This background watercolor panel was leftover from a previous project.  I used the star pieces on another card.  And I almost pitched this into the trash.  But then I thought of making another card with a birthday or celebration theme.  And so this card was born.

I trimmed the leftover watercolor paper to fit my card base.  Then, I added a stamped and die-cut celebrate sentiment.  To finish, I added a few adhesive pearls.  This was made in less than twenty minutes.
Tip:  You can get a similar look by die-cutting patterned paper using stars or other shapes.

Here is another look.


Supplies:  My Creative Time Bunch Of Stitched Stars and Best Day Ever; Simon Says Stamp intense black ink, mini misti, adhesive pearls, watercolor brushes and Altenew watercolor half pans.

Please visit Miss Emma's My Creative Time blog for more inspiration.

Thanks for visiting.
Gaylynn

6/05/2019

Congrats party favor wrap ~ My Creative Time

Today, the My Creative Time team is sharing party favor projects.


Sentiment:  Congrats.

This is a mini gift box, perfect for party favors, treats, small gifts or tokens.  This one is for a celebration with a little Congrats tag.  It could easily be made with any theme and sentiment.   This one is going to be for a housewarming decoration.

Supplies:  My Creative Time Stitched Mini Bag Die and Best Day Ever;  Ranger archival ink, Recollections paper and twine.

Please visit Miss Emma's My Creative Time blog for more inspiration.

Thanks for visiting.
Gaylynn

5/10/2019

A Sunny Hello My Creative Time stamp kit inspiration.

Today, I am sharing a cheerful sunny themed card.  It is one that I shared in the past.  But, My Creative Time has a small amount of these kits still available.  So if you want to grab it before it is gone, do so soon.


For today's card, I used Ranger distress oxide ink pads to cover the layers.  They ink colors are fossilized amber and spiced marmalade.  Then, I added modeling paste with the included dotted stencil.  Once it all dried, I spritzed it all with water.  Everything was layered for a happy and sunny greeting card.

MCT kits used:
A Sunny Hello KIT (stamps, stencil and dies)
Scalloped Stitched Oval Dies

To view the remaining special kit packs, click Limited Kits for a great deal before they are gone for good.

Here is a closer look at today's card.


Be sure to visit the My Creative Time blog for more inspiration.

Have a sunny day.
Gaylynn

5/03/2019

Graduation ~ MCT Flash Sale and Blog Hop

Hello, it's Gaylynn here. Welcome to another My Creative Time "48 Hour Flash Sale" and blog hop. This sale is for 48 hours ONLY that is going on right NOW and will end on Sunday, May 5, 2019 at 7am PST.
You may have arrived from Emily's blog.


I am sharing a graduation card with this new stamp and die set.
My niece is graduating. So instead of making a pop holder, I decided it would be perfect timing for a grad card. I added a bit of ink blending to the background and then added the cap and sentiment die-cuts.

We are showcasing this AMAZING new stamp and die set called “BEST DAY EVER” and “GRAD HAT LOLLIPOP HOLDER DIE” These 2 sets are available now for purchase here: https://shop.my-creative-time.com/FLASH-FRIDAY-SPECIAL_c54.htm Don't forget to use the code FLASH at checkout to get 20% off of your entire "in-stock" only purchase! Sale applies to in-stock items only!


GIVEAWAY!

Leave your comments for a chance to win a $25.00 Gift Card to the "My Creative Time" store! Don't forget to leave a way for us to contact you "just in case" YOU are the LUCKY winner! Good Luck!


Here is another look.


Supplies:  My Creative Time Best Day Ever and Grad Hat Lollipop Holder Die, glitter paper, distress oxide ink in worn lipstick, makeup brush, Simon Says Stamp ink, adhesive gems and foam tape.

Your next stop in the blog hop is Jessica's blog.
The entire hop lineup is on the My Creative Time blog.

Remember to leave comments along the way on the blog hop for prize chances.
Wishing  you a terrific day.

Gaylynn