Hey there. Thanks for stopping by. Today I am sharing a way to stamp in color and use colored pencils on kraft cardstock, for Unity Stamp Co. This provides a subtle look by combining the two techniques.
Sentiment: Take care.
Stamping different ink colors with a touch of colored pencils works beautifully on kraft.
Hi. Thanks for visiting. Today I am sharing a stencil frame moose card. This is similar to a previous project that I made using eclipse stenciling, but for this one, I added more blending for a rustic look.
Sentiment:
Wishing you a day full of wild surprises.
Since the background paper was dark green, I added even more of the ink blending during the masking process.
Hi there. Today, for Unity Stamp Company, I am sharing an ink blending and stencil color block butterfly card project. This one needs no additional coloring.
Sentiment: With all my heart.
This is easy to make. I love the abstract look of it.
For today on the Unity Stamp Company blog, I share this watercolor floral spotlight card project for sending support or condolences. This is made using rubber stamping, watercolor pens and masking.
The overall look of this technique is a mixed media style.
For this one-layer Summer card, I used watercolor, stenciling and ink blending. It was fun building added accents to this already lovely background stamp.
Hello, it's Gaylynn. The My Creative Time 119th Edition release and sale is coming up on Friday. But for today, the team is sharing adorable Day 2 sneak peeks.
Sentiment: I'm so sorry.
This sweet bear card is for sending support in trying times. It works for sympathy, get well, support, thinking of you and more.
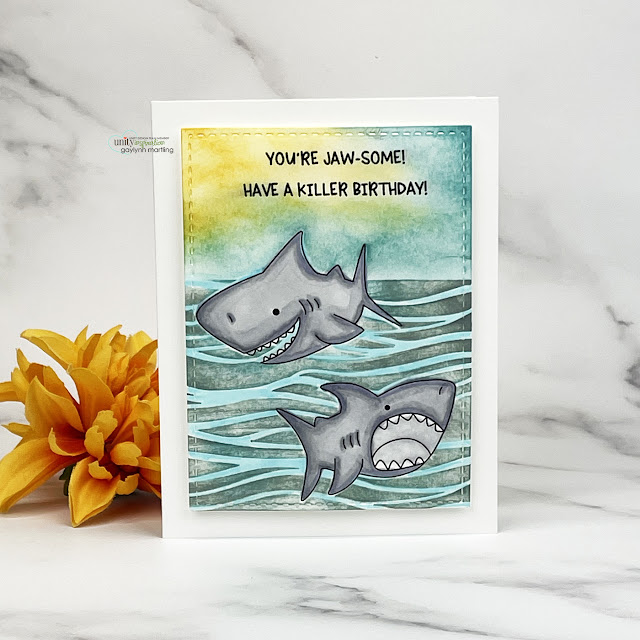
We are celebrating Angela's birthday week over at Unity Stamp Company. Here is another peek using some of the offerings over at Unity. This fun card with sharks is great for birthdays with a fun pun twist.
Sentiment:
You're jaw-some! Have a killer birthday!
For this card, I filled the whole card front with tropical scene building for the sharks, the ocean and the sky. This is is a one layer card with a clean look to it.
Today, I am sharing a clean and simple card featuring adorable owls. This card is easy to make. I used stamping, masking, ink blending and a bit of Copic coloring.
Sentiment: Cheers!
Helpful tips:
To create this, begin by stamping the owls onto smooth white cardstock. Then, die-cut or trim the stamped panel and a frame layer in green. Next, using masking tape or Post-It tape, create a mask above and below the ows. Then, add ink blending on the edge of the mask bottom in green and above the mask in yellow. I used ink pads for ink blending but distress ink works also. Next, add color to the owls. Finally, layer everything with added pearl gems, to finish.
Ink pad blending is another way to add shades of color and it is an alternative to distress ink blending. Today, on the Unity blog, I am sharing a colorful card using shades of two dye ink pads that are masked onto the background.
Sentiment:
Feel better. May today be a bit better than yesterday.
This background looks extra nice with masked ink pad blending for color. Using shades of dye inks made for vibrant ink blending.
Helpful tips:
Here are helpful tips for making this card. To begin, stamp and trim the background to fit an A2 sized card front. Next, stamp and trim the sentiment. Also, stamp, color and trim the tea bag. Next, mask the background edges to leave a rectangle for ink blending. I used a stencil but masking tape works also. Then, use two colors of dye ink and blending brushes to add color to the background panel. Once dry, layer the sentiment, the tea bag and the dots, to finish.
Here is another look.
I made a quick video tutorial showing the process for this project.
{{Please subscribe to my video channel and like this video. Many thanks.}} YouTube: Gaylynn NeatThingsBtq
Also, ink blending brushes, flat and foam double-sided tape, Post-It tape, My Favorite Things premium dye ink in fire coral and Caribbean sea also stitched mini scallop STAX die-namics and rectangle extraordinaire stencil.
Be sure to visit the Unity blog for the entire article and tutorial.
Sea turtle masking is great for scene building with stamping. Today, on the Unity blog, I am sharing a tropical card using sea turtle stamping along with pretty patterned paper.
Sentiment: Keep swimming.
A mix of pretty paper along with sea turtle masking help to make this card come to life. I requested a sea turtle stamp, and Lea Keisling then designed the stamp kit for Unity. How awesome is that? The elements are found in the August 2021 Whit Kit card kit.
Helpful tips:
Here are helpful tips for making this card. To begin, stamp two of the turtles onto a pre-trimmed cardstock panel. Then, stamp two more turtles onto scrap paper. Color in the turtles on the card panel. Next, fussy cut (cut out) the two extra turtles to use for masking. Using repositionable tape, mask the turtles with the cutout ones. Next, using a stencil, blend the color over the masked panel. Then, remove the stencil and the masks. Also, trim a background layer from patterned paper. Finally, layer it all onto the card base, to finish.
Here is another look.
I made a quick video tutorial showing the process for this project.
{{Please subscribe to my video channel and like this video. Many thanks.}} YouTube: Gaylynn NeatThingsBtq
Supplies:
Unity Stamp Co. Just Keep Swimming {Whit Kit August 2021} and By The Sea {paper pack}.
Also, foam and flat double-sided tape, scissors, distress ink in speckled egg, distress oxide ink in broken china, ink blending brushes, My Creative Time heart label dies, My Favorite Things double stitched rectangle STAX die-namics and wavy lines stencil, Nuvo crystal drops in bright gold, Gansai Tambi starry colors watercolor, Scrapbook Adhesives repositionable dots, Copic markers E29, E15, E13, E33, E11, E00, 0.
Be sure to visit the Unity blog for the entire article and tutorial.
Today, I am sharing a Summer beach card featuring a girl in a tropical scene. I used a mix of distress ink, Copic markers and masking for the scene building.
Sentiment: Wishing you sunshine & happiness.
Helpful tips:
To create this beach scene, begin by stamping the beach girl scene and the sentiment onto cardstock. Also, trim or die-cut the beach panel to fit the card base. Next, add a touch of Copic coloring to the girl and the shells. Then, mask the background, one section at a time, for distress ink blending. Use lots of color layers for a richer look. Move the masking to continue the process onto the sections of the beach where the color changes. Finally, layer the panel onto the card base with added gems, to finish.
Here is another look.
I made a quick video tutorial showing the process for this project.
{{Please subscribe to my video channel and like this video. Many thanks.}} YouTube: Gaylynn NeatThingsBtq
Hello, it's Gaylynn. The My Creative Time 111th Edition release is coming up on Friday. But for today, the team is sharing Day 2 sneak peeks.
Sentiment:
You're booked for a date night.
This is a fun date night movie themed card. It features popcorn, drink and a movie icon along with the sentiment label. I used Copic friendly ink for the stamping along with Copic markers. Also, I added a bit of distress ink masking for the background.
***Sneak Peek Giveaway!***
We will be giving away the sets we are showcasing each day to ONE lucky winner! ALL winners will be announced on Emma’s blog on Friday during the blog hop! ALL you have to do is leave a comment on each of our blogs! You are NOT required to comment on EVERY SINGLE blog, but the more you comment on, the more chances you have for winning! VERY IMPORTANT, PLEASE leave a way for us to contact you with your comment just in case "YOU" are the lucky winner! For EXTRA entries, you can spread the word about this release on Facebook OR even Instagram! #mycreativetime! GOOD LUCK EVERYONE. Let's start spreading the word!
Here is another look.
Supplies for today's project: My Creative Time Another Date Night and Label Dies; foam double-sided tape, cardstock, Ranger distress ink in pumice stone, Post-It tape, MFT cardstock and ink; Copic markers R27, Y21, Y11, C1, C3.
Hello. For Technique Time at Unity, I am sharing a one layer card with a beach theme and with sympathy sentiments. I show techniques for masking and ink blending.
Sentiment: Heartfelt sympathy. Praying for you.
The layers of ink combined with creative masking makes this one layer card come to life. Many different stamps can be used to accent this tropical beach background.
Helpful tips:
Here are helpful tips for creating this one layer card beach scene. To begin, trim a piece of cardstock a little larger than A2 size. Mask a horizon using post-it tape. Begin ink blending the water using torn cardstock for masking. Next, mask the water area to blend a sunset sky scene. Then, add more blending for the shoreline and the grassy areas. Next, using the original Misti, stamp the sun over the partially masked area and also the clouds, the birds, trees and the sentiments. Also, trim or die-cut the scene to fit. Finally, layer the scene panel using foam or flat double-sided tape or glue, to finish.
I made a quick video tutorial showing the process for this project.
{{Please subscribe to my video channel and like this video. Many thanks.}}
Hello, and welcome to the My Creative Time "5" Days of Christmas"! This week we will be sharing with you. The design team has LOTS of last-minute Christmas ideas, such as cards, tags, treat holders, gift card holders and whatever else comes to mind that will help YOU get your creative juices flowing for the holiday! There will be a giveaway each day and all winners will be announced next week on the MCT blog! All you have to do is leave your comments on each stop for a chance to win a $15 Gift Card to the My Creative Time store!
Today is the third day of our 5 Days of Christmas! We all will be showcasing some quick and EASY cards!
Sentiment: Happy Holidays
This is a clean and simple CAS card using a bit of distress oxide ink blending and oval masking. Using cloud die-cuts, stenciling or circle cuts, the clouds come to life with the ink blending. I used the card front for the masking and ink blending. With the bird and branch die-cuts, it was easy to make a focal point. To finish, I stamped the sentiment right onto the card front using a mini Misti.
***GIVEAWAY***Don’t forget to leave your comments on all of our blogs for a chance to win a $15 gift card to the My Creative Time store!
Supplies: My Creative Time Lucky Bird (revised), Gift Card Greetings; broken china distress oxide ink, blending brush, cardstock, foam tape, jet black ink, mini Misti and glue.
Hello. Here is a bright and cheerful birthday card with scene building. I use a mix of distress oxide inks and masking to create this scene strip.
Sentiment: Enjoy your birthday.
Here are helpful tips for creating this. To begin, stamp the sentiment and also the same images onto a trimmed cardstock panel and again onto masking paper. Next, color in the cardstock stamping. Now, cut out the masking paper stamping and peel away the film backing. Then, place the masking paper over the cardstock stamping. Using colors of distress oxide ink, blend the ink over the cardstock strip. Optional, add water splatters. Next, remove the masking pieces and fill in any extra color sections. Heat set the panel. Finally, layer the panels and add the tag and accents over the card base, to finish.
I made a quick video tutorial showing the process for this project.
{{Please subscribe to my video channel and like this video. Many thanks.}}
Supplies: Unity Stamp Co. So Mushroom; Simon Says Stamp intense black ink, Gina K. Designs masking magic, My Creative Time dies, black lace, double-sided flat and foam clear tape, Ranger mini mister and distress oxide ink in peeled paint, spiced marmalade and broken china; blending brush, twine, cardstock, Copic markers Y11, C1, C3, R02.
For Technique Time at Unity, I am showing a way to make a no layer card using distress oxide ink, a stencil, stamping and masking. This is a quick and easy CAS card design.
Sentiment: Time to hit refresh. This clean and simple card was made with a flat design, directly onto the card base. The process involves ink blending using a stencil plus stamping. See below for details and a video tutorial.
Here are helpful tips for creating this card. To begin, pre-cut and score your card base. Then, die-cut cardstock and use the negative as a mask. Next, place the card base onto a scrap piece of paper. Then position the mask over the card base. Now, adhere the stencil over the masked panel. I used repositionable tape. Next, blend the masked area with ink and then remove the card base. Finally, stamp the sentiment and the floral area directly onto the card base. As an option, top the card with sequins.
I made a quick video tutorial showing the process for this project.
{{Please subscribe to my video channel and like this video. Many thanks.}}
Today for Technique Time for Unity, I am sharing a one layer card with masking, ink blending and embossing.
Sentiment: Search always for those magical moments.
To begin, I masked with Post-It tape and then added three colors of distress oxide ink blending. Once dried, I stamped and heat embossed the trees in silver. Finally, the masking tape was removed and the card was assembled onto the card base.
I made a quick video tutorial showing the process for this project.
{{Please subscribe to my video channel and like this video. Many thanks.}}
Hi. This is Gaylynn and I enjoy paper crafts, mostly card making. This is a place to document my hobby. I get to do what I love as a contributor on creative design teams. You will find card tutorial videos here as well. Thank you so much for visiting.