Showing posts with label engagement. Show all posts

2/17/2023

Celebration monochromatic dry embossed card.

Hi there.  Today, I am sharing an elegant monochromatic card featuring a flower against a dry embossed script background.  I share how to make that background pop.


Sentiment:
Today we celebrate you.

This is a perfect greeting card for weddings, bridal showers, anniversaries, engagement, birthdays and more.

2/08/2023

Two Step Stenciling ~ Hearts

  Hi there.  For today on the Unity blog, I am sharing two step stenciling with hearts.  This was made using coordinating stamps and stencils with ink blending.


Sentiment:
True love 4 ever.
Happy for you.

These chatty hearts can be used for more than Valentines.  Here, I made a wedding card with a mix of stamping, ink blending and patterned paper.

5/04/2022

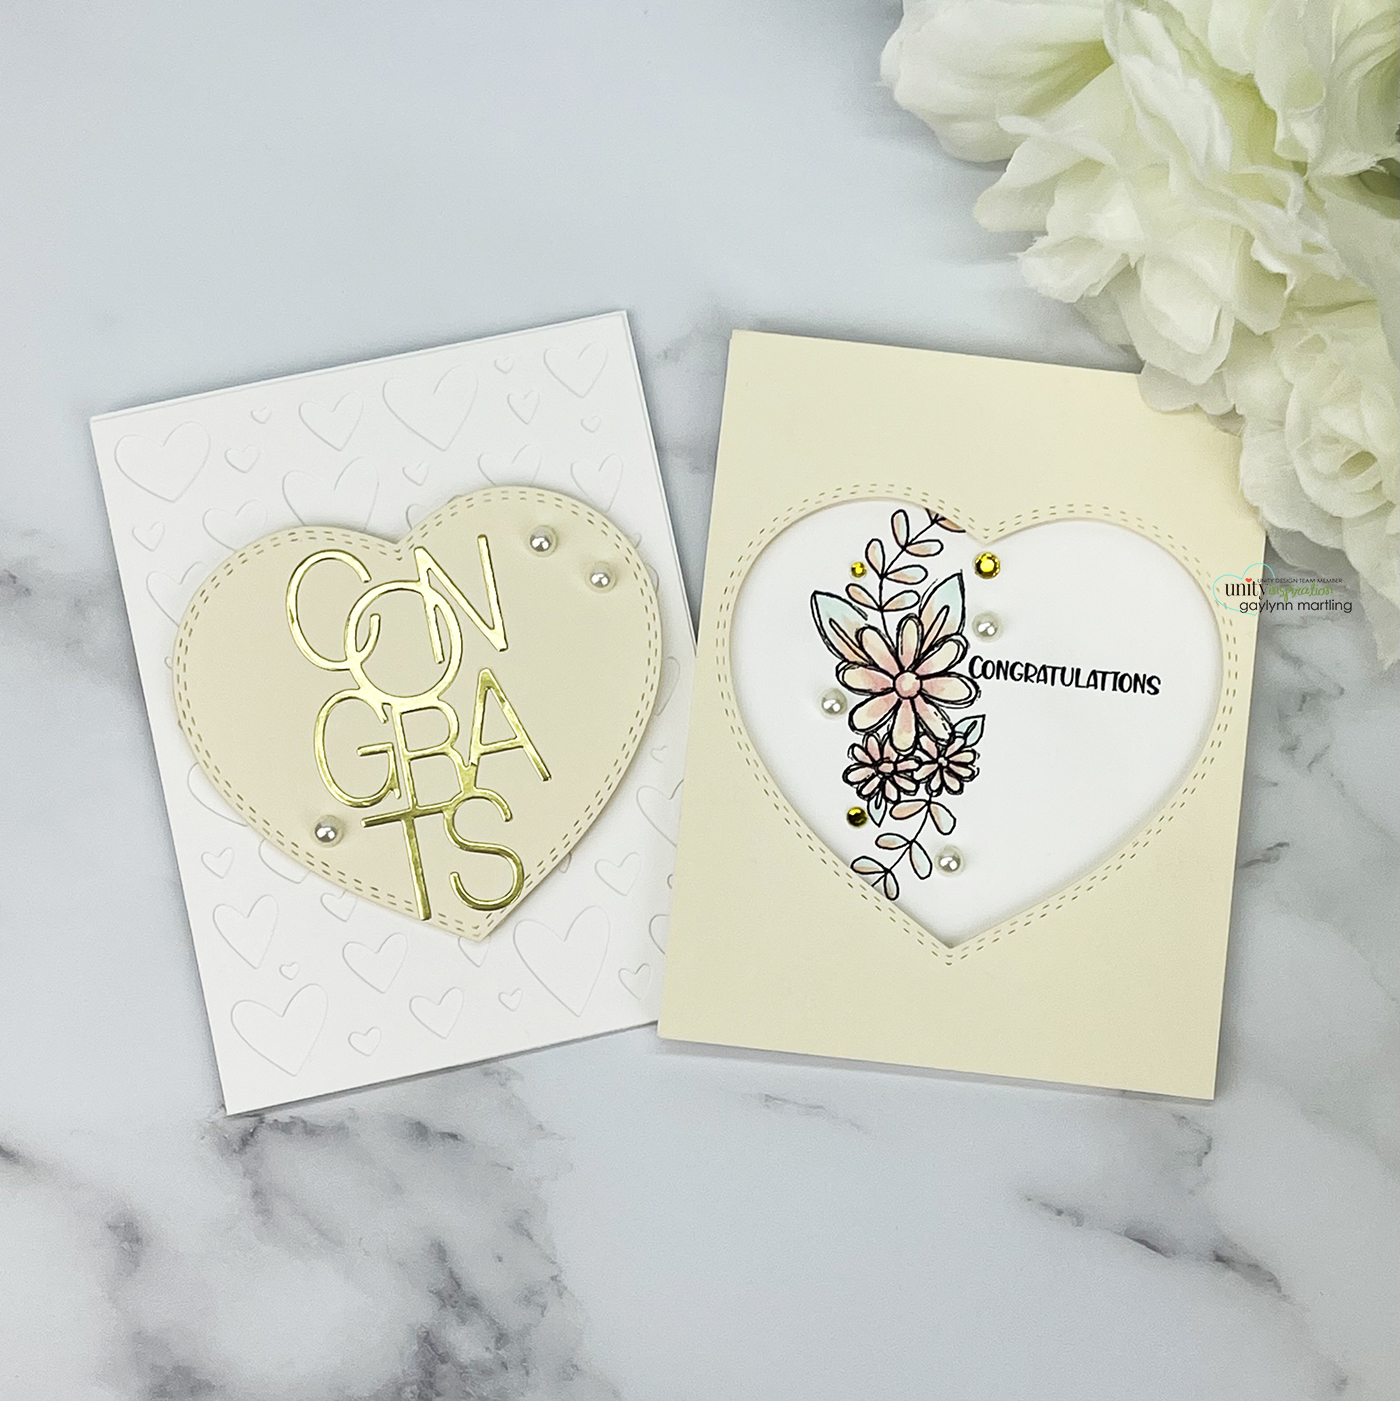
2 Cards Using 1 Heart Die-Cut ~ Wedding Theme

  Hello.  Today, on the Unity blog, I am sharing 2 cards using 1 heart die-cut with added Copic marker coloring.

Sentiments:
Congrats and
Congratulations

Both of these love or wedding cards were quick and easy to make.  Using both of the die-cut sections helped to make 2 cards using 1 heart die-cut.

I made a quick video tutorial showing the process for this project.

{{Please subscribe to my video channel and like this video.  Many thanks.}}

3/25/2022

Heart Support Card ~ MCT 119th Edition Release, Sale & Blog Hop

 Hello, it's Gaylynn.  The My Creative Time 119th Edition release and sale is live.  For today, I am sharing a heart tag card to say I love you.  See what Emma has in store for you.
For the blog hop, you may have arrived from Emily's blog.


Sentiment:  I love you.

This card shows the broken heart in gold bringing two hearts together as one.  This is great for saying I love you.

3/24/2022

Elegant pocket pillow box ~ Day 4 MCT 119th Edition Sneak Peeks

Hello, it's Gaylynn.  The My Creative Time 119th Edition release and sale is coming up on Friday.  But for today, the team is sharing Day 4 sneak peeks.  


This is an elegant pocket gift or favor pillow box.  It is all ready for wedding, engagement, anniversary or bridal shower tokens. 

2/03/2022

Wedding Car Slimline Card ~ My Creative Time Anything Goes

 Hello.  The My Creative Time design team is sharing anything goes projects.  Today, I am sharing a slimline or tall style card for a wedding.


Sentiment:
Mr. & Mrs.
Congratulations on your marriage.

This card is ready for the new bride and groom.  It can be for related occasions, like bridal shower, save the date, engagement, etc.  I thought that the car would be perfect on a tall or slimline card.

12/22/2021

Mandala stamped layers on color cardstock ~ tutorial

Hi there.  This is a demonstration of using mandala stamped layers in card making.  Today on the Unity blog, I am sharing a way to use some of the layers to make a soft wedding card on color cardstock.


Sentiment:  Congratulations

I made a quick video tutorial showing the process for this project.
{{Please subscribe to my video channel and like this video.  Many thanks.}}

8/30/2021

Wedding or shower congratulations ~ MCT Made In Minutes

 Hello.  The My Creative Time design team is sharing projects which were made in minutes.  This wedding themed card was put together in minutes and with no coloring involved.


Sentiment:
Sending you prayers for everlasting love and happiness.
Welcome to the family.
Congratulations.

For this card, I used the beautiful wedding sentiment stamps from the set noted below.  I paired a few sentiments together to say the perfect greeting.  Also, the sentiment panel was die-cut.  I added little icons from a previous set that are not currently available, my apologies.  But, any wedding stamps or dies will decorate this circle frame, nicely.  To soften the look, I tied tulle around the card panel, to finish.


Supplies:  My Creative Time Save Our DatePretty Scallop Circle Dies and wedding icons (out of stock).
Also, color cardstock, adhesive pearls, foam tape, white tulle, Gina K. Designs connect glue, MFT extreme black hybrid ink pad & chantilly cream prestige card stock.

Please visit Emma's My Creative Time blog for more inspiration.

Thank you for visiting.

Gaylynn

1/22/2020

Matching card and envelope in gold and navy blue.

Hi there, it's Gaylynn.  For Technique Time at Unity, I have a matching card and envelope set in metallic gold and navy blue.

This is a sweet mouse side-fold card, great for celebration occasions.  It was fun to put together and it has a stamped envelope to match.


Sentiment:  May all your wishes come true.

Here are helpful tips for creating this.  To begin, pre-cut the card base and the navy card front.  Next, stamp and/or heat emboss onto the solid trimmed front panel.  Then, add accents around the card and the sentiment, if you wish.  Next, adhere the stamped panel to the card base, using double-sided tape or foam tape.  Finally, tie cording or ribbon around the card for closure to finish.


I made a quick video tutorial showing the process for this project.
{{Please subscribe to my video channel and like this video.  Many thanks.}}
YouTube:  Gaylynn NeatThingsBtq


Here is another look.


Supplies:  Unity Stamp Co. Wishing and Wishing; cardstock, Ranger gold embossing powder and multi medium matte glue, gold glitter cardstock, heat tool, EK powder tool, VersaMark ink, mini misti, MCT stitched postage frame dies, archival ink in cobalt, clear double-sided tape and May Arts metallic gold cording.

Be sure to visit the Unity blog for the entire article and tutorial.
Also, you can find my other features at Unity's
Technique Time and
Watercolor Wednesday.


Have a fantastic day.
Best wishes for the New Year.
Gaylynn

1/16/2020

Heart shaped box ~ Day 4 MCT 99th Edition Sneak Peeks

Hi, it's Gaylynn.  Here is Day 4 of the My Creative Time 99th Edition sneak peeks.


Sentiment:  LOVE

For this project, I began by die-cutting the heart box and the LOVE word using navy cardstock.  Then, the heart was die-cut using gold glitter cardstock.  The box was assembled along the score lines.  It was adhered together in three sections using extra tacky double-sided tape.  I used a tissue paper wrap for the insert and then tied it with gold cording, to finish.

***Sneak Peek Giveaway***
We will be giving away the sets we are showcasing each day to ONE lucky winner!  For example, the set we are showcasing on Wednesday, Emma will announce the winner of that on Thursday and the sets we are showcasing on Thursday, Emma will announce that winner on Friday on my blog!  ALL you have to is leave a comment on each of our blogs!  You are NOT required to comment on every single blog, but the more you comment on, the more chances you have for winning!  VERY IMPORTANT, PLEASE leave a way for us to contact you with your comments just in case YOU are the lucky winner!  
For EXTRA entries, you can spread the word about this release on Facebook, tweet about it OR even Instagram it.... #mycreativetime.
GOOD LUCK EVERYONE and let's start spreading the word!


Supplies for today's project: My Creative Time Heart Treat Dies; gold cording, navy blue and gold glitter cardstock; Wonder tape.

For more sneak peek inspiration, visit Emma's My Creative Time blog. Tune in tomorrow for the blog hop and full release reveal.
Thanks for visiting. I look forward to your comments. Gaylynn


1/15/2020

Gate fold gold embossed floral card & video.

Hi there, it's Gaylynn.  For today, I am sharing a way to make a simple and pretty gate fold card.  This design would work for many occasions.


This gate fold panel can be used as a card with something on the inside, or as a card wrap to include an insert.  This one is made as a card.  It would work lovely as an invitation wrap as well.  I decided to use the colors of gold and light blue.  See below for details and a video tutorial.


Sentiment:  Love never fails.  1 Corinthians 13

Here are helpful tips for creating this.  To begin, pre-cut solid cardstock paper to 5 1/2" x 8 1/2".   Next, using a scoring board, score each of the long ends at 2 1/4".  Trim and stamp an inside panel onto another piece of cardstock and set aside.  Then, stamp or heat emboss onto the backside of the solid scored gate fold panel.  Next, add ink blending accents around the flowers on the end flaps.  Next, adhere the inside stamped panel (optional) or place it loosely inside.  Finally, tie cording or ribbon around the card for closure to finish.  Once folded, this would fit into an A2 sized envelope.  

Here is another look.

Supplies:  Unity Stamp Co. A Will, A Way and His Words; MSC scoring board, bone folder, cardstock, distress oxide ink in broken china, makeup blending brush, gold embossing powder, heat tool, EK powder tool, VersaMark ink, original misti, Tombow mono sand eraser, MCT more stitched rectangular dies, archival ink in cobalt, clear double-sided tape and May Arts metallic gold cording.

Have a fantastic day.
Best wishes for the New Year.
Gaylynn

Heart Tag ~ Day 3 MCT 99th Edition Sneak Peeks

Hi, it's Gaylynn.  Here is Day 3 of the My Creative Time 99th Edition sneak peeks.


Sentiment:  Congrats and best wishes.

For this card, I began by adding distress oxide ink blending directly onto the card base.  Then, I stamped and die-cut the wreath and the scalloped heart tag.  I used two kits for this and I think it works perfectly together.  This could be used for a wedding, bridal shower, anniversary or love occasions.

***Sneak Peek Giveaway***
We will be giving away the sets we are showcasing each day to ONE lucky winner!  For example, the set we are showcasing on Wednesday, Emma will announce the winner of that on Thursday and the sets we are showcasing on Thursday, Emma will announce that winner on Friday on my blog!  ALL you have to is leave a comment on each of our blogs!  You are NOT required to comment on every single blog, but the more you comment on, the more chances you have for winning!  VERY IMPORTANT, PLEASE leave a way for us to contact you with your comments just in case YOU are the lucky winner!  
For EXTRA entries, you can spread the word about this release on Facebook, tweet about it OR even Instagram it.... #mycreativetime.
GOOD LUCK EVERYONE and let's start spreading the word!


Here is another look:


Supplies for today's project: My Creative Time Scalloped Heart Tag Dies and I Have Faith In You; Ranger distress oxide ink in worn lipstick and archival ink in jet black, makeup brushes for blending, tan cording, cardstock and adhesive.

For more sneak peek inspiration, visit Emma's My Creative Time blog.
Thanks for visiting. I look forward to your comments. Gaylynn

6/27/2019

Flamingo envelope holder ~ MCT Gift Card Giving

Today, the My Creative Time team is sharing projects for gift card giving.


Sentiment:  Wishing you the best.

Here is a gift card holder envelope.  It was made from leftover double-sided paper from my stash.  I added a gold embossed flamingo and sentiment along with a glitter heart accent.  To finish, I added a few small adhesive pearls.

Supplies:  My Creative Time Hello GorgeousTreat Envelope Die and Made With Love;  assorted double-sided paper, Ranger gold embossing powder, VersaMark, heat tool, glitter paper, mini misti and adhesive pearls.

Please visit Miss Emma's My Creative Time blog for more inspiration.

Thanks for visiting.
Gaylynn

6/20/2019

Bride and Groom ~ Day 4 MCT 92nd Edition Sneak Peeks

Hello.  The MCT team is sharing Day 4 sneak peeks of the 92nd Edition release.


Sentiment:
To the bride and groom.  Congratulations.

This is a fun wedding card featuring icons for the bride and groom.  I added a sentiment, lips, pearls, a mustache and a bow tie to the heart center.  It is always fun to do non-traditional wedding cards like this.  As an accent, I added a glitter scalloped heart frame.
***Sneak Peek giveaway!***
We will be giving away the sets we are showcasing each day to ONE lucky winner! For example, the set we are showcasing on Wednesday, Emma will announce the winner of that on Thursday and the sets we are showcasing on Thursday, Emma will announce that winner on Friday on the MCT blog! ALL you have to do is leave a comment on each of our blogs! You are NOT required to comment on EVERY SINGLE blog, but the more you comment on, the more chances you have for winning! VERY IMPORTANT, PLEASE leave a way for us to contact you w/your comment just in case "YOU" are the lucky winner! For EXTRA entries, you can spread the word about this release on Facebook, tweet about it OR even Instagram it! #mycreativetime! GOOD LUCK EVERYONE and let's start spreading the word!

Here is another look:


Supplies: My Creative Time His & Her Dies, Save Our Date and More Scalloped Heart Dies; silver glitter paper, foam tape, Ranger ink and mini misti.

Please be sure to visit Miss Emma's My Creative Time blog for more sneak peeks, all week long.

Remember to comment all week for prize chances.
Have a great day.
Gaylynn


6/05/2019

Congrats party favor wrap ~ My Creative Time

Today, the My Creative Time team is sharing party favor projects.


Sentiment:  Congrats.

This is a mini gift box, perfect for party favors, treats, small gifts or tokens.  This one is for a celebration with a little Congrats tag.  It could easily be made with any theme and sentiment.   This one is going to be for a housewarming decoration.

Supplies:  My Creative Time Stitched Mini Bag Die and Best Day Ever;  Ranger archival ink, Recollections paper and twine.

Please visit Miss Emma's My Creative Time blog for more inspiration.

Thanks for visiting.
Gaylynn

5/14/2019

Cake Lollipop Holder ~ Day 2 MCT 91st Edition Sneak Peeks

Hi.  The MCT team is sharing Day 2 sneak peeks of the 91st Edition release.


Here is a lollipop holder favor wrap.  It is filled with die-cut cake layers.  It would be perfect for birthday or other celebration occasions like bridal shower, wedding, anniversary, congratulations, etc.  
For the background and for all of the cake die-cuts, I used distress oxide inks along with makeup brushes for blending.  I also splattered a little water over the pieces to create a look of watercolor.  
To finish, I added tiny hole punches over the trim and then tied twine to close the wrap.
***Sneak Peek giveaway!***
We will be giving away the sets we are showcasing each day to ONE lucky winner! For example, the set we are showcasing on Wednesday, Emma will announce the winner of that on Thursday and the sets we are showcasing on Thursday, Emma will announce that winner on Friday on the MCT blog! ALL you have to do is leave a comment on each of our blogs! You are NOT required to comment on EVERY SINGLE blog, but the more you comment on, the more chances you have for winning! VERY IMPORTANT, PLEASE leave a way for us to contact you w/your comment just in case "YOU" are the lucky winner! For EXTRA entries, you can spread the word about this release on Facebook, tweet about it OR even Instagram it! #mycreativetime! GOOD LUCK EVERYONE and let's start spreading the word!

Here is another look.


Supplies: My Creative Time Cake Lollipop Holder Die + Add-Ons, distress oxide ink in broken china, fossilized amber and vintage photo; makeup brushes and twine.

Please be sure to visit Miss Emma's My Creative Time blog for more sneak peeks, all week long.

Remember to comment all week for prize chances.
Have a great day.
Gaylynn


5/01/2019

Pink and gold color block watercolor Congrats card.

For Watercolor Wednesday, I am sharing a wedding card using pink and gold color block watercolor with foil accents.


Sentiment:  Congrats.  Wishing you a lifetime of happiness.

For the color block watercolor background, I used pink and gold color.  The sentiments were stamped onto vellum.  I added gold foil to the congrats panel for a bit of shine.
The full article and tutorial are up on the Unity blog.
I also made a quick video tutorial showing the process for this project.

{{Please subscribe to my video channel and give this video a like.  Many thanks.}}
YouTube:  Gaylynn NeatThingsBtq


Pink and Gold Color Block Watercolor Congrats Card
By Gaylynn Martling for Unity’s Watercolor Wednesday
(See also the video tutorial for this project.)

Stamp the sentiment panels.  I stamped onto vellum, trimmed and die-cut.
Optional:  Heat emboss or foil the Congrats sentiment.
Onto watercolor paper, add watercolor in alternating strips between pink and gold.
I used watercolor by Altenew and also Gansai Tambi.
Lightly blend with water where color meets.  Heat set.  Then add small splatters over the background.
Layer the background and the sentiment layers onto the card base, to finish.


Supplies:  Unity Stamp Co. Say It Big, Altenew watercolor half pans, Gansai Tambi starry colors watercolor, Ranger watercolor paper, Therm-0-Web Deco Foil, My Creative Time dies, laminator, gold cording, watercolor brush.

Be sure to visit the Unity blog for the entire article and tutorial.
Also, you can find my other watercolor features at Unity's Watercolor Wednesday.

Thanks for visiting.
Gaylynn

3/13/2019

Deco foil transfer gel + foiling + watercolor card.

For Watercolor Wednesday, I am sharing a card with opal shimmer.
I used distress ink for the flower watercolor.  And also, the background was created using deco foil transfer gel, foiling and a stencil.


Sentiment:  Congratulations

This card was made using two techniques which were combined for this elegant look

The full article and tutorial are up on the Unity blog.
I also made a quick video tutorial showing the process for this project.

{{Please subscribe to my video channel and give this video a like.  Many thanks.}}
YouTube:  Gaylynn NeatThingsBtq


Deco Foil Transfer Gel + Foiling + Watercolor Card 
By Gaylynn Martling for Unity’s Watercolor Wednesday
(See also the video tutorial for this project.)
Stamp the flowers onto watercolor paper with waterproof ink.  Trim a separate cardstock panel for the background.
Apply distress ink pads to a craft mat.  Pick up color using water and a watercolor brush.
Apply color from lightest to darkest and then light again.  I heat set at the end of the watercolor this time.
Distress ink pads used:  bundled sage, spun sugar and Victorian velvet.
I fussy cut the flowers.  For background foiling, I used Opal deco foil, deco foil transfer gel, a stencil and a laminator.
Apply gel with a spatula and stencil.   Then remove and clean the stencil.  Dry the background gel to a tacky texture.
Apply the foil pretty side up over the dried gel panel and then run them through a preheated laminator.
Gently remove the foil sheet.  Adhere the card layers and embellish with the watercolor flowers and gems.

Here is another look.


Supplies:  Unity Stamp Co. Border of Magnolias and Special Wishes; Tim Holtz stencil, opal deco foil, deco foil transfer gel, mini Misti, spatula, Ranger watercolor paper, archival ink and distress ink pads; My Creative Time dies, heat tool and adhesive gems.

Be sure to visit the Unity blog for the entire article and tutorial.
Also, you can find my other watercolor features at Unity's Watercolor Wednesday.

Thanks for visiting.
Gaylynn

2/12/2019

Celebration flower buds card.

Today, I get to share a card with little flower buds, perfect for any celebration occasion.  It is always nice to experiment with color combinations, just for fun.


Sentiment:  Today's a day to celebrate.

This is a beautiful floral stamp and die set by Altenew.  I have been experimenting with various ink colors and settled with this muted flower color against the bold leaves.  The background was made from a stencil along with heat embossing.  I tore the vellum edge for added texture.

Here is another look.


I am including this in a couple of challenges, just for the fun of it.


February 2019 Altenew Inspiration Challenge

The Daily Marker 30 Day ~ #thedailymarker30day on Instagram

Supplies:  Altenew Blissful Bud and Sketched Lines stencil; ink by MFT, Gina K. Designs and Ranger; vellum, embossing powder, VersaMark, adhesive gems and foam tape.

I hope you enjoyed my take on the inspiration.
For more of my creations, follow my Instagram @neatnook
and subscribe to my YouTube creative video channel Gaylynn NeatThingsBtq.

Have a great day.
Gaylynn

1/18/2019

You + Me ~ MCT 87th Edition Release and Blog Hop

Hello, Gaylynn here.  It is the My Creative Time 87th Edition release, sale and blog hop.
You may have arrived from Emily's blog.


Sentiment:  You complete me.

This love card was made using the beautiful heart shaped rose stamps and dies.  I also added the lacy heart and sentiment from this release.  I kept this one clean and simple with just a few layers and colors.  There are many possibilities with these kits for all year round.

*** BLOG HOP GIVEAWAY *** For our blog hop giveaway, Emma is giving away a $25 gift card to the "My Creative Time" store to ONE LUCKY winner! ALL you have to do is leave a comment on each of our blogs! You are NOT required to comment on EVERY SINGLE blog, but the more you comment on, the MORE chances you have for winning! VERY IMPORTANT, PLEASE leave a way for us to contact you with your comment just in case "YOU" are the lucky winner!

Below are the new kits that I used for today's project, but see the full release at My Creative Time.

You + Me
Image may contain: text

Pretty Heart Roses
Image may contain: text


*** SALE ALERT ***
ALSO, DON'T FORGET our sale starts RIGHT NOW here:http://shop.my-creative-time.com/Ne...! Use the code: JAN2019 to receive a 15% discount off your entire purchase! This sale applies to "IN-STOCK" items ONLY. This sale will end on Friday, January 25, 2019 @midnight PST.

Image may contain: text
***FREEBIE***
Starting today... Friday, January 18, 2019 at 8am PST we will be giving away this ADORABLE new "LOVE Block Die". This new die will be given to the FIRST 25 shoppers! If you are one of the 1st 25 shoppers it will automatically be added to your package at the time of packing/shipping. Once 25 shoppers come through, this stamp set will be available for purchase! So, if it's available in the store, you are not one of the 25. No exceptions will be made. This freebie is not part of the "Bundle" and will be sold separately!


Here are my sneak peek blog projects from this release.
Day 1

Day 2


Here is another look at today's card.


Supplies: My Creative Time You + Me and Pretty Heart Roses, XOXO Border Dies, Metal Adaptor Plate; Simon Says Stamp intense black ink for alcohol markers, Copic markers Y11, Y02, R27, R32, R20, BG32 and G0000.

Hop along with us.
Your next stop in the hop is Jessica's blog. The entire blog hop lineup is on Emma's My Creative Time blog. Thanks for visiting. I always look forward to hearing from you. Gaylynn