Showing posts with label wedding. Show all posts

5/19/2024

Bride & Groom wedding card & blended topper.

Sending wedding congratulations can be made easily with simple stamping and color.  This bride and groom card includes a top border made from soft ink blending.


I used pastel colors on this one.

2/03/2024

Sketch ~ Friends of Unity Blog Hop February 2024

 It is February already.  I hope you are being creative in the new year.
The February 2024
 Friends Of Unity blog hop inspiration is a "Sketch".  I hope that you will join in on the fun.  Simply comment on each blog in the hop.  See the end of this post for your next stop.


I made three different cards with the sketch inspiration this month.

6/14/2023

Zig Clean Color Real Brush Watercolor With Stamping

 For today for the Unity Stamp Co. blog, I am sharing tips on using Zig clean color real brush watercolor with stamping.


Sentiment: 
Time to celebrate.  Congratulations.

These watercolor marker brushes have a narrow brush tip which are perfect for small areas of color when you need more detail.

5/31/2023

Two step stamping on color cardstock ~ poppy flowers

 Hi friends.  Today we are creating a mini slimline card featuring poppy flowers with two step stamping on color cardstock.  This is a project made for Unity Stamp Co.


Sentiment:  Best wishes.

This mini slimline poppy card overlaps the card base, but it fits great inside an A2 sized envelope.

4/05/2023

Mixed media stamping and embossing Paris card.

 Hi there.  Today, I am sharing my layered card with mixed media stamping and embossing.  This one has a Paris theme with the Eiffel Tower as the focus.  This is a sneak peek of the release happening Thursday, April 6, 2023 at Unity.


Sentiment:
May your day be as wonderful as you are.

I added layered stamping as well as the frame and the embossed texture in the background.

2/17/2023

Celebration monochromatic dry embossed card.

Hi there.  Today, I am sharing an elegant monochromatic card featuring a flower against a dry embossed script background.  I share how to make that background pop.


Sentiment:
Today we celebrate you.

This is a perfect greeting card for weddings, bridal showers, anniversaries, engagement, birthdays and more.

2/08/2023

Two Step Stenciling ~ Hearts

  Hi there.  For today on the Unity blog, I am sharing two step stenciling with hearts.  This was made using coordinating stamps and stencils with ink blending.


Sentiment:
True love 4 ever.
Happy for you.

These chatty hearts can be used for more than Valentines.  Here, I made a wedding card with a mix of stamping, ink blending and patterned paper.

6/08/2022

2 Cards with 1 sheet of patterned paper + no coloring

Hello.  Today, on the Unity blog, I am sharing 2 cards with 1 sheet of patterned paper.  Plus no coloring is required for this card set.


Sentiments:
Love is all you need.
You are so very loved.

These 2 cards with 1 sheet of patterned paper were easy to make.  However, the shaker part is optional but took a bit more time than the other card.

I made a quick video tutorial showing the process for this project.

{{Please subscribe to my video channel and like this video.  Many thanks.}}

5/06/2022

Best wishes girl ~ Simple tag card layers + Copic markers

  Hello.  Today, I am sharing a way to make simple tag card layers with stamps and dies.  This also incorporates Copic coloring.


Sentiment:  Best wishes.

I made a quick video tutorial showing the process for this project.

{{Please subscribe to my video channel and like this video.  Many thanks.}}


Creating with simple layers helps to add softness and texture to card making.  I used soft shades of blue for color.

5/04/2022

2 Cards Using 1 Heart Die-Cut ~ Wedding Theme

  Hello.  Today, on the Unity blog, I am sharing 2 cards using 1 heart die-cut with added Copic marker coloring.
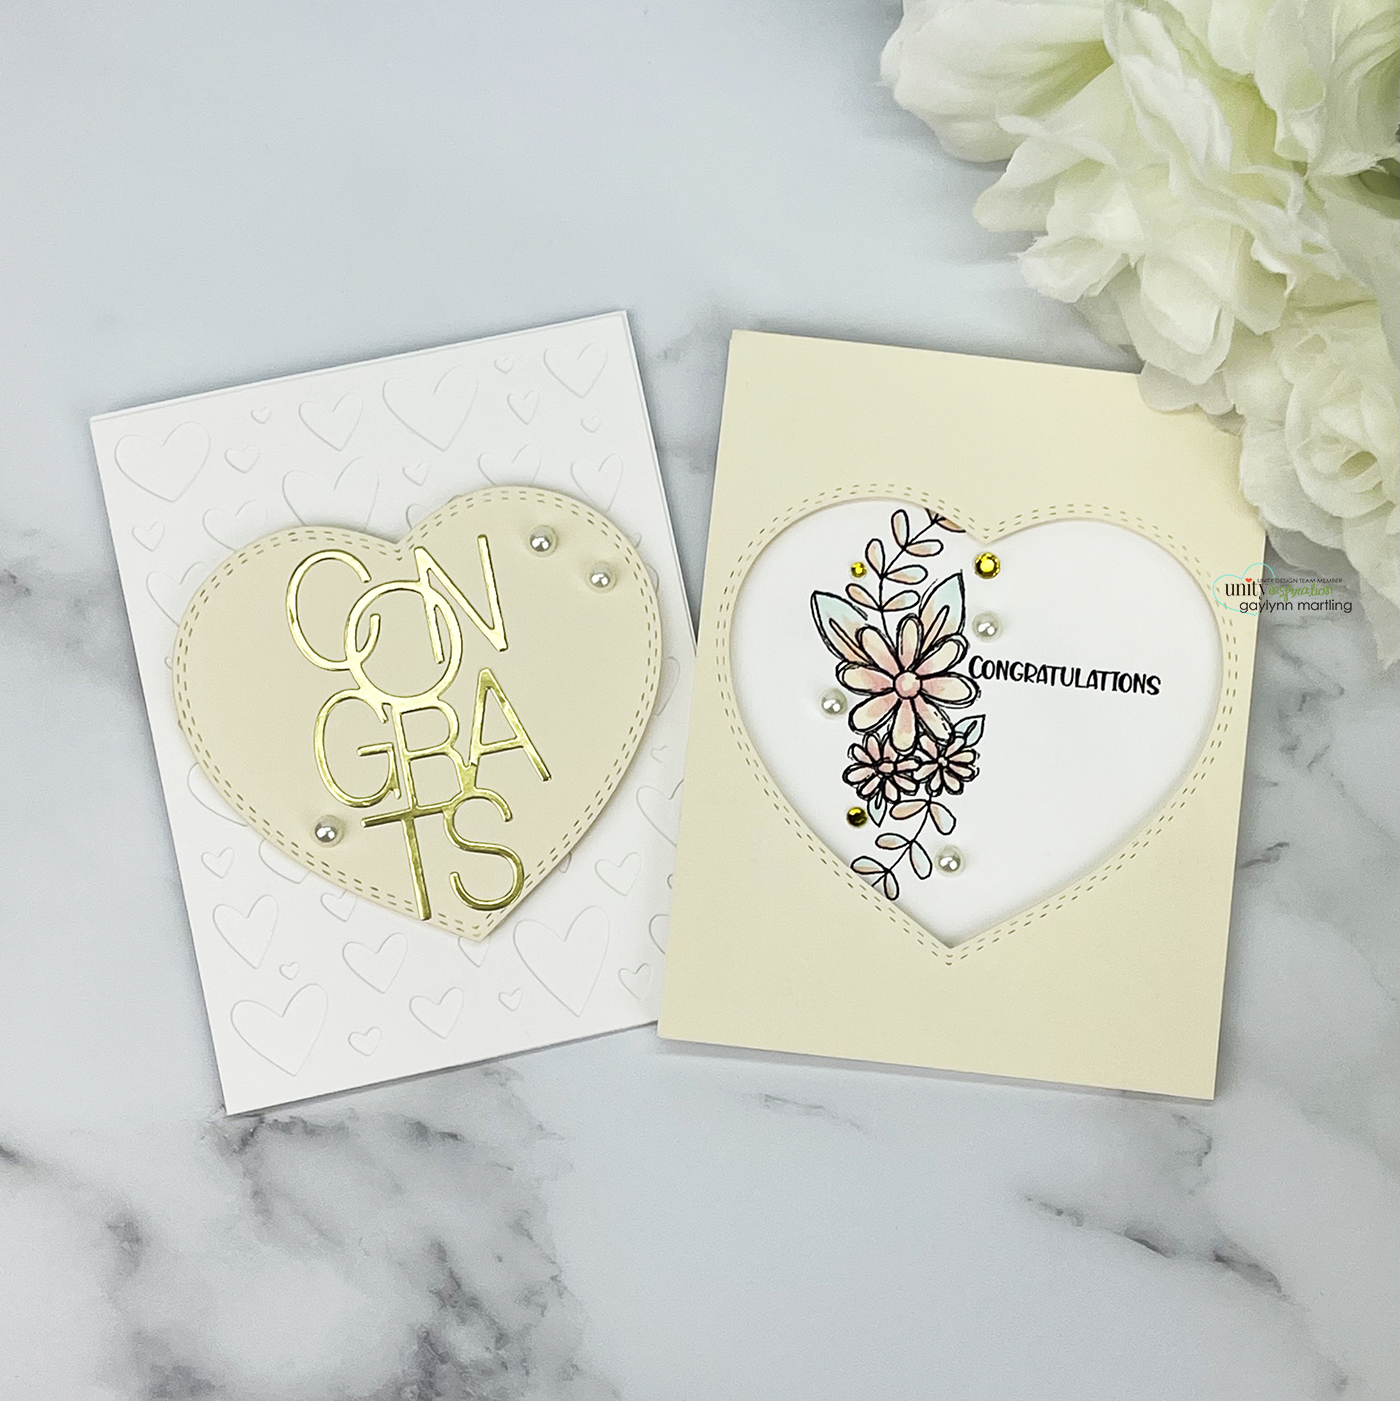
Sentiments:
Congrats and
Congratulations

Both of these love or wedding cards were quick and easy to make.  Using both of the die-cut sections helped to make 2 cards using 1 heart die-cut.

I made a quick video tutorial showing the process for this project.

{{Please subscribe to my video channel and like this video.  Many thanks.}}

3/30/2022

Card foiling 2 ways ~ Heat and Pressure Techniques

  Hello.  Today, on the Unity blog, I am sharing card foiling two ways on two cards.  This is a new and easy way to transfer foil onto card panels, with or without stamping.


Sentiments:

Happy Birthday
and
Congrats on your happy day.

I made a quick video tutorial showing the process for this project.

{{Please subscribe to my video channel and like this video.  Many thanks.}}


These cards were pre-stamped and colored with room for added foiled sentiments.  Using card foiling two ways adds the perfect touch to this set of floral cards.

3/24/2022

Elegant pocket pillow box ~ Day 4 MCT 119th Edition Sneak Peeks

Hello, it's Gaylynn.  The My Creative Time 119th Edition release and sale is coming up on Friday.  But for today, the team is sharing Day 4 sneak peeks.  


This is an elegant pocket gift or favor pillow box.  It is all ready for wedding, engagement, anniversary or bridal shower tokens. 

3/23/2022

Poppies celebration gold foil CAS card tutorial

 Hello.  Today, on the Unity blog, I am sharing a gold foil CAS card with a poppy flower and accents.

Sentiment:  Today we celebrate you.

I made a quick video tutorial showing the process for this project.

{{Please subscribe to my video channel and like this video.  Many thanks.}}


This is a great gold foil CAS card for celebrating a wedding, bridal shower, birthday or other celebration occasions.  It shimmers beautifully.

3/02/2022

Tall Favor Box ~ My Creative Time I Need A Favor

 Hello.  The My Creative Time design team is sharing treat or favor projects.  Today, I am sharing a mini tall favor box with an opened scalloped top.


Sentiment:  Just for you.

This is for almost any occasion.  I decorated it using decorative paper cuts in soft colors.  This is great for party favors, little gifts, gift card giving, table decor or treats.  This one works for occasions like baby and bridal shower, just because, teacher gifts, classroom, birthday & more.

2/03/2022

Wedding Car Slimline Card ~ My Creative Time Anything Goes

 Hello.  The My Creative Time design team is sharing anything goes projects.  Today, I am sharing a slimline or tall style card for a wedding.


Sentiment:
Mr. & Mrs.
Congratulations on your marriage.

This card is ready for the new bride and groom.  It can be for related occasions, like bridal shower, save the date, engagement, etc.  I thought that the car would be perfect on a tall or slimline card.

1/04/2022

Wishing happiness houses card ~ MFT Sketch Challenge 574

 Hello.  Gaylynn here.  Today's card was inspired by the My Favorite Things sketch challenge 574.


Sentiment:
Wishing you every happiness.

This is a nice card for new neighbors, a house warming, new home, moving, going away and more.  I used a mix of dies and a stamp for my interpretation of the sketch.  A neighborhood scene was what I was going for.  Little trees were made from patterned paper and the houses were paired over a grassy area.  The sky was stenciled with clouds.  

12/22/2021

Mandala stamped layers on color cardstock ~ tutorial

Hi there.  This is a demonstration of using mandala stamped layers in card making.  Today on the Unity blog, I am sharing a way to use some of the layers to make a soft wedding card on color cardstock.


Sentiment:  Congratulations

I made a quick video tutorial showing the process for this project.
{{Please subscribe to my video channel and like this video.  Many thanks.}}

12/15/2021

Using leftover watercolor pieces tutorial ~ 2 cards

           Adding leftover watercolor pieces to card projects makes beautiful accents in card making.  Today on the Unity blog, I am sharing two happy wishes wreath cards using leftovers.

Sentiments:

Happiest wishes.
Happy birthday.

I made a quick video tutorial showing the process for this project.
{{Please subscribe to my video channel and like this video.  Many thanks.}}


The background leftover watercolor pieces were made during a previous card project.  That project link is noted at the end of this post.

8/30/2021

Wedding or shower congratulations ~ MCT Made In Minutes

 Hello.  The My Creative Time design team is sharing projects which were made in minutes.  This wedding themed card was put together in minutes and with no coloring involved.


Sentiment:
Sending you prayers for everlasting love and happiness.
Welcome to the family.
Congratulations.

For this card, I used the beautiful wedding sentiment stamps from the set noted below.  I paired a few sentiments together to say the perfect greeting.  Also, the sentiment panel was die-cut.  I added little icons from a previous set that are not currently available, my apologies.  But, any wedding stamps or dies will decorate this circle frame, nicely.  To soften the look, I tied tulle around the card panel, to finish.


Supplies:  My Creative Time Save Our Date, Pretty Scallop Circle Dies and wedding icons (out of stock).
Also, color cardstock, adhesive pearls, foam tape, white tulle, Gina K. Designs connect glue, MFT extreme black hybrid ink pad & chantilly cream prestige card stock.

Please visit Emma's My Creative Time blog for more inspiration.

Thank you for visiting.

Gaylynn

5/19/2021

Potted plant shape card tutorial ~ gold embossing + Copics

 Adding shimmer with heat embossing makes this potted plant shape card shine.  Today, on the Unity blog, I am sharing one way to make a handmade shape card with a garden theme.


Sentiment:  Best wishes.

This card was hand trimmed with scissors to get the potted plant shape.  It stands up like a regular greeting card.


Helpful tips:

Here are helpful tips for making this potted plant shape card.  To begin, stamp and heat emboss the background and the sentiment.  Also, stamp, color and heat emboss the flower.  I suggest that if you want to use Copic markers for color, stamp first with Copic friendly ink, color and then heat emboss, using a stamp positioner.  Next, fussy cut (cut out) the flower, the gold glitter trim and the sentiment.  Then, trim the bottom sides of the pot and the card base to make the shape.  Finally, assemble the card layers over the shape card base, to finish.

Here is another look.


I made a quick video tutorial showing the process for this project.
{{Please subscribe to my video channel and like this video.  Many thanks.}}
YouTube:  Gaylynn NeatThingsBtq


Simon Says Stamp Wednesday Challenge ~ Use dies or punches

 Supplies:
 
Also, flat and foam double-sided tape, My Creative Time rectangle frame die layers, Ranger fine gold embossing powder, heat tool, EK powder tool, Fiskars paper trimmer, gold glitter cardstock, original Misti, cording, Wow embossing pad, Copic markers BG49, BG32, B01, RV29, R32.

Be sure to visit the Unity blog for the entire article and tutorial.
Also, you can find my other features at Unity's
Technique Time and
Watercolor Wednesday.

    Thank you for visiting.
   Gaylynn