Showing posts with label emboss resist. Show all posts

8/31/2022

Vellum overlay card ~ flowers & emboss resist background.

 Hello.  Today, I am sharing an idea for using heat embossing and ink blending for a vellum overlay card.


Sentiment:
Have a beautiful day.

This vellum card was fun to make and turned out so pretty and soft looking.

6/15/2022

Friendship card with embossing, ink blending & masking.

 Hello.  Today, on the Unity blog, I am sharing a friendship card with embossing, ink blending & masking to create this scene.
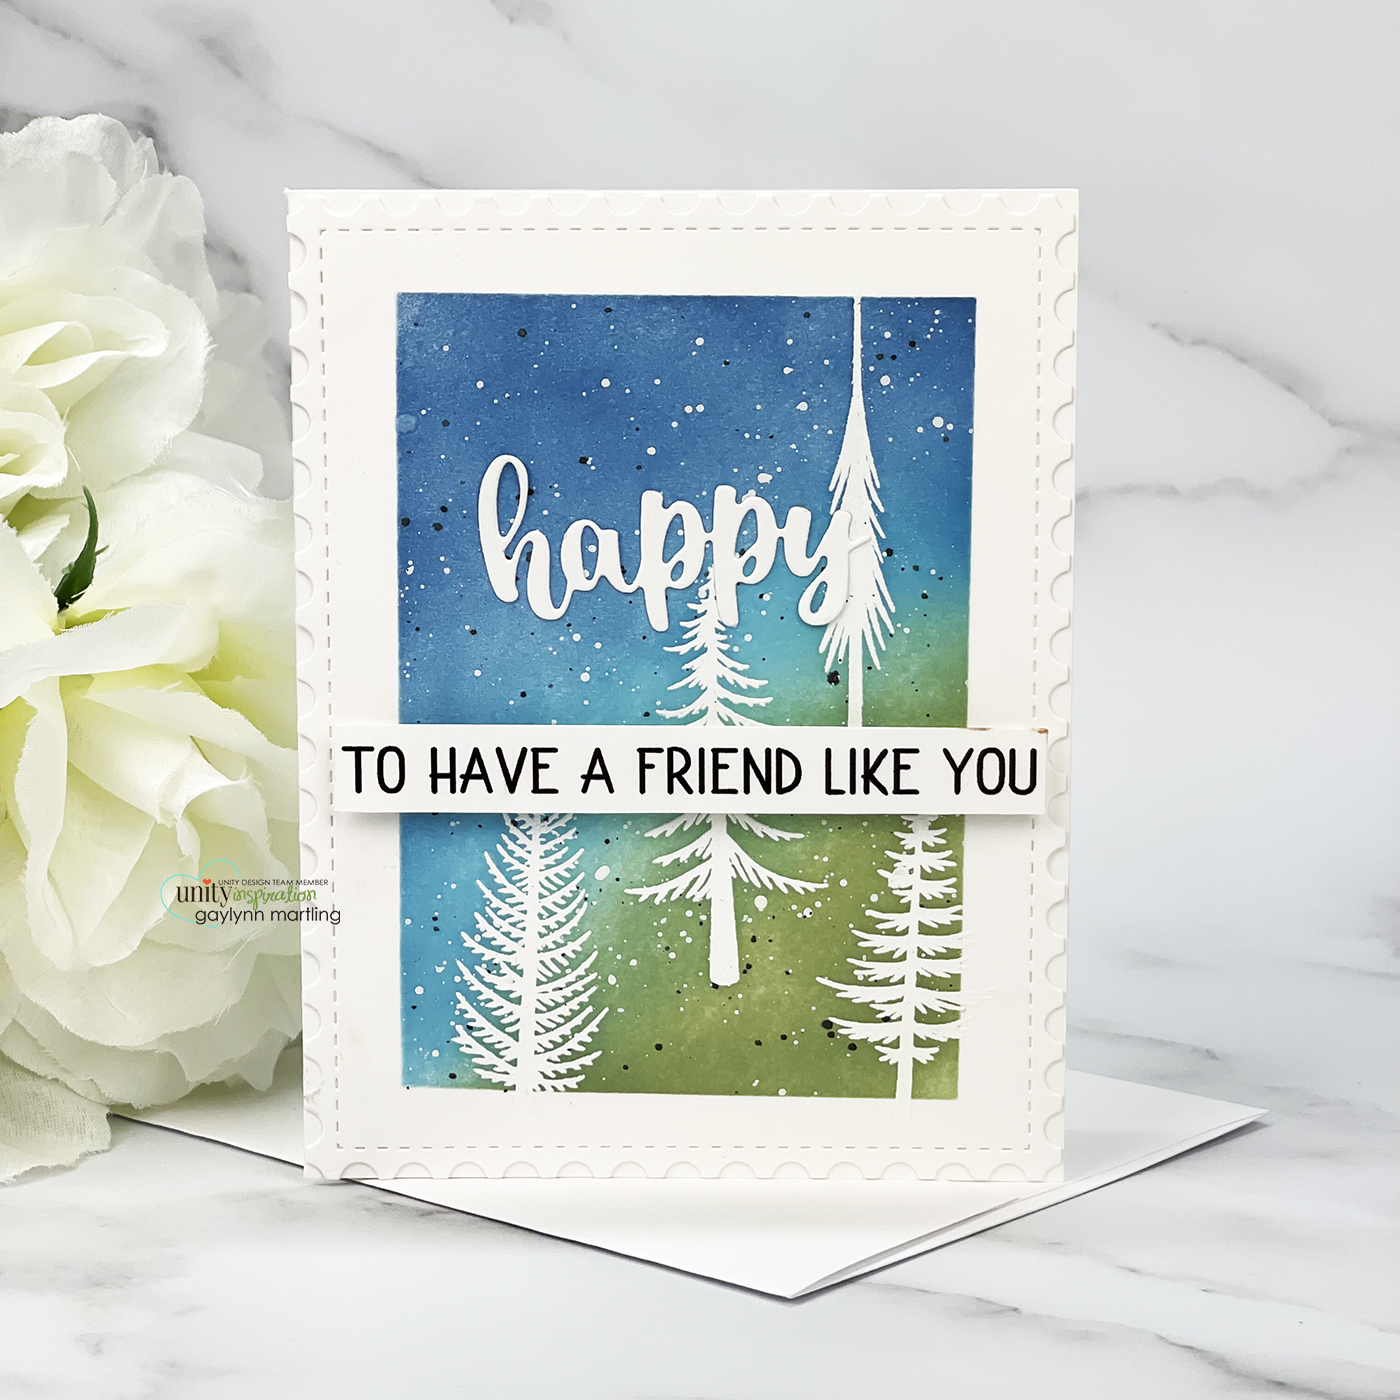

Sentiment:  Happy to have a friend like you.

I made a quick video tutorial showing the process for this project.

{{Please subscribe to my video channel and like this video.  Many thanks.}}


This card was made into a woodland scene with a friendship theme.  I love the look of the white embossing, ink blending & masked onto the card front.

4/29/2022

My Creative Time 120th Edition Release, Sale & Blog Hop

  Hello, it's Gaylynn.  The My Creative Time 120th Edition release and sale is live.  Here is my celebration card for today.  See what else Emma has in store for you.
For the blog hop, you may have arrived from Emily's blog.


Sentiment:  Celebrate your day.

This card was made cheerful and colorful for almost any celebration occasion like birthday and more.

For the background, I stamped in watermark ink and then heat embossed the butterflies in white.  And for the coloring, I used ink cubes and ink blending brushes.  I wanted to mimic the sky and the sun.

4/13/2022

Emboss resist with Brusho watercolor + Copic markers

  Hello.  Today, on the Unity blog, I am sharing a watercolor birthday card using emboss resist with Brusho watercolor plus added Copic coloring.


Sentiment:  Hip Hip Hooray

I made a quick video tutorial showing the process for this project.
{{Please subscribe to my video channel and like this video.  Many thanks.}}


This is a vibrant celebration card, perfect for birthdays and more.  The emboss resist with Brusho watercolor really pops.

12/08/2021

Vibrant watercolor cards using Brusho ~ Tutorial

          Using Brusho crystal color powders results in vibrant watercolor cards.  Today on the Unity blog, I am sharing a set of cards using this colorful watercolor technique.

Sentiments:
Happy Holidays
Merry Christmas

I made a quick video tutorial showing the process for this project.
{{Please subscribe to my video channel and like this video.  Many thanks.}}


I used the same process for all four color themes for a total of 16 vibrant watercolor cards, as part of my holiday card making this year.

9/22/2021

Outer space galaxy greetings ~ Brusho watercolor card tutorial

     Here is a tutorial on how to create outer space galaxy greetings on a card.  Today on the Unity blog, I am sharing one way to use Brusho crystal color powders watercolor to achieve this galaxy effect.


Sentiment:  Greetings.  Hi.

I will show a way to use watercolor along with outer space galaxy greetings stamps.  It is a fun yet messy card technique where the result is different each time.

I made a quick video tutorial showing the process for this project.
{{Please subscribe to my video channel and like this video.  Many thanks.}}


Helpful tips:

These are helpful tips to create this outer space galaxy greetings card.  To begin, stamp and heat emboss the scene onto the smooth side of watercolor paper.  Then, stamp and color the scene again onto white cardstock using Copic friendly ink and Copic markers.  Next, add water and Brusho crystal powders in three colors to the watercolor panel.  Move the color around and repeat until satisfied with the color.  Once dry, fussy cut the cardstock color scene and place it over the embossed scene.  Also, trim the paper layers to your liking.  Finally, layer it all to finish.

Here is another look.


Supplies:
Unity Stamp Co. Other Worldly Greetings

Also, Brusho crystal colors in scarlet, ultra marine and turquoise; flat and foam double-sided tape, white embossing powder, heat tool, Wow embossing ink pad, Original Misti, Canson watercolor paper, Ranger plastic craft mat and mini mister; Simon Says Stamp intense black ink pad, silver cardstock, Copic markers W5, W3, C3, C1, B14, BG0000. 

Be sure to visit the Unity blog for the entire article and tutorial.
Also, you can find my other features at Unity's
Technique Time and
Watercolor Wednesday.

Thank you for visiting.

   Gaylynn
         

9/08/2021

Watercolor wash embossed gnome card tutorial ~ Unity Stamp Co.

   The watercolor wash technique makes for an easy card background.  Today, I am sharing one way to incorporate this watercolor effect in teal shades and swatches for a card background.


Sentiment:  Rest & recover.

Making this watercolor wash background is an easy way to create your own paper design.  I used coordinating teal, green and blue colors, matching the stamped gnome colors.  


Helpful tips:

Here are helpful tips for getting this watercolor wash effect.  To begin, stamp and color the gnome onto white cardstock.  Also, stamp and trim the sentiment label.  Next, stamp and heat emboss the chicken wire onto the smooth side of watercolor paper.  Then, using a wide brush, add watercolor in strips or swatches using coordinating teal, blue and green layers.  Allow dry time or heat set.  Trim or die-cut the dried watercolor panel.  Also, die-cut or trim a corner window onto the watercolor panel and around the gnome.  To finish, layer it all with a pop-up of the gnome and sentiment panels.

Here is another look.


Thank you for visiting.

   Gaylynn
         

8/02/2021

Emboss Resist Watercolor Card ~ MFT Camp Create 2021 Day 3

 Hello.  Gaylynn here.  Today is Day 3 of the MFT Camp Create 2021 and I am participating in the camp projects.  For today, the theme is emboss resist.  Along with other techniques, this is one of my favorite ways to watercolor.  Here is my watercolor trees card using emboss resist.

Sentiment:  Thinking of you.

Here are tips for making this card.  To begin, stamp onto the smooth side of watercolor paper using embossing ink.  Then, heat emboss the trees in white or your choice of color.  Also, heat emboss the sentiment in black.  Next, add watercolor in two shades over the tree panel.  This technique uses the emboss resist, showing the trees on a slope.  Heat set the watercolor.  Finally, add the layers to assemble the card.


Here is another look.


I made a video tutorial showing the process for this project.
{{Please subscribe to my video channel and like this video.  Many thanks.}}
YouTube:  Gaylynn NeatThingsBtq


Supplies:  My Favorite Things Wonderful Woods and Elegant Rectangle STAX die-namics.
Also, Sakura Koi watercolor, white and black embossing powder, powder tool, heat tool, watercolor brush, Original Misti, Ranger plastic craft mat, foam double-sided tape, Wow embossing pad.

Please visit the My Favorite Things blog for more inspiration.

Thank you for visiting.

Gaylynn

11/18/2020

Night sky background stars celebration card with accents ~ tutorial

 Hello.  For Technique Time at Unity, I am showing a way to make a festive and fun night sky background for a celebration card.  Extra accents were added to make the scene.


Sentiment:  Cheers.  It is the beginning of anything you want.


Making a night sky background scene is easy with stamps, ink and embossing.  Plus, fun celebration details and stamps make it extra festive.

Helpful tips:
Here are helpful tips for creating this night sky background card.  To begin, die-cut or paper trim all of the background and accent layers and panels.  Next, stamp the girl and the sentiment.  Then, add color to the girl with Copic markers or others.  Also, make a strand of lights and add glitter glue to make them sparkle.  Next, fussy cut (cut out) the girl.  Then, onto the oval white cardstock panel, stamp the stars with embossing ink and then heat emboss the stars in white.  Next, blend distress ink in two blue colors, dark enough for a night sky.  Then, with a dry paper towel, wipe the inked panel lightly to make the stars appear brighter.  Finally, assemble the scene building card layers, to finish.


I made a quick video tutorial showing the process for this project.
{{Please subscribe to my video channel and like this video.  Many thanks.}}
YouTube:  Gaylynn NeatThingsBtq


Here is another look.


Supplies:  Unity Stamp Co. New Year Girl and Star Burst {background}. 
Also, foam and flat double-sided tape, cardstock, MCT Scalloped Stitched Oval Dies; MFT sentiment die, distress oxide ink in broken china and faded jeans; Ranger multi medium matte glue, glitter glue, Copi markers 100, C9, C5, C7, C3, C00, YR00, E00, W1, 0, E49, E29, E44, R02, E13, E33, E11; ink blending brush, white embossing powder, heat tool, Wow embossing pad.

Be sure to visit the Unity blog for the entire article and tutorial.
Also, you can find my other features at Unity's
Technique Time and
Watercolor Wednesday.


Thank you for stopping by.
Gaylynn

11/03/2020

Watercolor slimline card & envelope set ~ MCT Birthday Palooza

 Hi.  The My Creative Time design team is sharing birthday palooza themed projects.  For today, I am sharing a tall and slim style card and envelope set.  This can double as a money holder or a gift card holder.


Sentiment:  Happy Birthday.  Have a magical birthday.

To make this card, begin by die-cutting the envelope and the card base.  Use white cardstock for both.  Also, to make the card base, die-cut a tall die layer twice, score one end and adhere them together.  Then, stamp the top card layer onto smooth watercolor paper using embossing ink and heat emboss in copper.  Next, add watercolor over the embossing and onto a scrap piece of watercolor paper.  Also, die-cut the happy birthday sentiment over the scrap watercolor panel.  Next, assemble the envelope and then add ink blending.  To finish, add the envelope sentiment and embellish it with gems.

The assembled envelope measures 6 1/2" x 2 3/4"
The assembled card measures 6 1/4" x 2 1/2"


MCT is offering an election SALE.  Use code: VOTE2020 at checkout to get 20% off! Sale applies to IN-Stock items only!  Ends Wednesday, 11/4/2020 at 4pm PST. 


Supplies:  My Creative Time Money Envelope Die, Mermaid Kisses, You Are Cherished, Tall Frame Dies, Tall Frame Die Layers; Distress Oxide ink in worn lipstick and wilted violet; ink blending brush, Altenew watercolor half pans, paint brush, Ken Oliver TCW watercolor paper, copper embossing powder, heat tool, Wow embossing ink, cardstock, adhesive gems.

Please visit Emma's My Creative Time blog for more inspiration.

Thanks for visiting.

Gaylynn

10/07/2020

Use your glitter ~ Star glitter frame card tutorial

  Hello.  For Technique Time at Unity, I am showing a sparkly card.  The tutorial will show one way to make a glitter frame filled with stars.  It also incorporates a starry sky background.


Sentiment:  Bright Wishes

This glitter frame card can be used for Christmas or holiday greetings or as a birthday or celebration card for any time.

Helpful tips:
Here are helpful tips for creating this glitter frame card.  To begin, die-cut or trim a background panel and make a frame for it.  Next, stamp the star onto cardstock and add color with Copic markers or your coloring of choice.  Also, fussy cut the star.  Then, stamp and heat emboss the sentiment in white.  Also, add ink blending in darker blue shades around the sentiment panel to create a starry sky look.  Next, add stars to the background by either die-cutting, stenciling or by heat embossing the stars in white.  Then, add a thick layer of glossy accents (glue) along the front side of the frame area.  Also, generously pour glitter over the glued frame and allow it to dry completely.  Finally, assemble the card layers to finish.


I made a quick video tutorial showing the process for this project.
{{Please subscribe to my video channel and like this video.  Many thanks.}}
YouTube:  Gaylynn NeatThingsBtq


Here is another look.


Supplies:  Unity Stamp Co. Felt Star
Also, white embossing powder, Mini Misti, foam double-sided tape, cardstock, My Favorite Things Stitched Rectangle Frame and Starry Night Vertical Die-namics; glossy accents, MSC star glitter, distress oxide ink in faded jeans and broken china; Simon Says Stamp intense black ink, Gina K. Designs white pigment ink, Tombo glue, heat tool, ink blending brush, Copic markers Y11, Y02, Y26, YR23, 100, R20.

Be sure to visit the Unity blog for the entire article and tutorial.
Also, you can find my other features at Unity's
Technique Time and
Watercolor Wednesday.


Thank you for stopping by.
Gaylynn

9/30/2020

Offset card panel + Zig watercolor & embossed grapes ~ tutorial

 Hi there.  For Technique Time at Unity, I am showing a card using an offset card panel accented with gold heat embossing and watercolor grapes.


This offset card panel in watercolor could be used for almost any set of stamps.  It creates an interesting look against patterned paper.

Sentiment:
Sending prayers

Helpful tips:

Here are helpful tips for creating this offset card panel.  To begin, stamp and heat emboss onto watercolor paper.  Also, be sure to position the stamps so that they will fit into your planned offset area.  Next, add watercolor to the grapes and the leaves.  I used Zig clean color real brush watercolor, but most any will do.  Then, once dry, die-cut the offset panel into an oval shape using a circle or a border metal die.  Next, place a trimmed patterned paper panel as the background and then top with the grape panel.  Finally, add embellishments to finish.

I made a quick video tutorial showing the process for this project.
{{Please subscribe to my video channel and like this video.  Many thanks.}}
YouTube:  Gaylynn NeatThingsBtq


Here is another look.


Supplies:  Unity Stamp Co. The Vine
Also, Zig Clean Color Real Brush watercolor in 065, 041, 040, 083, 084; Altenew palette mat, TCW Ken Oliver watercolor paper, watercolor brush, BasicGrey paper, adhesive pearls, Ranger gold embossing powder, EK powder tool, Original Misti, flat and foam double-sided tape, VersaMark ink, cardstock, My Creative Time Pretty Scallop Circle Dies and Rectangle Frame Die Layers.

Be sure to visit the Unity blog for the entire article and tutorial.
Also, you can find my other features at Unity's
Technique Time and
Watercolor Wednesday.


Thank you for stopping by.
Gaylynn

9/02/2020

Watercolor mini note cards and gift box set ~ tutorial

 Hi there.  For Technique Time at Unity, I share how to make watercolor mini note cards and a matching gift box.  Sets like this are great to give as a gift for teachers, friends, family or anyone.


Sentiments:  Hello.  Thanks.

Helpful tips:
Here are helpful tips for creating watercolor mini note cards and the gift box.  First, trim or die-cut a box, mini notes and watercolor paper layers for each.  I used a die-cut from a slim or tall die and folded that in half for each mini note.  A paper trimmer works also.  Also, assemble the box or use an existing mini gift bag.  Next, stamp onto each of the watercolor panels and then heat emboss the stamping with white embossing powder.  Then, apply three thick watercolor lines in different colors onto each of the stamped watercolor paper panels.  Next, allow to dry completely or heat set the watercolor.  Then, adhere the watercolor panels onto the folded 3x3" mini note card fronts and onto the gift box front and back sides.  Optional, make handmade envelopes for each mini note or use existing 3x3" envelopes.  Finally, place the envelopes and the mini note cards inside of the gift box with or without tissue paper.

Gift box:  Die-cut or cut 2 box panels 5" x 4 1/2", score, fold & tape to assemble the box.
Mini note cards:  Die-cut or trim 6 1/2" x 3" and score at 3 1/4".


I made a quick video tutorial showing the process for this project.
{{Please subscribe to my video channel and like this video.  Many thanks.}}
YouTube:  Gaylynn NeatThingsBtq


Here is another look at the mini note cards with handmade envelopes included.


Supplies:  Unity Stamp Co. Heart of Autumn
Also, mini Misti, foam double-sided tape, white embossing powder, VersaMark ink, Ranger plastic craft mat, Canson watercolor paper; Altenew watercolor half pans, heat tool, paint brush, My Creative Time Present Box Die, Stitched Square Dies Inside & Out, Tall Frame Die Layers and 3x3 Fancy Envelope Die, score tape.

Be sure to visit the Unity blog for the entire article and tutorial.
Also, you can find my other features at Unity's
Technique Time and
Watercolor Wednesday.


Thank you for stopping by.
Gaylynn

7/02/2020

Watercolor hello slim or tall card ~ MCT Just Cards

Hello.  Today, the My Creative Time team is sharing card project ideas.  Here is my tall or slim style hello card with watercolor and silver embossing.


Sentiment:  Hello

This card is versatile to be used as a greeting card or money holder card.  It is great for many occasions or just because.  For this card, I die-cut the tall slim panels.  Then, I used silver heat embossing onto watercolor paper for the stamping.  Next, I added water and a touch of green Prima watercolor to the top layer.  Finally, everything was layered and silver cording was added, to finish.  

Supplies:  My Creative Time tall frame dies, tall frame die layers, fun notes and just because; original Misti, silver cording, Canson watercolor paper, brush, Prima Art Philosophy watercolor, VersaMark ink, silver embossing powder, heat tool, cardstock, clear flat and foam double-sided tape.

Please visit Emma's My Creative Time blog for more inspiration.

Enjoy your day.
Gaylynn

3/25/2020

Narrow shaped card with an oversized watercolor flower.

Hi there.  I am sharing a creative way to make a narrow shaped card with an oversized watercolor flower.  This was made to fit into an A2 sized envelope.


Sentiment:  So sorry for your loss.

Here are helpful tips for creating this narrow shaped card with an oversized watercolor flower.  To begin, trim a card base to 11" x 3".  Then, score at 5 1/2" for a narrow top fold card base.  Next, stamp and emboss the sentiment and accents directly onto the card base, leaving room for your main focal stamp to be added later.  Then, stamp and heat emboss a big flower onto the smooth side of watercolor paper.  For color, watercolor or use your color medium for the oversized flower.  Next, cut out the flower with scissors (fussy cut).   Then, add foam tape to pop up the oversized flower over the narrow card base.  Finally, place it so that the card will still fit inside of an A2 sized envelope.  For example, I placed my flower diagonally, so that part of it remains off of the card base.

Here is another look.


Supplies:  

{Some links include affiliate links.  I may receive a small commission for the referral but at no cost to you.  Also, I am a participant in the Amazon Services, LLC Associates Program, an affiliate advertising program designed to provide a means for me to earn fees by linking to Amazon.com and affiliate sites.  If you want to learn more about a product that I used here or to purchase it, the link is available to click on.  It would make my day if you would do so.}


Thanks for visiting.
Gaylynn

1/15/2020

Gate fold gold embossed floral card & video.

Hi there, it's Gaylynn.  For today, I am sharing a way to make a simple and pretty gate fold card.  This design would work for many occasions.


This gate fold panel can be used as a card with something on the inside, or as a card wrap to include an insert.  This one is made as a card.  It would work lovely as an invitation wrap as well.  I decided to use the colors of gold and light blue.  See below for details and a video tutorial.


Sentiment:  Love never fails.  1 Corinthians 13

Here are helpful tips for creating this.  To begin, pre-cut solid cardstock paper to 5 1/2" x 8 1/2".   Next, using a scoring board, score each of the long ends at 2 1/4".  Trim and stamp an inside panel onto another piece of cardstock and set aside.  Then, stamp or heat emboss onto the backside of the solid scored gate fold panel.  Next, add ink blending accents around the flowers on the end flaps.  Next, adhere the inside stamped panel (optional) or place it loosely inside.  Finally, tie cording or ribbon around the card for closure to finish.  Once folded, this would fit into an A2 sized envelope.  

Here is another look.

Supplies:  Unity Stamp Co. A Will, A Way and His Words; MSC scoring board, bone folder, cardstock, distress oxide ink in broken china, makeup blending brush, gold embossing powder, heat tool, EK powder tool, VersaMark ink, original misti, Tombow mono sand eraser, MCT more stitched rectangular dies, archival ink in cobalt, clear double-sided tape and May Arts metallic gold cording.

Have a fantastic day.
Best wishes for the New Year.
Gaylynn

12/02/2019

Winter night sky color burst watercolor card with trees.

Here is a winter card scene with a nighttime sky and embossed trees.  This is a peaceful snow scene.


Sentiment:  May the blessings of the season fill your heart and home.

For this card, I began by stamping and heat embossing in white onto watercolor paper and then die-cutting.  Also, I stamped and die-cut the sentiment.  Next, I added watercolor with Color Burst powders, using the emboss resist technique.  Then, I heat set each color layer.  Finally, everything was assembled to finish.


Here is a closer look.


Supplies:  Unity Stamp Co. Alpine Wonderland and More Sparkle, Less Stress; foam tape, My Creative Time More Stitched Rectangular Dies and Pretty Gift Card Holder dies; watercolor brush, Ken Oliver watercolor paper and Color Burst powders in field day, blueberry and grape jelly; white embossing powder, VersaMark ink, heat tool, Misti and Ranger jet black archival ink.

Thanks for visiting.
Gaylynn