Showing posts with label one layer. Show all posts

3/18/2024

What's up Chick? Quick and easy ink blending card.

This is a fun card for friendship.  I made this in a flash with stamping and some ink blending layers.  


Sentiment:  What's up chick?

8/07/2023

Best Teacher Ever School Card ~ Instagram Hop

 Welcome.  Thanks for visiting.  The August 2023 Unity Stamp Company Instagram Hop is happening now.  Check out all of the wonderful project inspiration.  You can find me on Insta @neatnook as well as @unitystampco and all of the other hoppers noted there.


Sentiment:
Best teacher ever

I hope that you hop on over to Instagram to leave us some love and comments.  Then, go see all of the fabulous projects.

3/04/2023

March 2022 Friends Of Unity Blog Hop ~ Winnie

Welcome.  Thank you for stopping by.  The March 2023 Friends Of Unity blog hop inspiration is all about Winnie The Pooh crafting.  I hope that you will join in on the fun.  Simply comment on each blog in the hop.  See the end of this post for your next stop.

I made a set of two Pooh themed cards with stamping and watercolor.
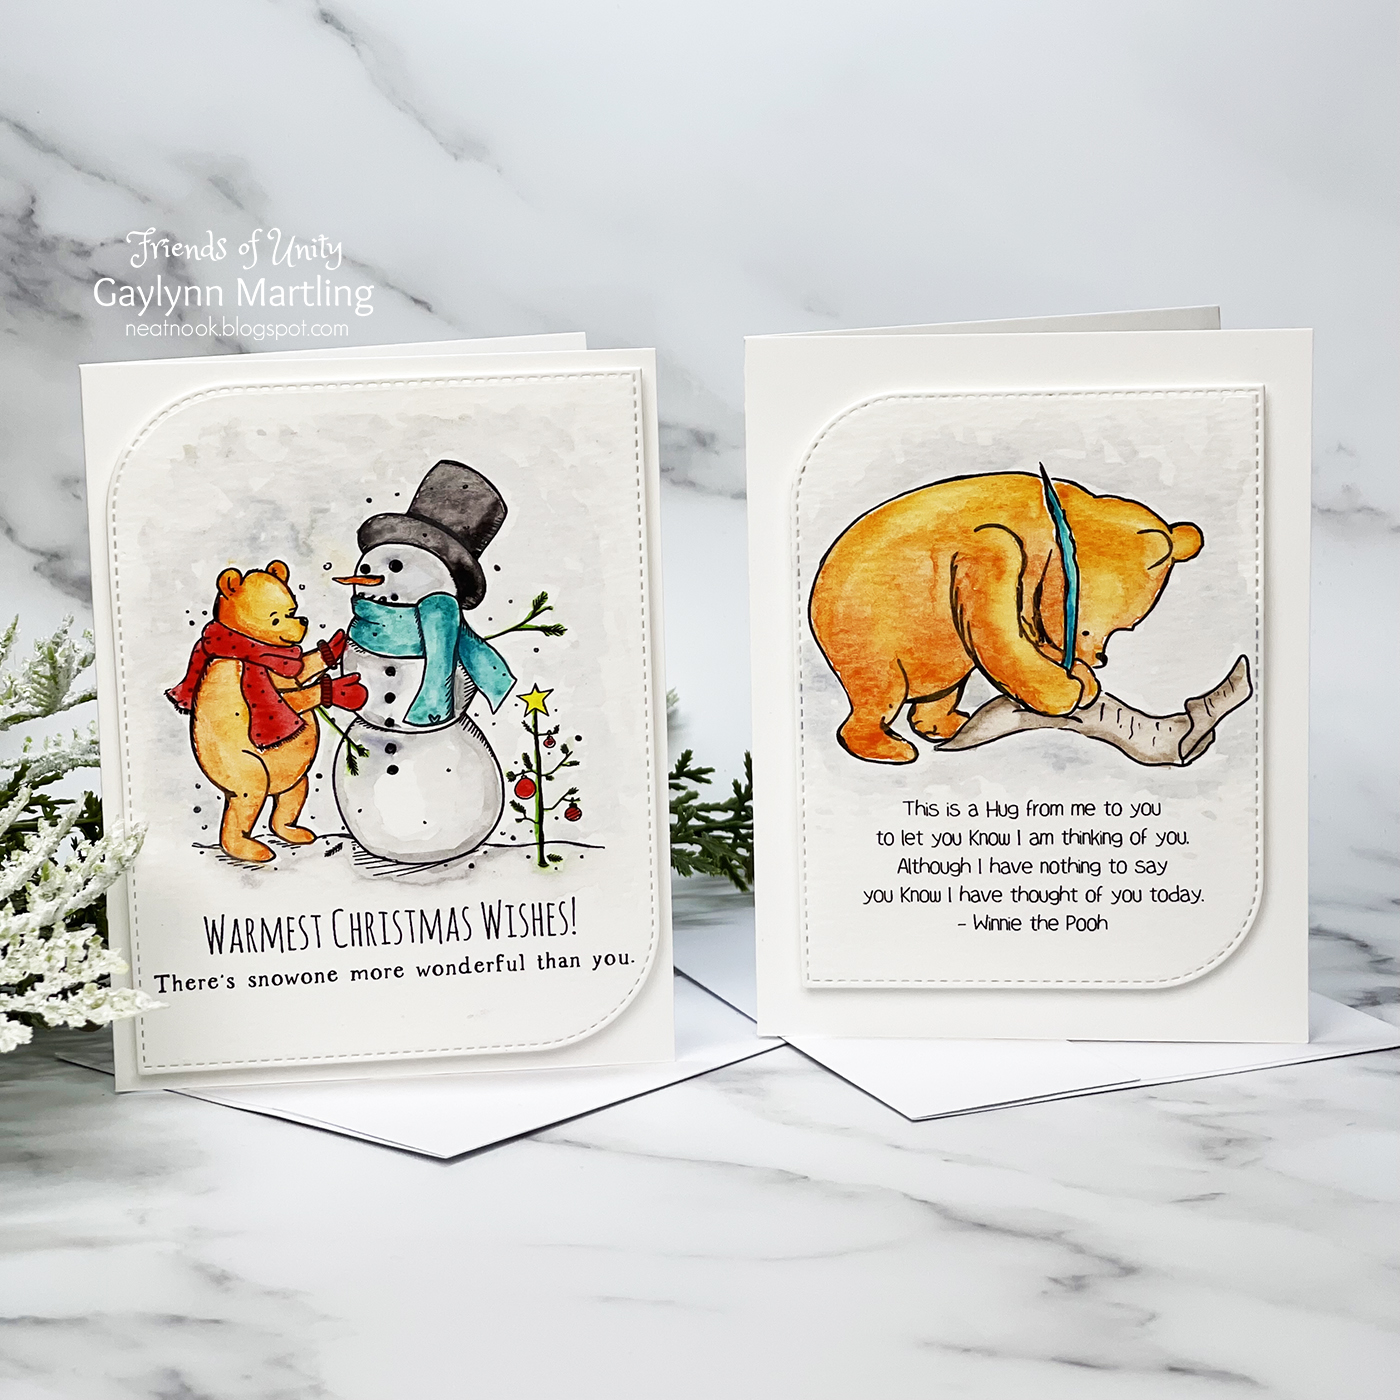

The details for each card follow.
Be sure to check out the rest of the blogs in the hop for beautiful inspiration and ideas for card making.

3/01/2023

Masculine card ~ A good man.

Want to make a quick and easy card with just one layer and with no coloring?  This is a simple one layer flat card that has a masculine theme.  Sometimes, less is more, especially for the guys.


Sentiment:
A good man is something you do not who you are.
Thanks for being a good man.

The guys need cards too.  This one is ready for offering love and encouragement to the men in our lives.

2/21/2023

Sun ray bunnies Easter one layer flat card.

 Sometimes you just want a simple one layer flat card that still makes an impact.  This Easter card was accented with a sun ray background using a blend of colors.


Sentiment:
Bunny kisses & Easter wishes.

This one layer card was made simple and bright with a touch of coloring and stenciling over the stamping.

11/05/2022

Watercolor ~ November 2022 Friends of Unity Blog Hop

Hello and welcome.  The November 2022 Friend's Of Unity blog hop inspiration is watercolor.  I hope that you will join in on the fun and inspiration.  Simply comment on each stop in the hop.  See the end of this post for your next stop in the hop.

Here is my watercolor project for November.


Sentiment:  Merry Christmas


This card was a joy to make.  Watercolor is one of my favorite additions to card making.

11/02/2022

Vintage watercolor holiday card ~ mailbox theme

 Hello.  Today, I am sharing a vintage watercolor holiday card with a mail or postage theme.


Sentiment:  
Making spirits bright.  Let your heart be light.

Using light colors and accents, this vintage watercolor holiday card came to life.

8/10/2022

DecoFoil sentiment foiling with adhesive transfers & pressure

 Hello.  Today, on the Unity blog, I am sharing pretty hanging flowers with added red foiling for the sentiments.  This process uses only pressure for foiling.  No laminator is required.


Sentiment:  Have an amazing birthday.

Use your favorite stamps and then accent the card with foiling with only pressure from a die-cutting & embossing machine.

7/06/2022

Water soluble oil pastels ~ watercolor beach card technique

 Hello.  Today, on the Unity blog, I am sharing a tropical beach scene card using water soluble oil pastels for watercolor


Sentiment:  Oh hello

I made a quick video tutorial showing the process for this project.

{{Please subscribe to my video channel and like this video.  Many thanks.}}


For this one-layer Summer card, I used watercolor, stenciling and ink blending.  It was fun building added accents to this already lovely background stamp.

6/22/2022

Daisies ~ Colored Pencils on Colored Cardstock Technique

 Hello.  Today, on the Unity blog, I am sharing a card featuring colored pencils on colored cardstock with a sympathy theme.


Sentiment:  Deepest sympathy.

I made a quick video tutorial showing the process for this project.

{{Please subscribe to my video channel and like this video.  Many thanks.}}


This daisy vase is perfect for sympathy card making to have on hand for those times when you want to send condolences.  And, it is possible and easy to color using colored pencils on colored cardstock. 

5/18/2022

One layer stenciled card & night sky frog spotlight

    Hello.  Today, on the Unity blog, I am sharing a one layer night scene card.  This one features a frog spotlight and a surrounding night sky.


Sentiment:  Hey there good lookin'.

I made a quick video tutorial showing the process for this project.

{{Please subscribe to my video channel and like this video.  Many thanks.}}


This one layer stenciled card was fun to spotlight with layers of ink blending around it.  The frog is just too cute.

4/06/2022

Layered embossed poppy flowers & matching envelope

 Hello.  Today, on the Unity blog, I am sharing a layered embossed poppy flower card & matching envelope.  This one was easy to do with no coloring involved.


Sentiment:  Birthday wishes.

Layered embossed poppy flowers make beautiful florals.  Using solid or variegated ink on the solid stamp along with white heat embossing on the outlines, the results are wonderful.

I made a quick video tutorial showing the process for this project.

{{Please subscribe to my video channel and like this video.  Many thanks.}}

2/15/2022

Donut birthday cake slimline pun one layer watercolor card

Here is a fun pun card for a birthday.  It is made slimline style in just one layer with watercolor accents. 

Sentiment:

Happy Birthday
You definitely don't look your age.

This card is great for friendship or family.  The coloring can be in your choice of mediums.  For this one I chose watercolor.

1/15/2022

You're jaw-some shark pun card with stenciling and masking.

     We are celebrating Angela's birthday week over at Unity Stamp Company.  Here is another peek using some of the offerings over at Unity.  This fun card with sharks is great for birthdays with a fun pun twist.
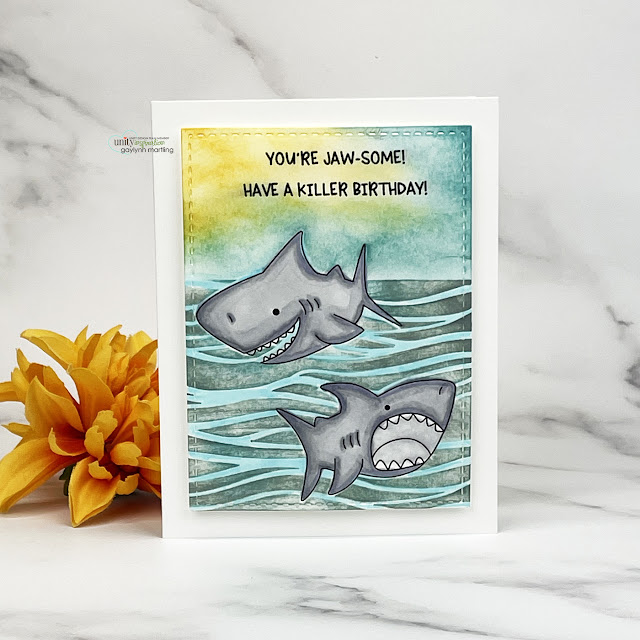

Sentiment:
You're jaw-some!
Have a killer birthday!

For this card, I filled the whole card front with tropical scene building for the sharks, the ocean and the sky.  This is is a one layer card with a clean look to it.

1/14/2022

Cute gnome birthday candle stars card ~ Clean and Simple

    This is our feeless leader Angela Magnuson's birthday week and we are celebrating over at Unity Stamp Company.  This fun gnome birthday card was made using some of the items in the Unity birthday sale.  I think that this card will work for almost anyone's birthday.


Sentiment:
Happy Birthday.  Happy Birthday.  Happy Birthday To You!
Celebrate.

For this card, I kept it clean and simple with only a touch of color.  Also, I left it as a one layer card without added embellishments.

12/01/2021

Watercolor dinosaur scene card for anniversary ~ tutorial

         Creating a watercolor dinosaur scene card is easy with simple stamping and watercoloring.  Today on the Unity blog, I am sharing a cute anniversary card for a special first anniversary.


Sentiment:  
To my favorite couple.
Happy 1st Anniversary.
Here's to your day, your life and your enduring love.

This watercolor dinosaur scene card was made using two completely different stamp sets that blend beautifully together for this love theme.

I made a quick video tutorial showing the process for this project.
{{Please subscribe to my video channel and like this video.  Many thanks.}}

11/20/2021

Friendship or family cancer support card with girls.

 Today, I am sharing a heartfelt card for support.  This one has a friendship theme for battling cancer.


Sentiments:
Hey cancer, you picked the wrong girl.
Sometimes the girl who is always there for someone else needs someone there for her.
I am here for you.
Inside:  Never be afraid of a scar.  It simply means you were stronger than whatever tried to hurt you.

These girls can be paired with endless other sentiments.  But, this card was made special for a dear friend.

1/20/2021

Beach sympathy one layer card ~ masking & ink tutorial

 Hello.  For Technique Time at Unity, I am sharing a one layer card with a beach theme and with sympathy sentiments.  I show techniques for masking and ink blending.


Sentiment:
Heartfelt sympathy.  Praying for you.

The layers of ink combined with creative masking makes this one layer card come to life.  Many different stamps can be used to accent this tropical beach background.

Helpful tips:
Here are helpful tips for creating this one layer card beach scene.  To begin, trim a piece of cardstock a little larger than A2 size.  Mask a horizon using post-it tape.  Begin ink blending the water using torn cardstock for masking.  Next, mask the water area to blend a sunset sky scene.  Then, add more blending for the shoreline and the grassy areas.  Next, using the original Misti, stamp the sun over the partially masked area and also the clouds, the birds, trees and the sentiments.  Also, trim or die-cut the scene to fit.  Finally, layer the scene panel using foam or flat double-sided tape or glue, to finish.


I made a quick video tutorial showing the process for this project.
{{Please subscribe to my video channel and like this video.  Many thanks.}}
YouTube:  Gaylynn NeatThingsBtq


Here is another look.


This project is included in:

Supplies:  Unity Stamp Co. No Better Words.
Also, foam and flat double-sided tape, cardstock, heat tool, My Creative Time rectangle frame die layers; Ranger archival ink in pale ochre, Venetian orange, potting soil, olive, watering can, jet black; Ranger distress ink in peacock feathers; distress oxide ink in spiced marmalade, fossilized amber, peeled paint and broken china; Ranger plastic craft mat, ink blending brush, Sharpie white paint pen, Post-It tape, Original Misti.

Be sure to visit the Unity blog for the entire article and tutorial.
Also, you can find my other features at Unity's
Technique Time and
Watercolor Wednesday.


Thank you for visiting.
Gaylynn

10/21/2020

CAS one layer card ~ ink blending & Copic marker tutorial

    Hello.  For Technique Time at Unity, I show a way to make a CAS style one layer card.  Ink blending and Copic coloring were added without additional card layers.

Sentiment:  
Glory to God in the highest, and on earth peace, good will toward men.
~ Luke 2:14

This is a wonderful inspirational one layer card for Christmas or almost any time.  This sweet scene can be used with many other sentiments.

Helpful tips:
Here are helpful tips for creating this one layer card.  To begin, stamp the large scene in black Copic friendly ink.  Next, die-cut or trim a card front layer featuring the combined stamping.  Then, for color, begin by adding ink blending in yellow and blue shading for the sky.  Next, add snow detail to the sky.  For this, I used dots from a Sharpie paint pen.  Also, add Copic markers in layers to the girl and to the snowy ground.  Finally, to finish, adhere the card front onto the card base.


Here is a closer look.


Thank you for stopping by.
Gaylynn


10/14/2020

Pumpkin Coffee or Tea Mug Window Card + Copic marker tutorial

   HelloI am sharing one way to make a window card with added Autumn stamping.  This also shows how I added Fall coloring using Copic markers.


Sentiment:  Many Blessings

This is a great window card for thinking of you, Thanksgiving, just because or Autumn occasions.  It would also be perfect with a coffee or tea gift.

Helpful tips:
Here are helpful tips for creating this Autumn window card.  To begin, stamp the mug directly onto the card base.  Then, stamp the mug again and the sentiment onto another cardstock piece.  Use Copic friendly ink.  Next, add Copic color layers to the full mug and also to the pumpkins on the second mug.  Also, add light distress oxide ink shading around the mug.  Then, cut out the second set of pumpkins to use as a card accent.  (You can stop there for a finished flat card.)

To make the window, open the card base and die-cut a shape onto the card front panel.  Be sure that the shape will fit your stamping.  I used an oval die but it could be hand-cut or punched out.  Then, add temporary tape, like washi, to hold the cut in place.  Next, close the card base to adhere to the oval to the inside.  Now, the card front becomes a window and the stamping becomes the inside panel.  To finish, adhere the sentiment and the extra pumpkins using foam tape.


This is the card while it is closed.


Here is the inside of the card.


Supplies:  Unity Stamp Co. Fall To Go and Heart Of Autumn
Also, original Misti, flat and foam double-sided tape, cardstock, My Favorite Things Stitched Mini Scallop Oval STAX and Essential Fishtail Sentiment Strips Die-namics; distress oxide ink in spiced marmalade; Gina K. Designs chocolate truffle amalgam ink, ink blending brush, Copic markers E29, E09, E15, E11, E00, YR00, YR14, YR04, R08, W3, Y11, YG13, YG03, .

Thank you for stopping by.
Gaylynn