10/28/2020

Toner Foiling ~ How to use leftovers for negative foiling ~ 2 cards

 Hello.  For Technique Time at Unity, I show a way to use leftover foil pieces in this negative foiling technique.  For today's example, I am using Deco Foil toner card fronts which include toner images.  And then, I added foil using a laminator.


Sentiment:  From our gnome to yours.

With this negative foiling background technique, you get two foiled cards with one piece of deco foil.  And if you also use blank toner sheets, more colors can be added to the same toner card front.  In these cards, I added cute gnome stamping.


Helpful tips:
Here are helpful tips for negative foiling.  To begin, use a toner card front or an otherwise prepared panel for foiling.  Also, preheat a laminator and have a carrier sheet (parchment paper) ready.  Then, pre-trim foil pieces to cover the foil area.  Next, sandwich the foil piece over the toner card front inside of the carrier sheet.  Then, run this through the preheated hot laminator.  Next, gently peel away the first foil sheet to reveal the shiny foiled image.  You will have a sheet of leftover foil, I call the negative.  

For the negative foiling steps, trim a blank deco foil toner sheet panel to match your foil area.  Next, sandwich the negative foil over the toner sheet.  Then, run that through a hot pre-heated laminator.  Next, carefully peel away the "clear" film top layer where the foil used to be.  You will see that the foiling was transferred to the toner sheet.  This is ready to trim to fit your project.  OR, you can go one step further and add another foil color over that same foil sheet, run through a laminator to get a two-toned foiling result.  


I made a quick video tutorial showing the process for this project.
{{Please subscribe to my video channel and like this video.  Many thanks.}}
YouTube:  Gaylynn NeatThingsBtq


Here is another look.

Also, mini Misti, flat and foam double-sided tape, cardstock, My Favorite Things Stitched Basic E Die-namics; My Creative Time Rectangle Frame Die Layers, Simon Says Stamp intense black ink, Copic markers R27, RV29, R02, W7, W5, W3, W1, 0, B05, BG15, B01; Therm-O-Web Deco Foil in silver and deco foil toner sheets; Yourstory laminator, carrier sheet.

Be sure to visit the Unity blog for the entire article and tutorial.
Also, you can find my other features at Unity's
Technique Time and
Watercolor Wednesday.


Thank you for stopping by.
Gaylynn

10/27/2020

Holiday wreath gift tag ~ MCT Tag It Tuesday

Hello.  The My Creative Time design team is sharing projects with tags.  I decided to chip away at more Christmas and Holiday gift tags.  This is one made using a sweet wreath stamp and die set.


Sentiment:  Happy Holidays

This is one of my favorite stamp and die sets, because of the whimsical wreath.  I made it in Christmas colors and then added a Holiday sentiment.  I like it because it can be used year-round.  For color, I added a touch of Copic markers on the wreath in a few coordinating colors.  To finish, I stamped and layered the wreath over the chunky tag die-cut panel.

Supplies:  My Creative Time I Have Faith In You, Chunky Stitched Tag DiesDec 25th Stamp Set, Ranger multi medium matte glue, Simon Says Stamp Intense Black Ink, cardstock, Copic markers BG49, BG32, BG10, 0 R27, R02.

Please visit Emma's My Creative Time blog for more inspiration.

Thanks for visiting.

Gaylynn

10/26/2020

Winter night sky Holiday twinkle card ~ MFT Stamps

 Hello.  Today, I am playing with My Favorite Things stamps and dies.  Also, I am participating in their sketch challenge using winter stamps and a watercolor night sky background.


Sentiment:  You are so bright, you twinkle.

For this starry winter night scene, I decided to make a watercolor background using Colorburst powders on watercolor paper.  Then, once dried, the background was die-cut using slimline die-namics and trimmed further to fit the card base.  Also, I stamped and heat embossed paint splatters onto the sky.  Next, I stamped and colored the bunny and trimmed the sentiments.  Stars were die-cut into the background and larger ones were added in. I think that the night sky turned out better than expected.  The sketch was the inspiration for this twinkle card.

Here is another look.


Supplies:  My Favorite Things Stamps Merry Wishes by Stacey Yacula, Starry Night Sentiments, Starry Night Sentiments Die-namics, Starry Night Horizontal Die-namicsPaint Splatter BackgroundMerry Wishes Die-namics, Tag Builder Blueprints 4, Blueprints 15, Slimline Starter Die-namics, Rainbow Garden A2 Envelopes, Night Sky Colorburst Trios Ken Oliver in grape jelly, blueberry & field day, TCW Ken Oliver watercolor paper;  Copic markers B06, B29, B14, BG53, BG49, BG32, BG10, C5, C3, C1, V0000; Wow embossing pad, Simon Says Stamp intense black ink, EK powder tool, white embossing powder, mini mister, iCraft ultra bond adhesive, heat tool, Original Misti.

Thanks for stopping by.  Have a great day.

Gaylynn 

Foiling 4 Holiday Cards Deco Foil Toner Card Fronts ~ Tutorial

 Hi there.  For today, I am sharing four different Christmas and holiday cards using the new co-branded Deco Foil / Unity toner card fronts along with stamping.  This was a joy to do.  The toner card fronts work perfectly with laminator foiling.


This is the set of cards, all together.  I used four different colors of Deco Foil sheets for them.


Sentiment:  Warm hugs.

This gold ornament card was made using gold deco foil along with Copic markers.  I suggest adding color first and then add foil.  This helps to prevent damage to the marker nibs from the foiling.  All of the supplies are listed at the bottom of this post.  The florals give the look of garland.


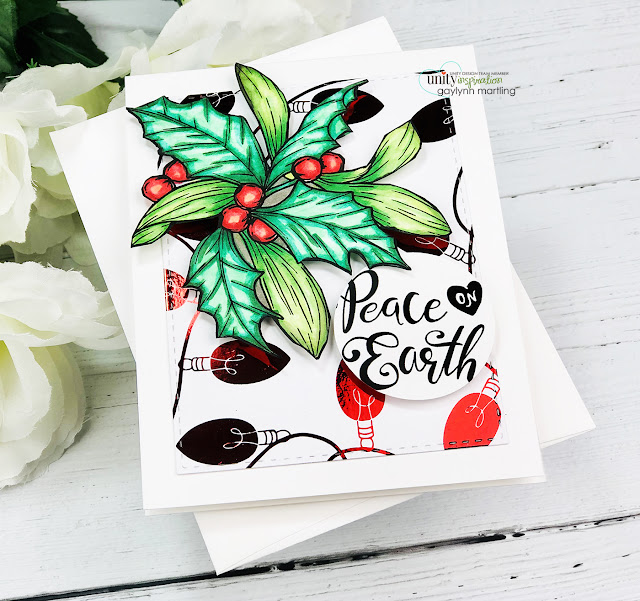
Sentiment:  Peace on Earth

Here is a card using red foil with added Copics for the leaves accent.


Sentiment:  Merry & Bright

Here is a monochromatic card in blue foil and accented with a sentiment and a blue card base.


Sentiment:  Grateful for you this Christmas

And, finally, this green foil Christmas tree card shimmers beautifully.  I added the sentiment along with a green card base.

Supplies:  Unity Stamp Co. Christmas Wishes, Start Anew and Glimmering Greetings stamps, plus Deco Foil Toner Card Fronts Gifts A Plenty, Holiday Lights, Ornate Ornaments and Flurry Forest;  My Creative Time Rectangle Frame Die Layers; cardstock, double-sided flat and foam tape, Misti stamping tool, laminator, Deco Foil sheets in red, blue, green and gold.
Copic markers:
Warm Hugs card, YR14, YR23, Y21, YG0000, R27, R02, G28, G03, YG13,0, E13, E11. 
Peace on Earth card, G28, G17, G16, G07, G03, YG03, YG13, R27, R02, 0.


Thank you for visiting.  Have a wonderful day.
Gaylynn

10/21/2020

CAS one layer card ~ ink blending & Copic marker tutorial

    Hello.  For Technique Time at Unity, I show a way to make a CAS style one layer card.  Ink blending and Copic coloring were added without additional card layers.

Sentiment:  
Glory to God in the highest, and on earth peace, good will toward men.
~ Luke 2:14

This is a wonderful inspirational one layer card for Christmas or almost any time.  This sweet scene can be used with many other sentiments.

Helpful tips:
Here are helpful tips for creating this one layer card.  To begin, stamp the large scene in black Copic friendly ink.  Next, die-cut or trim a card front layer featuring the combined stamping.  Then, for color, begin by adding ink blending in yellow and blue shading for the sky.  Next, add snow detail to the sky.  For this, I used dots from a Sharpie paint pen.  Also, add Copic markers in layers to the girl and to the snowy ground.  Finally, to finish, adhere the card front onto the card base.


Here is a closer look.


Thank you for stopping by.
Gaylynn


10/19/2020

Christmas tree friends + winter night sky ~ MFT Stamps

Hello.  Today, I am playing with My Favorite Things stamps and dies.  And, I am participating in their sketch challenge using winter stamps.


Sentiment:  Merry Christmas to my amazing, beautiful, wonderful friend.

For this sweet winter night scene, I paired these sweet friends against a snowy night sky.  
For the sky, I stamped and embossed first in gold.  Then, I rotated the stamp a bit and restamped in white.  This was a tip from Koren Wiskman in one of her MFT videos.  I must say, I will use this background technique often.  This was a joy to create.  

Here is another look.


Supplies:  My Favorite Things Stamps Merry Wishes by Stacey Yacula, Stitched Traditional Tag STAX Die-namics, Stitched Slimline Snow Die-namics, Paint Splatter Background, Merry Wishes Die-namics and navy cardstock;  Also, Copic markers R27, R02, E44, E71, E33, E11, E00, YR00, YR0000, W1, Y21, YR23, Y11, E29, W3, G28, G99, YG95, YG13, YG03, G21, BG32, BG10; Wow embossing pad, Simon Says Stamp intense black ink, EK powder tool, Original Misti.

Thanks for visiting.  Have a great day.

Gaylynn 

Santa holiday tall or slimline card ~ MCT anything goes

 Hello.  The My Creative Time design team is sharing anything goes, projects of our choice, today.  I decided to make another holiday card.


Sentiment:  From our family to yours!

Looking through stamps and dies to use for today, I found this set of big Santa dies.  And, they work perfectly paired with the coordinating tall dies which are slimline style.  

Here is an easy clean and simple CAS card.  The sentiment was stamped on the scallop layer.  I used mostly gray and white solid cardstock with a touch of polka dot patterned paper, for a pop of red.  To give the Santa die-cuts a bit more depth, I added shades of gray around the edges of each Santa cut, using Copic markers.  Finally, I layered the panels together, to finish this tall or slimline Christmas or holiday card.

envelope 4 3/8" x 8 1/4" 
card base cut 7 1/2" x 7 1/2" and scored 3 3/4"

Supplies:  My Creative Time Big Santa Dies, Dec 25th Stamp Set, Scallop Tall Frame Dies, Tall Frame Dies and Tall Frame Die Layers; Ranger multi medium matte glue and jet black archival ink, cardstock, BoBunny paper, flat and foam double-sided tape, Copic markers C3, C5.

Please visit Emma's My Creative Time blog for more inspiration.

Thanks for visiting.

Gaylynn 

10/14/2020

Pumpkin Coffee or Tea Mug Window Card + Copic marker tutorial

   HelloI am sharing one way to make a window card with added Autumn stamping.  This also shows how I added Fall coloring using Copic markers.


Sentiment:  Many Blessings

This is a great window card for thinking of you, Thanksgiving, just because or Autumn occasions.  It would also be perfect with a coffee or tea gift.

Helpful tips:
Here are helpful tips for creating this Autumn window card.  To begin, stamp the mug directly onto the card base.  Then, stamp the mug again and the sentiment onto another cardstock piece.  Use Copic friendly ink.  Next, add Copic color layers to the full mug and also to the pumpkins on the second mug.  Also, add light distress oxide ink shading around the mug.  Then, cut out the second set of pumpkins to use as a card accent.  (You can stop there for a finished flat card.)

To make the window, open the card base and die-cut a shape onto the card front panel.  Be sure that the shape will fit your stamping.  I used an oval die but it could be hand-cut or punched out.  Then, add temporary tape, like washi, to hold the cut in place.  Next, close the card base to adhere to the oval to the inside.  Now, the card front becomes a window and the stamping becomes the inside panel.  To finish, adhere the sentiment and the extra pumpkins using foam tape.


This is the card while it is closed.


Here is the inside of the card.


Supplies:  Unity Stamp Co. Fall To Go and Heart Of Autumn
Also, original Misti, flat and foam double-sided tape, cardstock, My Favorite Things Stitched Mini Scallop Oval STAX and Essential Fishtail Sentiment Strips Die-namics; distress oxide ink in spiced marmalade; Gina K. Designs chocolate truffle amalgam ink, ink blending brush, Copic markers E29, E09, E15, E11, E00, YR00, YR14, YR04, R08, W3, Y11, YG13, YG03, .

Thank you for stopping by.
Gaylynn

10/12/2020

Masculine Father's Day Card ~ MCT Manly Mondy

 Hello.  The My Creative Time design team is sharing Manly Monday masculine themed projects.  Here is my Father's Day themed card for today.


For this masculine themed card, I first die-cut all of the layers and added elements.  Then, I stamped the sentiment and die-cut that.  I choose to use coordinating assorted patterned paper and cardstock.  Next, I added foam tape behind the sentiment panel to add dimension.  Finally, I adhered all of the layers and elements, to finish.  

Here is another look.


Supplies:  My Creative Time Have A Super Day, Little Stitched Leaves Dies, Rectangle Frame Die Layers, Rectangle Frame DiesEtched Edge Frame Dies; photo corners, pattered paper, cardstock.

Please visit Emma's My Creative Time blog for more inspiration.

Thanks for visiting.

Gaylynn 

10/09/2020

MCT 48 Hour Flash Sale and Blog Hop + Torn Paper Dies

 Hi, it's Gaylynn here. Welcome to another My Creative Time "48 Hour Flash Sale" and blog hop. This sale is for 48 hours ONLY that is going on right NOW and will end on Sunday, October 11, 2020, at 7am PST. Use the code FLASH at checkout to get 20% off of your entire "in-stock" only purchase! Sale applies to in-stock items only! Start shopping HERE.

Sentiment: Merry Christmas!

My card shows cuts using both of the torn frame dies, which are part of this release. I decided to make a Christmas card using them for today. Some of the smaller decorative elements are from other kits. I just love finding little MCT treasures to add here and there, for different themes.

In addition to our sale, we are ALSO showcasing two brand new die sets! They are “TORN PAPER FRAME DIES” & “TORN PAPER FRAME DIE LAYERS”.

The new sets are available for purchase HERE.
GIVEAWAY!
Leave your comments for a chance to win a $25.00 Gift Card to the "My Creative Time" store! Don't forget to leave a way for us to contact you "just in case" YOU are the LUCKY winner! Good Luck!


Here is another look.


Don't forget to use the code FLASH at checkout to get 20% off of your entire "in-stock" only purchase!

Supplies:  My Creative Time Torn Paper Frame Dies, Torn Paper Frame Die Layers, Snowflake Tag Die, Money Envelope Die and Holiday Envelope Die; brad, adhesive gems, cardstock, Ranger multi medium matte glue.

Your next stop in the blog hop is Ginger's blog.


The entire hop lineup is on Emma's My Creative Time blog.

Remember to leave comments along the way on the blog hop for prize chances.
Thanks for stopping by.

Gaylynn

10/07/2020

Use your glitter ~ Star glitter frame card tutorial

  Hello.  For Technique Time at Unity, I am showing a sparkly card.  The tutorial will show one way to make a glitter frame filled with stars.  It also incorporates a starry sky background.


Sentiment:  Bright Wishes

This glitter frame card can be used for Christmas or holiday greetings or as a birthday or celebration card for any time.

Helpful tips:
Here are helpful tips for creating this glitter frame card.  To begin, die-cut or trim a background panel and make a frame for it.  Next, stamp the star onto cardstock and add color with Copic markers or your coloring of choice.  Also, fussy cut the star.  Then, stamp and heat emboss the sentiment in white.  Also, add ink blending in darker blue shades around the sentiment panel to create a starry sky look.  Next, add stars to the background by either die-cutting, stenciling or by heat embossing the stars in white.  Then, add a thick layer of glossy accents (glue) along the front side of the frame area.  Also, generously pour glitter over the glued frame and allow it to dry completely.  Finally, assemble the card layers to finish.


I made a quick video tutorial showing the process for this project.
{{Please subscribe to my video channel and like this video.  Many thanks.}}
YouTube:  Gaylynn NeatThingsBtq


Here is another look.


Supplies:  Unity Stamp Co. Felt Star
Also, white embossing powder, Mini Misti, foam double-sided tape, cardstock, My Favorite Things Stitched Rectangle Frame and Starry Night Vertical Die-namics; glossy accents, MSC star glitter, distress oxide ink in faded jeans and broken china; Simon Says Stamp intense black ink, Gina K. Designs white pigment ink, Tombo glue, heat tool, ink blending brush, Copic markers Y11, Y02, Y26, YR23, 100, R20.

Be sure to visit the Unity blog for the entire article and tutorial.
Also, you can find my other features at Unity's
Technique Time and
Watercolor Wednesday.


Thank you for stopping by.
Gaylynn

10/05/2020

Reindeer Gift Tag ~ MCT Made In Minutes

 Hi.  The My Creative Time design team is sharing projects made in minutes.  Here is a simple Christmas or holiday gift tag for the holidays.  It has a reindeer shape and adorable face, ready for gift giving.


For this adorable tag, I simply die-cut all of the elements onto cardstock and glitter paper.  I used the face only from the lollipop holder die, for this.  Then, I glued the face and antler accents to the reindeer.  Next, I added a bit of distress ink blending around the face and cheeks.  Then, cording was added along with adhesive gems, to finish.  

Supplies:  My Creative Time Reindeer Lollipop Die; glitter paper, cardstock, cording, Ranger multi medium matte glue, adhesive gems, Tim Holtz distress oxide ink in walnut stain and worn lipstick colors, ink blending brush.

Please visit Emma's My Creative Time blog for more inspiration.

Enjoy your day.

Gaylynn 

10/03/2020

Peace on earth Holiday card set ~ Dreamy shading tutorial

 Hello. Today, I am sharing two coordinating Christmas or holiday cards.  These include stamping with dreamy winter ink shading and a tutorial.

Sentiment:  Peace on earth.

Here are tips for making this card set.  First, die-cut or trim paper layers for the stamping and for the background layer.  Next, stamp the snowflake heart using partial stamping on the top and on the bottom of a colored cardstock panel.  Then, stamp the peace sentiment.  (Stamp with or without foiling or embossing.)  Also, stamp the smaller sentiment onto a separate paper layer.  And then cut the portion of the paper strip to get just the "on earth" words.  Next, add white ink blending accents around the snowflake panel.  Using an ink blender, blend white ink around the oval edges for a dreamy look.  Finally, assemble the card, to finish.

Here is one card example with added silver foiling.
Foiling is optional.  A similar look can be accomplished with silver heat embossing.


I made a quick video tutorial showing the process for this project.
{{Please subscribe to my video channel and like this video.  Many thanks.}}
YouTube:  Gaylynn NeatThingsBtq


Here is another card version with just the stamping and ink blending.


Supplies:  Unity Stamp Co. Heart of Christmas;  My Creative Time Scallop Stitched Oval Dies; cardstock, double-sided flat and foam tape, Fiskars paper trimmer, blending brush, adhesive pearls, May Arts silver twine, Gina K. Designs premium white pigment ink, black ink, laminator, silver deco foil.

Thank you for visiting.
Gaylynn

10/02/2020

Daisy flower card with Prismacolor colored pencils ~ tutorial

  Hi there.  For today, I am sharing a way to add daisy color using colored pencils.  This is another fun way to use color with card stamping.


Sentiment:  Hello

Here are tips for making this card.  First, stamp the daisy background onto cardstock.  Next, die-cut or trim into circle layers and also trim the background patterned paper.  Then, stamp the sentiment onto the floral panel, before adding color pencils.  Next, begin adding color to the daisies in wispy layers and colors of choice.   Finally, layer everything onto the card base, to finish.

I made a quick video tutorial showing the process for this project.
{{Please subscribe to my video channel and like this video.  Many thanks.}}
YouTube:  Gaylynn NeatThingsBtq


Here is another look.


Supplies:  Unity Stamp Co. Daisy Days, Heart of Autumn, Cozy Christmas {paper pack};  My Creative Time Pretty Circle Layer Dies, Pretty Scallop CirclesRectangle Frame Die Layers; cardstock, double-sided flat and foam tape, Prismacolor colored pencils PC918, PC916, PC938, PC949; Misti, ink.

Thank you for visiting.
Gaylynn

10/01/2020

Gingerbread Holiday card & Copic blending on kraft cardstock ~ tutorial

 Hi there.  For today, I am showing a tutorial on Copic marker coloring and shading with kraft color cardstock.  This technique is a favorite of mine.


Sentiment:
Sending sweet Holiday wishes.

Here are tips for making this card.  First, die-cut or trim background layers and frames.  Next, stamp the background onto kraft color cardstock, using Copic friendly ink.  Also, stamp the sentiment and trim those layers.  Next, begin adding Copic markers using the lightest shades first.   Then, layer color tones in darker colors.  The 0 marker or colorless blender can be used to lighten areas.  Next, add white paint splatters onto the layers.  Finally, layer everything, then add twine and embellishments.

Here is another look.


Supplies:  Unity Stamp Co. Christmas Cookie {border background}; My Creative Time Tag Frame Dies, Tag Frame Die Layers, Rectangle Frame Dies, Rectangle Frame Die Layers; cardstock, double-sided flat and foam tape, adhesive pearls, Simon Says Stamp intense black in for alcohol markers, Ranger multi medium matte glue, Liquitex Basics white acrylic paint, paint brush, water, cording, Copic markers G99, G21, E18, E33, E13, R27, R02, 0, 110.

Thank you for visiting.
Gaylynn