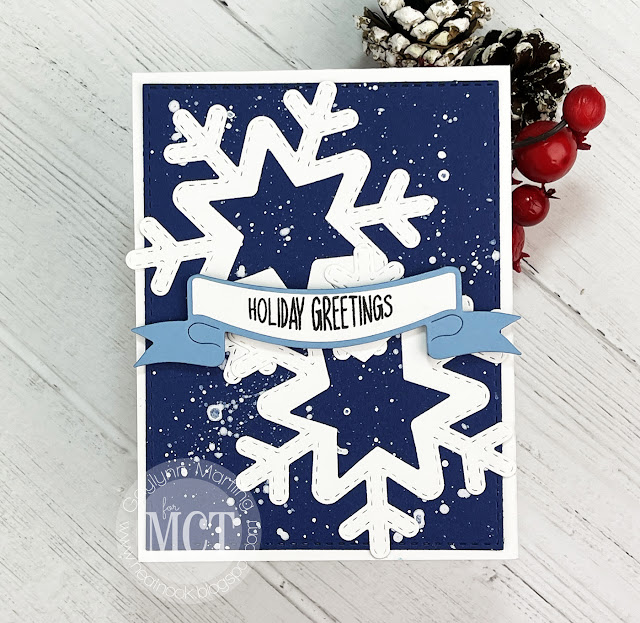
Hello, it's Gaylynn. The My Creative Time 114th Edition release is coming up on Friday. But for today, the team is sharing Day 4 sneak peeks.
9/30/2021
Snowflakes Card ~ Day 4 MCT 114th Edition Sneak Peeks
9/29/2021
Sympathy quick & easy no coloring card ~ 1 minute tutorial
Here is a quick and easy no coloring card. Today on the Unity blog, I am sharing one way to make a meaningful and heartfelt card quickly, for condolences.
This floral sympathy quick & easy no coloring card was made in less than ten minutes using simple techniques. And it has a clean and simple yet classy look to it.
{{Please subscribe to my video channel and like this video. Many thanks.}}
Teal Holiday Tree ~ Day 3 MCT 114th Edition Sneak Peeks
Hello, it's Gaylynn. The My Creative Time 114th Edition release is coming up on Friday. But for today, the team is sharing Day 3 sneak peeks.
9/28/2021
Ho Ho Ho Circle 3x3 Tag Card ~ Day 2 MCT 114th Edition Sneak Peeks
Hello, it's Gaylynn. The My Creative Time 113th Edition release is coming up on Friday. But for today, the team is sharing Day 2 sneak peeks.
9/27/2021
Autumn Turkey ~ Day 1 My Creative Time 114th Edition Sneak Peeks
Hello, it's Gaylynn. The My Creative Time 114th Edition release is coming up on Friday. But for today, the team is sharing Day 1 sneak peeks.
9/25/2021
Cheers owls celebration card ~ masking, blending & Copics
Today, I am sharing a clean and simple card featuring adorable owls. This card is easy to make. I used stamping, masking, ink blending and a bit of Copic coloring.
9/24/2021
Watercolor with Dye Ink Refills ~ Leaf Card Tutorial
Today, I am sharing a set of three Autumn themed leaf cards made using stamping and watercolor. For color, I used dye in refill bottles in three shades along with gold shimmer.
9/22/2021
My Favorite Things 2021 Card Design Superstar Challenge ~ Coloring Virtuoso
Hello. Gaylynn here. Today's card was made exclusively for the My Favorite Things 2021 Card Design Superstar Challenge in the category of Coloring Virtuoso. For the coloring, I chose to use watercolor paints, one of my favorite techniques.
For the mice and elements, I heat embossed the stamping onto watercolor paper. I used the same shades as the background plus a few more shades from my stash. Once everything was dry, I die-cut the background, the mice and all of the elements. Finally, I assembled the card pieces along with the sentiment, to finish.
Also, Original Misti, foam double-sided tape, Wow embossing pad, black embossing powder, heat tool, paint brushes, Ranger watercolor paper, Gansai Tambi starry colors gold watercolor, Altenew watercolor half pans, Liquitex acrylic paint and score tape.
Gaylynn
Outer space galaxy greetings ~ Brusho watercolor card tutorial
Here is a tutorial on how to create outer space galaxy greetings on a card. Today on the Unity blog, I am sharing one way to use Brusho crystal color powders watercolor to achieve this galaxy effect.
I will show a way to use watercolor along with outer space galaxy greetings stamps. It is a fun yet messy card technique where the result is different each time.
{{Please subscribe to my video channel and like this video. Many thanks.}}
These are helpful tips to create this outer space galaxy greetings card. To begin, stamp and heat emboss the scene onto the smooth side of watercolor paper. Then, stamp and color the scene again onto white cardstock using Copic friendly ink and Copic markers. Next, add water and Brusho crystal powders in three colors to the watercolor panel. Move the color around and repeat until satisfied with the color. Once dry, fussy cut the cardstock color scene and place it over the embossed scene. Also, trim the paper layers to your liking. Finally, layer it all to finish.
Here is another look.
Unity Stamp Co. Other Worldly Greetings
Also, Brusho crystal colors in scarlet, ultra marine and turquoise; flat and foam double-sided tape, white embossing powder, heat tool, Wow embossing ink pad, Original Misti, Canson watercolor paper, Ranger plastic craft mat and mini mister; Simon Says Stamp intense black ink pad, silver cardstock, Copic markers W5, W3, C3, C1, B14, BG0000.
Also, you can find my other features at Unity's
Technique Time and
Watercolor Wednesday.
Thank you for visiting.
9/21/2021
MFT 2021 Card Design Superstar Challenge ~ Innovative Master
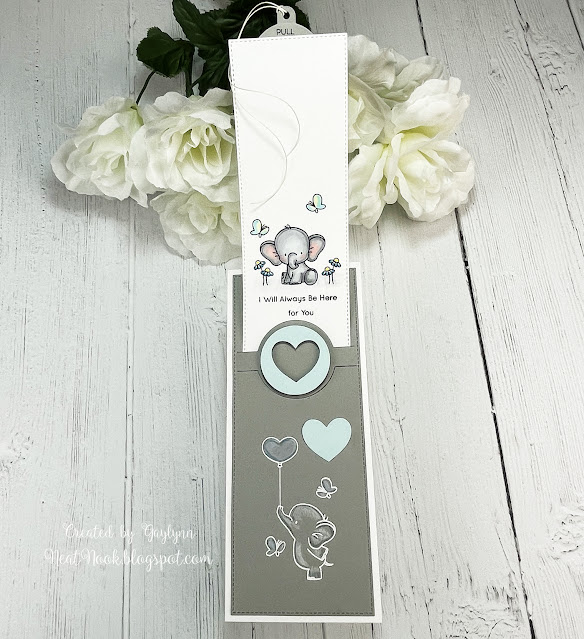
Hello. Gaylynn here. Today's card was made exclusively for the My Favorite Things 2021 Card Design Superstar Challenge in the category of Innovative Master.
{FTC: Some links include affiliate links. I may receive a small commission for the referral but at no cost to you. Also, I am a participant in the Amazon Services, LLC Associates Program, an affiliate advertising program designed to provide a means for me to earn fees by linking to Amazon.com and affiliate sites. If you want to learn more about a product that I used here or to purchase it, the link is available to click on. It would make my day if you would do so.} Featuring MFT Stamps: Adorable Elephants Stamps Adorable Elephants Die-namics Slimline Starter die-namics Slimline Slide In die-namics Interactive Labels Card stock in cement gray and sno cone Extreme black hybrid ink Also, Copic markers C1, N1, N3, B14, B00, R20, Y08, YG0000 White embossing powder Prismacolor color pencils PC1060, PC938, PC1051, PC1063, PC904, PC1023
Misti
Gaylynn
MFT 2021 Card Design Superstar Challenge ~ Clean & Simple Genius
Hello. Gaylynn here. Today's card was made exclusively for the My Favorite Things 2021 Card Design Superstar Challenge in the category of Clean & Simple Genius.
This is going to be used as a holiday card but is suitable for most any winter occasion.
Also, Copic markers B06, BG49, BG32, C1, C3, E43, YR00, Y15, Y11; mini Misti, foam double-sided tape, adhesive pearls, Wow embossing pad, white embossing powder, heat tool, ink blending brush.
Gaylynn
Ghost Halloween Treat Wrap Tag ~ MCT Tag It Tuesday
Hello. The My Creative Time design team is sharing gift tag projects. This cute little treat or favor tag features a ghost for Halloween.
To create this, begin by die-cutting tag layers in different colors. I chose purple and white. Next, die-cut the ghost and the eyes. Then, to finish, assemble the layers using flat and foam double-sided tape and twine. Use the tags to dress up treat bags.
Please visit Emma's My Creative Time blog for more inspiration.
Gaylynn
9/17/2021
Purple aster flowers card + Copic markers & pretty layers
Today, I am sharing a purple layered card featuring beautiful aster flowers for sending love. This works for get well, support, thinking of you or many occasions to show you care.
I took some time adding color to each amazing aster flower. A mix of colors were used to get the look. The stamp is large and includes all three flowers in one Unity stamp. Background panels were layered to frame the pretty bouquet of purple asters. To top off the card, I added a sentiment panel over the flowers and a layered flag embellishment at the top.
Unity Stamp Co. September Aster.
Also, flat and foam double-sided tape, adhesive pearls, My Favorite Things grapesicle and grape jelly card stock, My Creative Time Rectangle Frame Die Layers and Rectangle Frame Dies; Copic markers V04, V06, V01, V0000, BV0000, Y13, YR23, Y21, YG95, YG03.
Thank you for visiting.
Gaylynn
9/16/2021
Yellow rose vase card ~ My Creative Time Just Cards
Hello. The My Creative Time design team is sharing card projects. Here is my rose vase card using a yellow rose with turquoise accents.
Please visit Emma's My Creative Time blog for more inspiration.
Gaylynn
9/15/2021
Heat emboss on vellum & brick stenciling slimline card tutorial.
Here is a tutorial on how to heat emboss on vellum & brick stenciling. Today on the Unity blog, I am sharing one way to mix vellum cardstock embossing, sunflowers and brick background stenciling.
I will show my process to heat emboss on vellum & brick stenciling below. It provides a pretty alternative to coloring the stamping.
{{Please subscribe to my video channel and like this video. Many thanks.}}
These are helpful tips to heat emboss on vellum & brick stenciling in Autumn colors. To begin, stamp the sunflower three times using embossing ink and then heat emboss them in white. Also, fussy cut (cut out) each sunflower. Then, die-cut a slimline card base and a background panel. Next, make a background using a stencil along with ink blending. I used a brick stencil with ink in Fall shades. Then, stamp and trim a sentiment panel and the tiny bees. Also, add a bit of color in yellow and orange to the bees. Finally, layer the sunflowers, embellishments and panels, to finish.
This slimline card base is 7" x 8 1/2" and scored at 3 1/2".
Unity Stamp Co. Sunflower Wishes {September 2021 Sentiment Kit}.
Also, flat and foam double-sided tape, white embossing powder, ink blending brushes, heat tool, Wow embossing ink pad, Original Misti, My Favorite Things slimline starter die-namics, slimline English brick wall stencil, extreme black hybrid ink pad, premium dye ink cubes in kraft, candied yam and lemon drop; purple tape, Gina K. Designs connect glue, adhesive gems, EK powder tool, Papertrey Ink vellum cardstock, Copic markers orange and yellow.
Also, you can find my other features at Unity's
Technique Time and
Watercolor Wednesday.
Thank you for visiting.
9/14/2021
Sending Sunshine Girl Card ~ MFT Slimline Challenge Feeling Fall
Hello. Gaylynn here. Today's card has an Autumn seasonal theme. I am participating in the MFT Stamps slimline challenge with the theme "Feeling Fall". Here is my contribution using stamps and dies that I have been wanting to use.
Also, Copic markers E11, E02, E00, E30, E81, E42, YR02, YR14, YR27, G07, G12, YR12, Y08, BG45, B00, E35, E13, E31, E43; ink blending brushes, original Misti, flat and foam double-sided tape, Gelly Roll pen.
Gaylynn
Winter holiday snowman tag card ~ clean and simple
Today, I am sharing a clean and simple tag card, perfect for winter time or for a holiday greeting card.
Unity Stamp Co. Snow Day Like Today.
Also, flat and foam double-sided tape, adhesive pearls, My Favorite Things sno cone card stock, twine, My Creative Time Tall Tag Frame Dies, Rectangle Frame Die Layers, Copic markers BG15, BG32, BG10, C00, C1, YR14, YR23.
Thank you for visiting.
Gaylynn
9/08/2021
Watercolor wash embossed gnome card tutorial ~ Unity Stamp Co.
The watercolor wash technique makes for an easy card background. Today, I am sharing one way to incorporate this watercolor effect in teal shades and swatches for a card background.
Making this watercolor wash background is an easy way to create your own paper design. I used coordinating teal, green and blue colors, matching the stamped gnome colors.
Here are helpful tips for getting this watercolor wash effect. To begin, stamp and color the gnome onto white cardstock. Also, stamp and trim the sentiment label. Next, stamp and heat emboss the chicken wire onto the smooth side of watercolor paper. Then, using a wide brush, add watercolor in strips or swatches using coordinating teal, blue and green layers. Allow dry time or heat set. Trim or die-cut the dried watercolor panel. Also, die-cut or trim a corner window onto the watercolor panel and around the gnome. To finish, layer it all with a pop-up of the gnome and sentiment panels.
Here is another look.
Also, score tape, foam double-sided tape, Ranger gold embossing powder & watercolor paper; Altenew watercolor half pans, paint brush, heat tool, Wow embossing pad, Original Misti, Nuvo crystal drops in bright gold, My Creative Time rectangle frame dies and 4" circle card dies; Copic markers
Thank you for visiting.
9/07/2021
Birthday Rose Square Card ~ MCT Birthday Palooza
Hello. The My Creative Time design team is sharing birthday projects. This 4x4 square shape birthday card was perfect for the rose and sentiment labels.
Please visit Emma's My Creative Time blog for more inspiration.
Gaylynn
9/01/2021
Paper layers, Unity stamps & Copic coloring ~ cross card tutorial
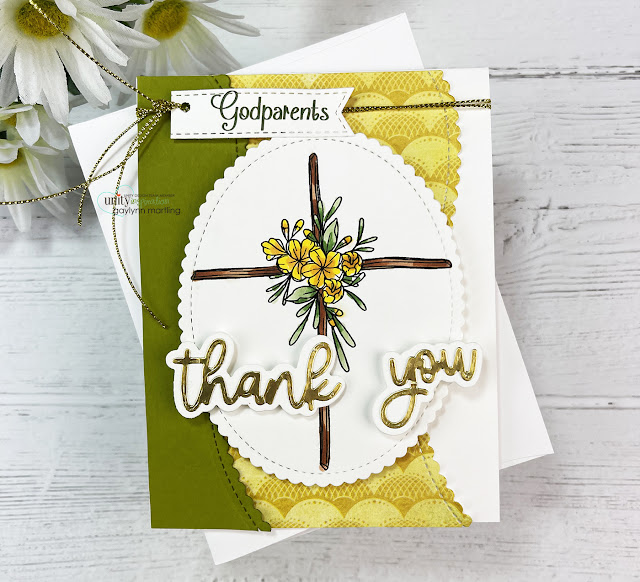
Today on the Unity blog, I am sharing this bright and sweet cross card using paper layers, Unity Stamps & Copic coloring.
Here are helpful tips for using paper layers, Unity stamps & Copic coloring, for this card. To begin, stamp the cross onto white cardstock using Copic friendly ink. Next, die-cut or trim a cross panel, background paper accents and the thank you sentiment layers. Also, stamp and trim a sentiment label for the top of the card. (I printed the Godparents word but stamps will work also to fit your occasion.) Then, color in the cross and the florals using coordinating colors to match the background paper. Finally, layer it all using flat and foam double-sided tape plus add cording to the top of the card, to finish.
YouTube: Gaylynn NeatThingsBtq
Also, flat and foam double-sided tape, Gina K. Designs connect glue, My Favorite Things card stock in prickly pear and gold shine, stitched mini scallop oval STAX die-namics, stitched scallop basic edges 2, essential stitched sentiment strips die-namics; May Arts gold cording, BasicGrey PB&J paper, Copic markers Y08, Y17, YR12, 0, E13, E39, YG67, YG61.
Also, you can find my other features at Unity's
Technique Time and
Watercolor Wednesday.
Thank you for visiting.


