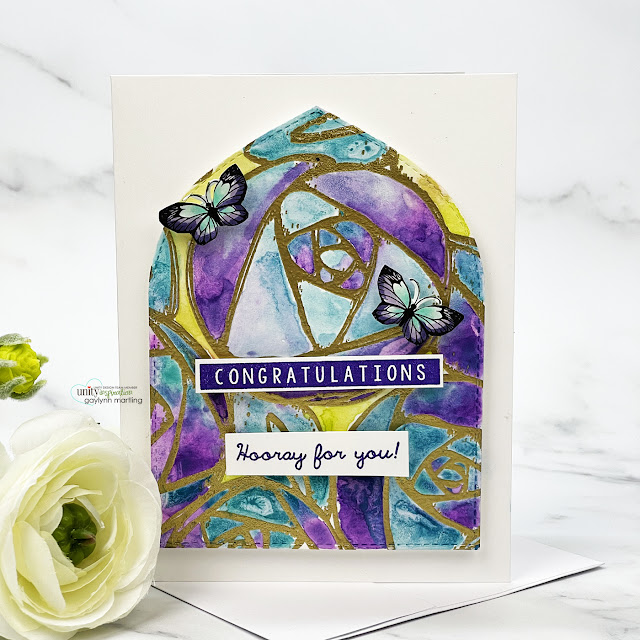
Hi friends. Today, I am showing a gold heat embossing & watercolor together for a congratulations card. It has a stained glass look to it.
Congratulations.
Hooray for you!
In summary, to make this card using gold heat embossing & watercolor, begin by preparing an A2-sized card base in white. Then, onto the smooth side of watercolor cardstock, stamp the background in watermark ink. Also, stamp the sentiments in dark purple ink. Next, add gold embossing powder and heat set for shiny gold embossing. Also, trim or die-cut the background card layer. For watercolor, mix the desired colors and then color in the embossed stamping. Allow the colors to blend together where they meet. Once dried, assemble the card layers, sentiments and accents onto the card base, to finish. Optional, add colored butterflies or accents.
See a peek at how this card was made:
*** Enjoy in-depth content in my Online Card Making Courses. These are guided learning classes bundled into themes or techniques. From online video tutorials to downloadable files, something for everyone and it is all self-paced. Create with me! ***
Supplies:
Life Is Rosy
So Kind, So Caring, So You
Special Wishes
Elegant dies, dye ink boysenberry, waxed paper, gold embossing powder, heat tool, anti-static powder tool, watermark ink pad Versamark, watercolor brush, watercolor cardstock Ranger, Altenew watercolor, palette large, foam tape, Copic markers BV08, V25, BG10, BG23, BG32; misti magnet, removable tape; A2 envelopes, piercing tool, glue, magnetic die storage sheets, plastic stamp & die storage pockets, Misti stamping tool, Misti sticky mat, flat double-sided tape ATG, tweezers, scissors, die-cutting machine, scoring board, bone folder, clear bags card storage, Neenah 110 lb cover solar white cardstock, Neenah 80 lb solar white cardstock, paper trimmer, desk craft & cutting mat, metal adapter plate.
Sharing crafty savings:
{{ Don't miss my crafty news. Sign up for my emails below. }}


No comments:
Post a Comment