4/28/2021

3 Color Burst Watercolor Cards ~ Teacher Appreciation

  Making a set of coordinating cards is fun using color burst watercolor.  Today, I am sharing three cards using these powders in different shades.


Sentiment:  Teach Love Inspire

Color Burst watercolor card backgrounds can be made ahead.  They make great backdrops for stamping or layers.


Helpful tips:

Here are helpful tips for making these cards.  To begin, pre-cut or trim three watercolor paper background panels.  Next, stamp and cut out the sentiment tag.  Also, stamp three apples and color them in.  Then, fussy cut (cut out) the apples.  Next, onto each watercolor panel, spritz generously with water.  Then, lightly tap color burst powder over the wet panel, one color per panel.  The color will move.  Spritz more water over the panel until you are happy with the look.  Leave it to dry or heat set the watercolor.  Finally, layer each card, to finish.


Here is another look at the set.


 Supplies:
Unity Stamp Co. Teach Love Inspire.


Also, flat and foam double-sided tape, My Creative Time square tag dies, My Favorite Things wonky stitched rectangle STAX die-namics, MFT Ken Oliver Crafts Color Burst in field day, lemon drop & orange zest; Ranger plastic craft mat, watercolor paper and mini mister; Fiskars paper trimmer, cording, Copic markers 0, 100, R27, G07, YG03.

    Thank you for visiting.
   Gaylynn


4/27/2021

Plant Themed Tag Card ~ My Creative Time Tag It Tuesday

 Hi.  The My Creative Time design team is sharing tag projects for Tag It Tuesday on our blogs.  I decided to make a plant themed tag card.


Sentiment:
Thinking of you during this difficult time.

For this tag card, I chose to use a tag on a card.  I also dipped into my scrap stash for leftover pieces from watercolor, cardstock and embossing.  The layers were trimmed and some were die-cut.  The sentiment was stamped and hand trimmed.  To finish, I layered it all onto a navy blue card base.


Also, embossing folder, watercolor, cording, flat and foam double-sided tape, Gina K. Designs connect glue, paper trimmer, scoring board, mini Misti, cardstock in navy blue, mint, white and gold shimmer.

Please visit Emma's My Creative Time blog for more inspiration.

Thank you for visiting.

Gaylynn

4/24/2021

Pop-up and wobble 2 interactive cards ~ 2 ways

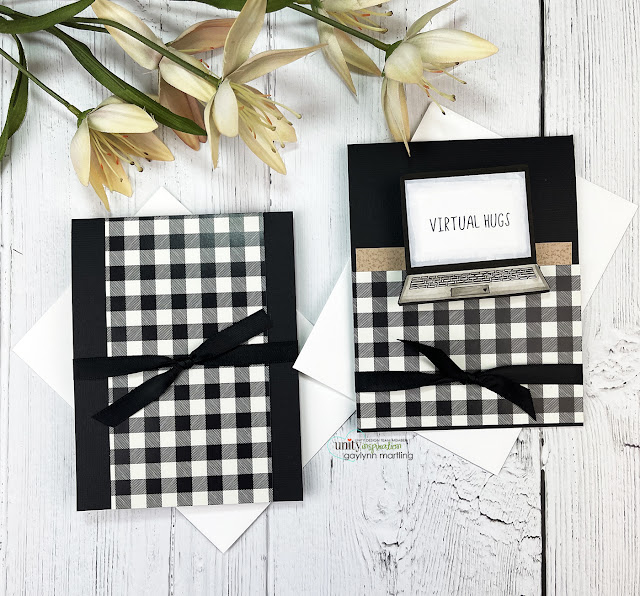
 For today, I am sharing interactive cards, two ways.  This set features a laptop computer as a pop-up card and another as a wobble card.


Sentiments:

Virtual Hugs
Happy Father's Day

Interactive cards are always well received and unexpected.  They are fun to make and to receive.


Helpful tips:
Here are helpful tips for making these two interactive cards.  First, trim accent pieces of patterned paper for the card fronts.  Also, trim a full card length tan insert and another card insert from white cardstock.  I used black card bases to coordinate with the paper used.  Next, stamp and color two laptops.  Then fussy cut them. (cut out)  Layer the virtual hugs laptop and paper over the card front using an Action Wobble spring.  For the Father's Day laptop, make a pop-out cut into the long liner insert.  I used a die-cut over the score line.  (see the video)  Next, adhere the long liner inside of the card base.  Then, adhere the second laptop to the bottom fold of the pop-out cut.  Finally, layer paper and ribbon on the second card front, to finish.
 

Here is another look:


Supplies:  Unity Stamp Co. Virtual Hugs and Farmhouse Plaid {paper pack}.
Also, My Creative Time stitched pop-up dies, double-sided paper, cardstock, ribbon, action wobble, scissors, Copic markers C1, C3, 0, W5, W3, 100; scoring board, paper trimmer.

Thank you for visiting.
Enjoy your day.


4/23/2021

My Creative Time 110th Edition Release, Sale & Blog Hop

  Hi, it's Gaylynn.  The My Creative Time 110th Edition release, sale and blog hop has begun.  For the blog hop, you may have arrived from Emily's blog.


Sentiment:
Thanks, teacher.
Take a moment to appreciate how awesome you are.

 *** BLOG HOP GIVEAWAY ***
Leave your comments on each blog for a chance to win a $25 Gift Card to the My Creative Time store. One lucky winner will be chosen and noted on the MCT blog! GOOD LUCK my friends! (Please don't forget to leave a way/email for MCT to contact you, if you were to be one of the lucky winners.) 

Here is a look at the essential MCT release items:


*** SALE ALERT ***
DON'T FORGET our sale starts RIGHT NOW HERE! Use the code: APR2021 to receive a 15% discount off of your entire purchase! This sale applies to "IN-STOCK" items ONLY. This sale will end on Friday, April 30, 2021, at midnight PST.

Here is another look at today's card.


Here are my sneak peek blog projects from this release.


Supplies for today's project: My Creative Time Cute Postage Frame Dies, Big Word Dies, Big Word Sentiments, Cute Card Dies, Cute Card Envelope Dies, Belly Band Dies; My Favorite Things tropical teal premium dye ink pad, tropical teal & summer splash cardstock, poppin' polka dots paper; flat & foam double-sided tape, adhesive pearl, Gina K. Designs connect glue, bone folder, mini Misti, score tape.

Hop along with us.

Your next stop in the hop is Ginger's blog. The entire blog hop lineup is on the My Creative Time blog.

Thanks for visiting and hopping along. I look forward to your comments.

Gaylynn

4/22/2021

Day 3 MCT 110th Edition Sneak Peeks ~ Big Word Stamps & Dies

Hello, it's Gaylynn.  The My Creative Time 110th Edition release is coming up on Friday.  But for today, the team is sharing Day 3 sneak peeks.

For today, I am sharing an uplifting layered slimline style card with tall dies and a sneak of the big word stamps and dies.  


Sentiment:  You make me smile.

This slimline tall card was made using the circle background and accented with the big word sets. Everything was layered and placed onto the card base, to finish.

Card base: Cut 7 1/2" x 7" 1/2", scored at 3 3/4" (made to fit the die-cuts that I used) I also used a photo greeting card envelope, approximately 8 1/4" x 4 1/4"
***Sneak Peek Giveaway!***
We will be giving away the sets we are showcasing each day to ONE lucky winner! ALL winners will be announced on Emma’s blog on Friday during the blog hop! ALL you have to do is leave a comment on each of our blogs! You are NOT required to comment on EVERY SINGLE blog, but the more you comment on, the more chances you have for winning! VERY IMPORTANT, PLEASE leave a way for us to contact you with your comment just in case "YOU" are the lucky winner! For EXTRA entries, you can spread the word about this release on Facebook OR even Instagram! #mycreativetime! GOOD LUCK EVERYONE. Let's start spreading the word!

Here is another look.


Supplies for today's project: My Creative Time Big Word dies, Big Word Sentiments, Linked Circle Die, Layered Banner Dies, Tall Frame Die Layers, Tall Frame Dies, cardstock, Simon Says Stamp cardstock, Fiskars paper trimmer, flat & foam double-sided tape, scoring board, Gina K. Designs connect glue, adhesive gems, original Misti.

See more inspiration on the My Creative Time blog.

Thanks for visiting. I look forward to your comments.

Gaylynn


4/21/2021

Mouse stamping, paper & markers ~ easy card making tutorial

 Mixing stamping, Unity paper and Copic markers offer easy card making.  Today, on the Unity blog, I am sharing a sweet mouse card tutorial.


Sentiment:  Sending happy thoughts.

Using sweet stamps, Unity paper & Copic markers helped to provide easy card making and made this cute mouse card come to life.


Helpful tips:

Here are helpful tips for easy card making.  To begin, trim or die-cut a background border from patterned paper and cardstock.  Also, layer the border over the card base.  Next, stamp with ink compatible with your markers.  Then,  color in the mouse scene.  Next, trim or die-cut the mouse focal panel for the card center.  Also, stamp and trim a sentiment flag.  Assemble the card in layers, to finish.

Here is another look.


I made a quick video tutorial showing the process for this project.
{{Please subscribe to my video channel and like this video.  Many thanks.}}
YouTube:  Gaylynn NeatThingsBtq


 Supplies:
Also, flat and foam double-sided tape, mini Misti, My Creative Time Pretty Scallop Circle Dies, My Favorite Things lazy day cardstockextreme black hybrid ink pad, premium dye ink pad in lazy day; envelope, Fiskars paper trimmer, Copic markers B14, B01, BG0000, G0000, W5, W3, W1, C1, R02, Y21, Y11.

Be sure to visit the Unity blog for the entire article and tutorial.
Also, you can find my other features at Unity's
Technique Time and
Watercolor Wednesday.

    Thank you for visiting.
   Gaylynn


Day 2 MCT 110th Edition Sneak Peeks ~ Postage Die-cuts

Hello, it's Gaylynn.  The My Creative Time 110th Edition release is coming up on Friday.  But for today, the team is sharing Day 2 sneak peeks.

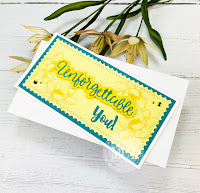
For today, I am sharing another layered slimline style floral card with tall dies and a sneak of the tall postage die-cut which is coming up.  


Sentiment:  Unforgettable you!

This bright card was made using background flower stamping and tall dies along with coordinating color cardstock. Everything was layered and placed onto the card base, to finish.

Card base: Cut 7 1/2" x 7" 1/2", scored at 3 3/4" (made to fit the die-cuts that I used) I also used a photo greeting card envelope, approximately 8 1/4" x 4 1/4"
***Sneak Peek Giveaway!***
We will be giving away the sets we are showcasing each day to ONE lucky winner! ALL winners will be announced on Emma’s blog on Friday during the blog hop! ALL you have to do is leave a comment on each of our blogs! You are NOT required to comment on EVERY SINGLE blog, but the more you comment on, the more chances you have for winning! VERY IMPORTANT, PLEASE leave a way for us to contact you with your comment just in case "YOU" are the lucky winner! For EXTRA entries, you can spread the word about this release on Facebook OR even Instagram! #mycreativetime! GOOD LUCK EVERYONE. Let's start spreading the word!

Here is another look.


Supplies for today's project: My Creative Time Tall Postage Frame Dies, Holiday Envelope die, Stay Beautiful, Tall Frame Dies, MFT cardstock and ink, Fiskars paper trimmer, flat & foam double-sided tape, scoring board, Gina K. Designs connect glue, adhesive gems, original Misti.

See more inspiration on the My Creative Time blog.

Thanks for visiting. I look forward to your comments.

Gaylynn

4/20/2021

Day 1 MCT 110th Edition Sneak Peeks ~ Circle Background

   Hello, it's Gaylynn.  The My Creative Time 110th Edition release is coming up on Friday.  But for today, the team is sharing Day 1 sneak peeks.

For today, I am sharing a layered slimline style floral card with the tall dies and a sneak of the circle die-cut coming up.  

Sentiment:
Sending well wishes your way.

This get well card was made using floral stamping, background circle cuts and tall dies along with coordinating color cardstock. The flowers were colored with Copic markers. Everything was layered and placed onto the card base, to finish.

Card base: Cut 7 1/2" x 7" 3/4", scored at 3 3/4" (made to fit the die-cuts that I used) I also used a photo greeting card envelope, approximately 8 1/4" x 4 1/4"
***Sneak Peek Giveaway!***
We will be giving away the sets we are showcasing each day to ONE lucky winner! ALL winners will be announced on Emma’s blog on Friday during the blog hop! ALL you have to do is leave a comment on each of our blogs! You are NOT required to comment on EVERY SINGLE blog, but the more you comment on, the more chances you have for winning! VERY IMPORTANT, PLEASE leave a way for us to contact you with your comment just in case "YOU" are the lucky winner! For EXTRA entries, you can spread the word about this release on Facebook OR even Instagram! #mycreativetime! GOOD LUCK EVERYONE. Let's start spreading the word!

Here is another look.


Supplies for today's project: My Creative Time Linked Circle Die, You Are Cherished, Tall Frame Dies, Tall Frame Die Layers, Layered Banner Dies, SSS fog cardstock, purple and white cardstock, Fiskars paper trimmer, flat & foam double-sided tape, cardstock, scoring board, Gina K. Designs connect glue, Copic markers G99, YG13, V06, V01, YR23.

See more inspiration on the My Creative Time blog.

Thanks for visiting. I look forward to your comments.

Gaylynn


4/16/2021

Sending A Smile Rainbow Card ~ MFT Sketch Challenge 537

  Hello.  Today on the blog, I am sharing a sweet rainbow card that will bring smiles.  I used a bit of ink blending using ink pads, sweet stamps and dies for the MFT sketch challenge.

Sentiment:  Smile.  Sending a smile your way.

For this card, I chose to use ink pads and blending brushes for background ink blending.  I was going for an outdoor scene for the oval.  The sweet rainbow and bird stamps accent the background just the way I had imagined.  Then, for the sentiment, I used the smile die-cut with patterned paper and also added a coordinating stamp with it.  I used a mix of light colors for the coloring and the paper choices.  Finally, to finish, I layered it all onto the card base.

Here is another look.


Supplies:  My Favorite Things Smile MakerBig Smile, Double The Fun stamps & dies, Stitched Mini Scallop Oval STAX, Sno Cone cardstockextreme black hybrid ink pad, and premium dye ink pads in lazy day, sno cone, lemon drop, prickly pear, jalapeno poppercardstock, flat and foam double-sided tape, 

Thank you for visiting.

Gaylynn 

4/15/2021

Tag Card & Envelope ~ My Creative Time Just Cards

Hi.  The My Creative Time design team is sharing card projects for Just Cards on our blogs.  I decided to make a mini slimline card and envelope out of cute tag dies.


Sentiment:  Just a note.

For this card, I chose a coordinating mini tag card and envelope, slim or tall style.  I used monochromatic colors.  For the tag card, I stamped and heat embossed the flowers in white over the darkest teal shade.  Then, I stamped and die-cut a sentiment tag including one of the heart stamps.  Also, a little flower brad was added to the top.  I adhered a top fold onto the back side of the card.  This allows it to open and close and even stand upright.  Finally, I made a mini slimline envelope using dies that fit the tag card perfectly, to finish
The finished tag card measures approximately 3" x 5 1/2".

Here is another look.


Supplies:  My Creative Hearts & Flowers, Cute Card Envelope Die, Tall Tag Frame Die Layers, Tall Tag Frame Dies, Heart Label Dies.
Also, MFT cardstock and ink, flat and foam double-sided tape, iCraft ultra bond adhesive glue, paper trimmer, scoring board, Wow embossing pad, white embossing powder, heat tool, flower brad, original Misti.

Please visit Emma's My Creative Time blog for more inspiration.

Thank you for visiting.

Gaylynn  

4/14/2021

Ink pad watercolor tutorial ~ Beautiful unicorn card

 Ink pad watercolor is another way to use watercolor with stamping.  Today, on the Unity blog, I am sharing one way to watercolor this beautiful unicorn and the background stamps.

Sentiment:  Have a beautiful day.

One of the things I love is watercoloring with stamping.  Ink pad watercolor is one way to stretch your dye or water based ink pads and dip into more color choices for watercoloring.
 

Helpful tips:

Here are helpful tips for ink pad watercolor with stamping.  To begin, prepare a color paper cardstock base and trim watercolor panels for stamping.  Next, stamp onto the smooth side of watercolor paper using waterproof ink.  Once dry, prepare a palette or acrylic block with a dye ink pad or with water-based ink color sections, directly onto the palette or block.  Then, using water and a paint brush, begin adding the water and colors to the background panel, allowing the colors to blend together between sections.   Next, using the same colors with a narrow brush, add color to the unicorn.  Heat set or allow the watercolor to dry.  Then, fussy cut (cut out) the unicorn and the sentiment panel.  Finally, adhere it all to the card front with added twine, to finish.

Here is another look.


I made a quick video tutorial showing the process for this project.
{{Please subscribe to my video channel and like this video.  Many thanks.}}
YouTube:  Gaylynn NeatThingsBtq


 Supplies:
Unity Stamp Co. Beautiful Unicorn and A Faithful Letter.
Also, foam double-sided tape, original Misti, heat tool, My Creative Time rectangle frame die layers, paint brush, My Favorite Things tropical teal cardstock, extreme black hybrid ink pad, premium dye ink pads in tropical teal, fire coral and prickly pear; envelope, Fiskars paper trimmer, Ranger watercolor paper, Prima brown watercolor, cording, scissors.

Be sure to visit the Unity blog for the entire article and tutorial.
Also, you can find my other features at Unity's
Technique Time and
Watercolor Wednesday.

    Thank you for visiting.
   Gaylynn


4/10/2021

Variegated stenciling ~ purple tulips slimline card tutorial

 For today, I am sharing variegated stenciling using distress ink blending and glitz glitter gel.  It is said that purple tulips represent royalty, rebirth and elegance.  And so this is the inspiration for the purple and the shimmer for my slimline tulip card.


Sentiment:  It is a time to celebrate!


Helpful tips:
Here are helpful tips for creating using variegated stenciling.  To begin, trim or die-cut a slimline card panel and accent layers.  Next, apply ink blending in coordinating shades using the tulip stencil over the card front panel.  Blend with one color at a time, blending between colors for the leaves and again for the tulip petals.  Then, add shimmer for the third stencil pattern with glitz glitter gel.  Also, remember to immediately clean all tools and surfaces where the gel was used.  Next, prepare small bow and sentiment accents.  Finally, layer everything, to finish. 

Here is another look:


I made a video tutorial showing the process for this project.
{{Please subscribe to my video channel and like this video.  Many thanks.}}


Supplies:  Unity Stamp Co. Layered Tulip Stencil and Hello Sweetheart Bouquet.
Also, Ranger plastic craft mat and distress ink pads in dusty concord, milled lavender, bundled sage, pine needles and shabby shutters; cardstock, ink blending brushes, Pink Fresh Studio slim diagonal stitched rectangles, My Creative Time bow dies, Gina K. Designs / Therm-o-Web glitter glitz gel in wild lilac; purple tape, paper trimmer.

Thank you for visiting.
Enjoy your day.